Masterpage:Right-NoTitle0
75
Filename [HM-HDS4EK_06Edit.fm]
Page 75 April 22, 2003 10:12 pm
A
Make connections.
Connect an audio component to the AUDIO L + R input
connectors on the recorder’s front panel.
● When connecting a monaural audio component, use only the
recorder’s AUDIO L input connector.
B
Select the HDD deck.
Slide
TV/CABLE/SAT
to the right, then press
HDD
.
C
Select the audio track to monitor the
recorded programme’s original sound.
Set “AUDIO MDE” to “SOUND1”. (
੬
pg. 78, 79)
D
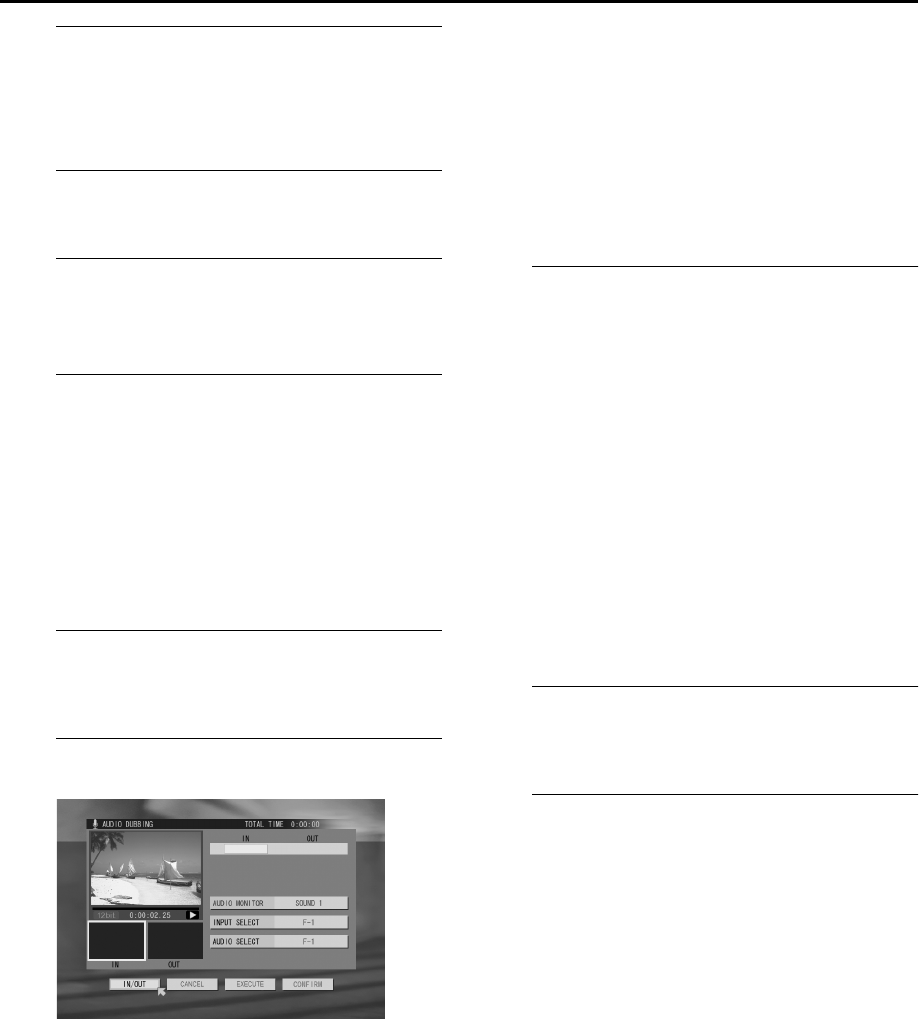
Select the programme and access the A. DUB
screen.
A
Press
EDIT
.
B
Press
w
r
e
t
to move the arrow to “A. DUB”, then
press
OK
.
● Only the programmes having the recording speed of DV
(12BIT) on the HDD appear in the list.
C
Press
w
r
e
t
to move the arrow to the desired
programme index, then press
OK
.
● The index of the selected programme appears in the left large
window.
E
Prepare the audio component.
Search for the point where you want to start playback and
pause playback.
F
Select the desired scene.
A
Press
r
t
to move the arrow to “AUDIO SELECT”,
then press
OK
.
B
Press
w
e
to select “HDD”, then press
OK
.
C
Press
r
t
to move the arrow to “IN/OUT”, then press
4
to start playback.
D
Press the appropriate buttons (
4
,
9
,
5
, or
3
) to
search for the desired point. You can also search for
the point by turning and pressing the
JOG
dial.
E
Press
OK
when beginning picture of the desired scene
is found. The picture for the selected scene appears in
the left bottom “IN” window.
● To cancel the setting, press
w
r
e
t
to move the arrow to
“CANCEL”, then press
OK
.
F
Perform steps
D
to
E
again to locate the ending
picture of the desired scene. The picture for the ending
of the selected scene appears in the right bottom
“OUT” window.
● While your are editing a programme in DV mode, the
distortion of the picture on the small window (showing the
result of the edition) does not affect the actual edited picture.
G
Start audio dubbing.
A
Press
w
r
e
t
to move the arrow to “EXECUTE”, then
press
OK
.
● Countdown images appears 5 seconds before the beginning of
the scene.
● You can select the monitoring sound from among the recorded
original sound (“SOUND 1”), the sound of the external audio
component (“SOUND 2”), and both “SOUND 1” and
“SOUND 2” at the same time (“MIX”). Press
rt
to move the
arrow to “AUDIO MONITOR”, press
OK
, press
w
e
to select
the desired sound, then press
OK
.
B
At the actual beginning of the scene, start playback on
the audio component.
● Countdown images appears 5 seconds before the ending of
the scene.
C
Stop playback on the audio component.
● When you play and check the dubbed programme, press
w
e
to move the arrow to “PREVIEW”, then press
OK
.
● When you quite dubbing or previewing, press
r
t
to move
the arrow to “STOP”, then press
OK
.
H
Confirm the edited scene.
Press
w
r
e
t
to move the arrow to ”CONFIRM”, then
press
OK
.
I
Return to the normal screen.
Press
w
e
to move the arrow to “EXIT”, then press
OK
.
● To edit other programmes, press
w
e
to move the arrow to
“CONTINUE”, press
OK
, then perform steps
F
to
I
.
NOTES:
Audio Dubbing is also possible using the rear panel L-1 IN/OUT
or L-2 IN/DECODER connector. When using these 21-pin SCART
connectors, be sure to select the appropriate input mode in the
A.DUB screen as follows;
A
After step
D
, press
w
r
e
t
to move the arrow to
“INPUT SELECT”, then press
OK
.
B
Press
w
e
to select “L-1” or “L-2” , then press
OK
.
● When “HDD” is selected as “AUDIO SELECT” option, the
sound of the original programme selected in step
D
is heard
during audio dubbing. If you wish to monitor sound from the
external audio component, perform the following procedure;
A
Press
w
r
e
t
to move the arrow to “AUDIO
SELECT”, then press
OK
.
B
Press
w
e
to select the input connector (“L-1”, “L-2”,
or “F-1“) to which the external audio component is
connected, then press
OK
.
HM-HDS4EK.book Page 75 Tuesday, April 22, 2003 10:14 PM
