Filename [SR-MV40U_10Editing.fm]
Masterpage:Left0
58 EN
Page 58 March 13, 2006 11:41 am
EDITING
Because this unit includes both DVD deck and VCR deck, you can
easily use this unit for dubbing without connecting any other
equipment.
NOTES:
● If you set the dubbing direction incorrectly, you could erase an
important recording that you wanted to dub. It is recommended to
conduct a test with unimportant cassettes first.
● The superimposed indication during the operation or dubbing is not
recorded.
● It is not possible to dub a tape with a copy protection signal.
● If the recording capacity of disc become full, the tape stops
automatically.
● It is not possible to perform other operations like Live Memory
Playback. Check the recorded program on the disc after dubbing.
● Dubbing is not possible on the discs used exclusively for On-Disc
Timer Programming.
● If the index code is found on a tape, a single title is created. While
creating a title, the dubbing stops and then starts again.
● When dubbing can not be performed properly, set “BLUE BACK” to
“OFF”. (੬ pg. 72)
Dubbing An Entire Cassette
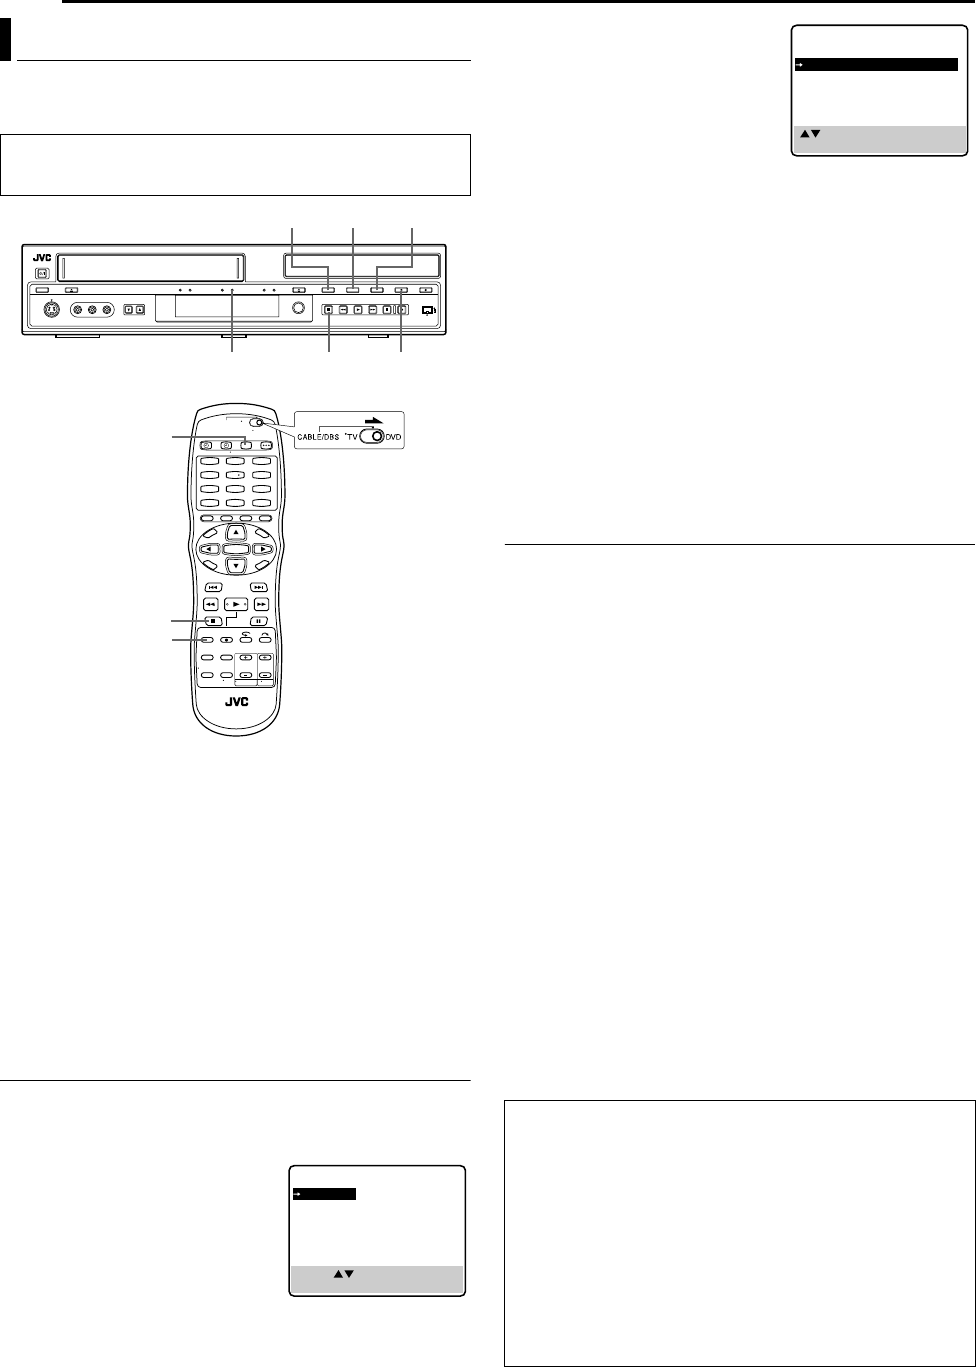
1 Press VCR/DVD repeatedly so that the VCR lamp lights up on
the unit.
2 Press SET UP to access the Main Menu screen.
3 Press rt to select “COPY SET”,
then press ENTER.
4 Press rt to select “FULL DISC”,
then press ENTER to select “OFF”.
● Pressing ENTER toggles the setting
between on and off.
5
Press
SET UP
to complete the setting.
6 For VCR deck
Load a cassette you want to dub.
For DVD deck
Load a recordable disc.
7 Press VCR/DVD repeatedly so that the DVD lamp lights up on
the unit.
8 Press REC MODE repeatedly to set the recording mode.
9 Press VCR]DVD to select the dubbing direction.
10 Press and hold DUBB. for more than 2 seconds to start
dubbing. The dubbing (DUBB.) lamp lights up on the unit.
● When dubbing a tape-end recorded VHS tape, set the input of this
unit to a no signal input channel (L-1, F-1 etc.) before dubbing. If a
broadcast channel is selected, broadcast images may be recorded to
the end of the dubbing.
● If the tape has not been rewound, the VCR deck rewinds the tape
automatically. When the VCR deck has finished rewinding, dubbing
begins automatically.
● After dubbing is completed, the VCR deck rewinds the tape
automatically.
● To stop dubbing, press 8.
Dubbing An Entire Cassette with Just Dubbing
When using the Just Dubbing function, the unit automatically fast-
forwards the tape to the end, then rewinds back to the beginning to
calculate the total recording time. The unit then automatically sets
the appropriate recording mode depending on the total recording
time and the available disc space.
1 Press VCR/DVD repeatedly so that the VCR lamp lights up on
the unit.
2 Perform steps 2 – 3 of “Dubbing An Entire Cassette” in the left
column before continuing.
3
Press
rt
to select “FULL DISC”, then press
ENTER
to select “ON”.
4 Press SET UP to complete the setting.
5 For VCR deck
Load a cassette you want to dub.
For DVD deck
Load a recordable disc.
6 Press VCR/DVD repeatedly so that the DVD lamp lights up on
the unit.
7 Press VCR]DVD to select the dubbing direction.
8 Press and hold DUBB. for more than 2 seconds to start
dubbing. The dubbing (DUBB.) lamp lights up on the unit.
● When dubbing a tape-end recorded VHS tape, set the input of this
unit to a no signal input channel (L-1, F-1 etc.) before dubbing. If a
broadcast channel is selected, broadcast images may be recorded to
the end of the dubbing.
● After dubbing is completed, the VCR deck rewinds the tape
automatically.
● To stop dubbing, press 8.
Tape Dubbing (From VCR To DVD)
● Turn on the unit.
● Turn on the TV and select the video channel (or AV mode).
● Slide the TV/CABLE/DBS/DVD switch to DVD.
1
4
7
2
5
8
0
3
6
9
REC MODE
VCR/DVD
8
8
DUBB.
VCR ] DVD
VCR/DVD
REC MODE
DUBB. Lamp
PRESS ( , ) THEN (OK)
(SET UP) TO END
COPY SET
FUNCTION SET
MAIN MENU
Auto Finalizing
You can select whether to finalize the disc automatically after
dubbing has been completed.
To automatically finalize the disc after dubbing:
A Perform steps 1 – 3 of “Dubbing An Entire Cassette” in the
left column before continuing.
B Press rt to select “AUTO FINALIZE”, then press ENTER to
select “ON”.
C Press SET UP to complete the setting.
NOTE:
It is possible to create a disc in the desired playback format when
finalizing the disc. Each time the finalized disc is played back, it will be
played back in accordance to the setting you have selected during
finalization. For details, refer to “Finalize A DVD-R/RW Disc” (
੬
pg. 76).
( , ) THEN (ENTER)
(SET UP) TO END
COPY MODE FULL COPY
FULL DISC OFF
AUTO FINALIZE OFF
COPY
SR-MV40US.book Page 58 Monday, March 13, 2006 11:41 AM
