


16
INSTALLATION AND CONNECTION
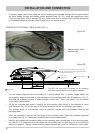
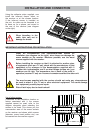
VERSION WITH EXTERNAL CABLE GLAND (FIG. F)
• Lay the cables supplied with the turntable (2 x coaxial cables and 1 x power supply cable) into
the mounting plate as indicated by the markings on the mounting plate (see illustrations in Fig. F),
and feed the remaining lengths of cable through a cable duct*
)
and a roof gland¹
)
into the interior
of the motor home/caravan.
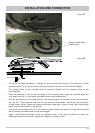
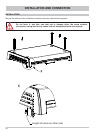
• Lift up the turntable and place it carefully on the mounting plate facing in the direction of travel
(see illustration Fig. F2) (do not step on the plug connectors and do not kink/crush the cables!)
The through holes on the turntable must be perfectly aligned with the threaded holes on the
mounting plate.
• Allow the turntable to rest on the front edge of the mounting plate. Keep the turntable supported
at an angle (see Fig. F1) and insert a suitable piece of wood underneath it.
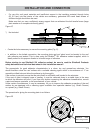
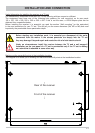
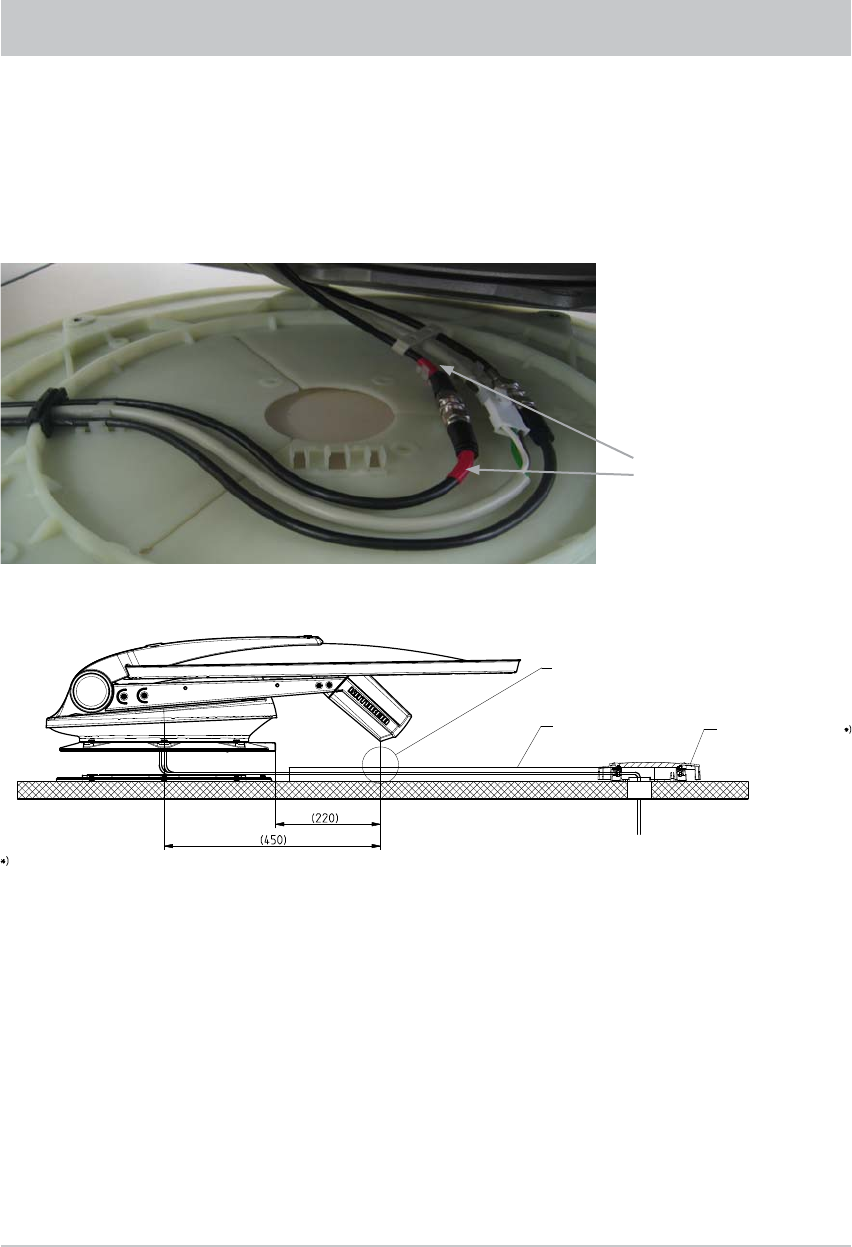
• Now lay and connect the turntable cables on the mounting plate (as indicated on the mounting plate,
see also Fig. F1). Make sure that the cables are not crossed over and that they are taut so that they
cannot be crushed. The two master coaxial cables, marked red, must be connected to each other.
Figure: F1
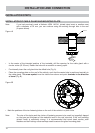
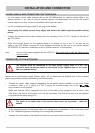
• To prevent water vapour from inside the vehicle reaching the turntable through the roof gland, thread
the three cables through the sealing gasket supplied (see Fig. E2), close the gasket and insert
it into the roof gland until it reaches the stop. Make sure that no tensile load is acting downwards
on the sealing gasket as this can cause it to fall out in the course of time.
Figure: F2
Master coaxial cable
(marked red)
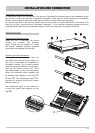
1)
The HDZ 100 roof gland is available as an accessory
under part number 20410032 from specialist dealers.
Not included
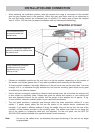
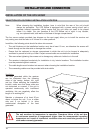
Laying the cable
in the cable duct
HDZ 100 roof gland
When using a cable duct in direct extension of the cable
emerging from the CAP, the height under the feed system
hood must not exceed 10mm.