20
Timer Recording
Follow the steps below to program
your VCR to record TV programs
while you're away from home. You
can program up to eight timer record-
ings. For each one, the VCR will turn
itself on, record, and turn itself off
automatically. Before you begin make
sure:
• Channels have been programmed.
• The clock has been set.
• There is a tape in the VCR. Make
sure the tape's record tab is intact
and the tape is long enough to record
the program(s).
• The VCR is in VCR position.
You must do each step within 60 sec-
onds of completing the previous step.
If you don't, you will have to start
again at step 1.
1
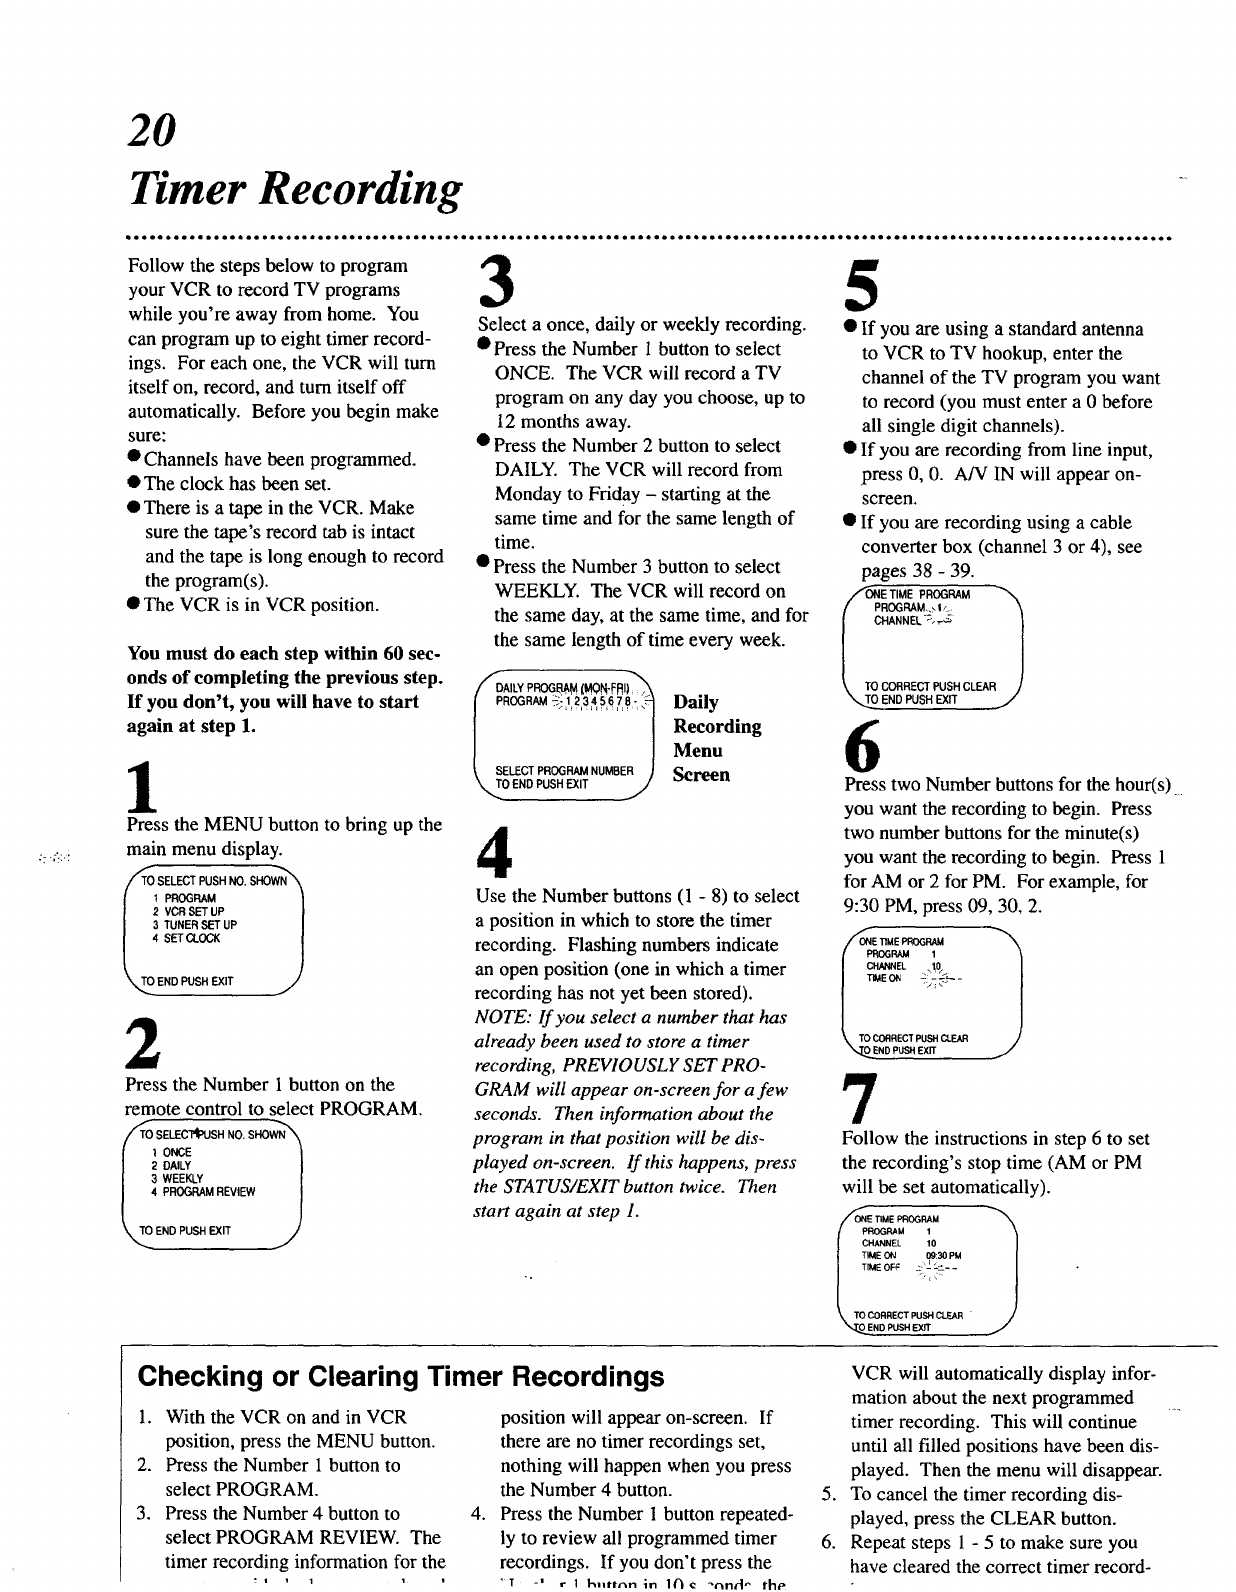
Press the MENU button to bring up the
main menu display.
SELECT PUSH NO. SHOW1
1 PROGRAM
2 VCR SET UP
uP
END PUSH EXIT
2
Press the Number 1 button on the
remote control to select PROGRAM.
'i-oSE, NO.S,OW,
1 ONCE |
2 DAILY |
3 WEEKLY |
, PROGRAM REVIEW
\.,TO0END PUSH EXIT J
3 5
Select a once, daily or weekly recording.
• Press the Number 1 button to select
ONCE. The VCR will record a TV
program on any day you choose, up to
12 months away.
• Press the Number 2 button to select
DAILY. The VCR will record from
Monday to Friday - starting at the
same time and for the same length of
time.
• Press the Number 3 button to select
WEEKLY. The VCR will record on
the same day, at the same time, and for
the same length of time every week.
IDAILY PROGBAM (M,QF_-F_I)_
PROGRAM _; 1:23456 7 8-_]
|
SELECT PROGRAM NUMBER J
0 END PUSH EXIT J
Daily
Recording
Menu
Screen
4
Use the Number buttons (1 - 8) to select
a position in which to store the timer
recording. Flashing numbers indicate
an open position (one in which a timer
recording has not yet been stored).
NOTE: If you select a number that has
already been used to store a timer
recording, PREVIOUSLY SET PRO-
GRAM will appear on-screen for a few
seconds. Then information about the
program in that position will be dis-
played on-screen. If this happens, press
the STATUS/EXIT button twice. Then
start again at step 1.
• If you are using a standard antenna
to VCR to TV hookup, enter the
channel of the TV program you want
to record (you must enter a 0 before
all single digit channels).
• If you are recording from line input,
press 0, 0. A/V IN will appear on-
screen.
• If you are recording using a cable
converter box (channel 3 or 4), see
pages 38 - 39.
ETIME PROGRAM
ROGRAM,,_I_,,
CHANNEL':._,,_ /
J
CORRECT PUSHCLEAR /
"...TOEND PUSH EXff /
6
Press two Number buttons for the hour(s)
you want the recording to begin. Press
two number buttons for the minute(s)
you want the recording to begin. Press 1
for AM or 2 for PM. For example, for
9:30 PM, press 09, 30, 2.
EL ,1o_
CORRECT PUSH CLEAR
_END PUSH EXff
7
Follow the instructions in step 6 to set
the recording's stop time (AM or PM
will be set automatically).
CHANNEL 10
TIME ON 09:30PM
TIME OFF :.'-_ L±. _
CORRECT PUSH CLEAR
_T_.E NOPUSH EXIT
Checking or Clearing Timer Recordings
1. With the VCR on and in VCR
position, press the MENU button.
2. Press the Number 1 button to
select PROGRAM.
3. Press the Number 4 button to
select PROGRAM REVIEW. The
timer recording information for the
4.
position will appear on-screen. If
there are no timer recordings set,
nothing will happen when you press
the Number 4 button.
Press the Number I button repeated-
ly to review all programmed timer
recordings. If you don't press the
"T r 1 h=lttnn_n 1(_€ _o, nrl_ th_
.
6.
VCR will automatically display infor-
mation about the next programmed
timer recording. This will continue
until all filled positions have been dis-
played. Then the menu will disappear.
To cancel the timer recording dis-
played, press the CLEAR button.
Repeat steps 1 - 5 to make sure you
have cleared the correct timer record-
