14
RQT6986
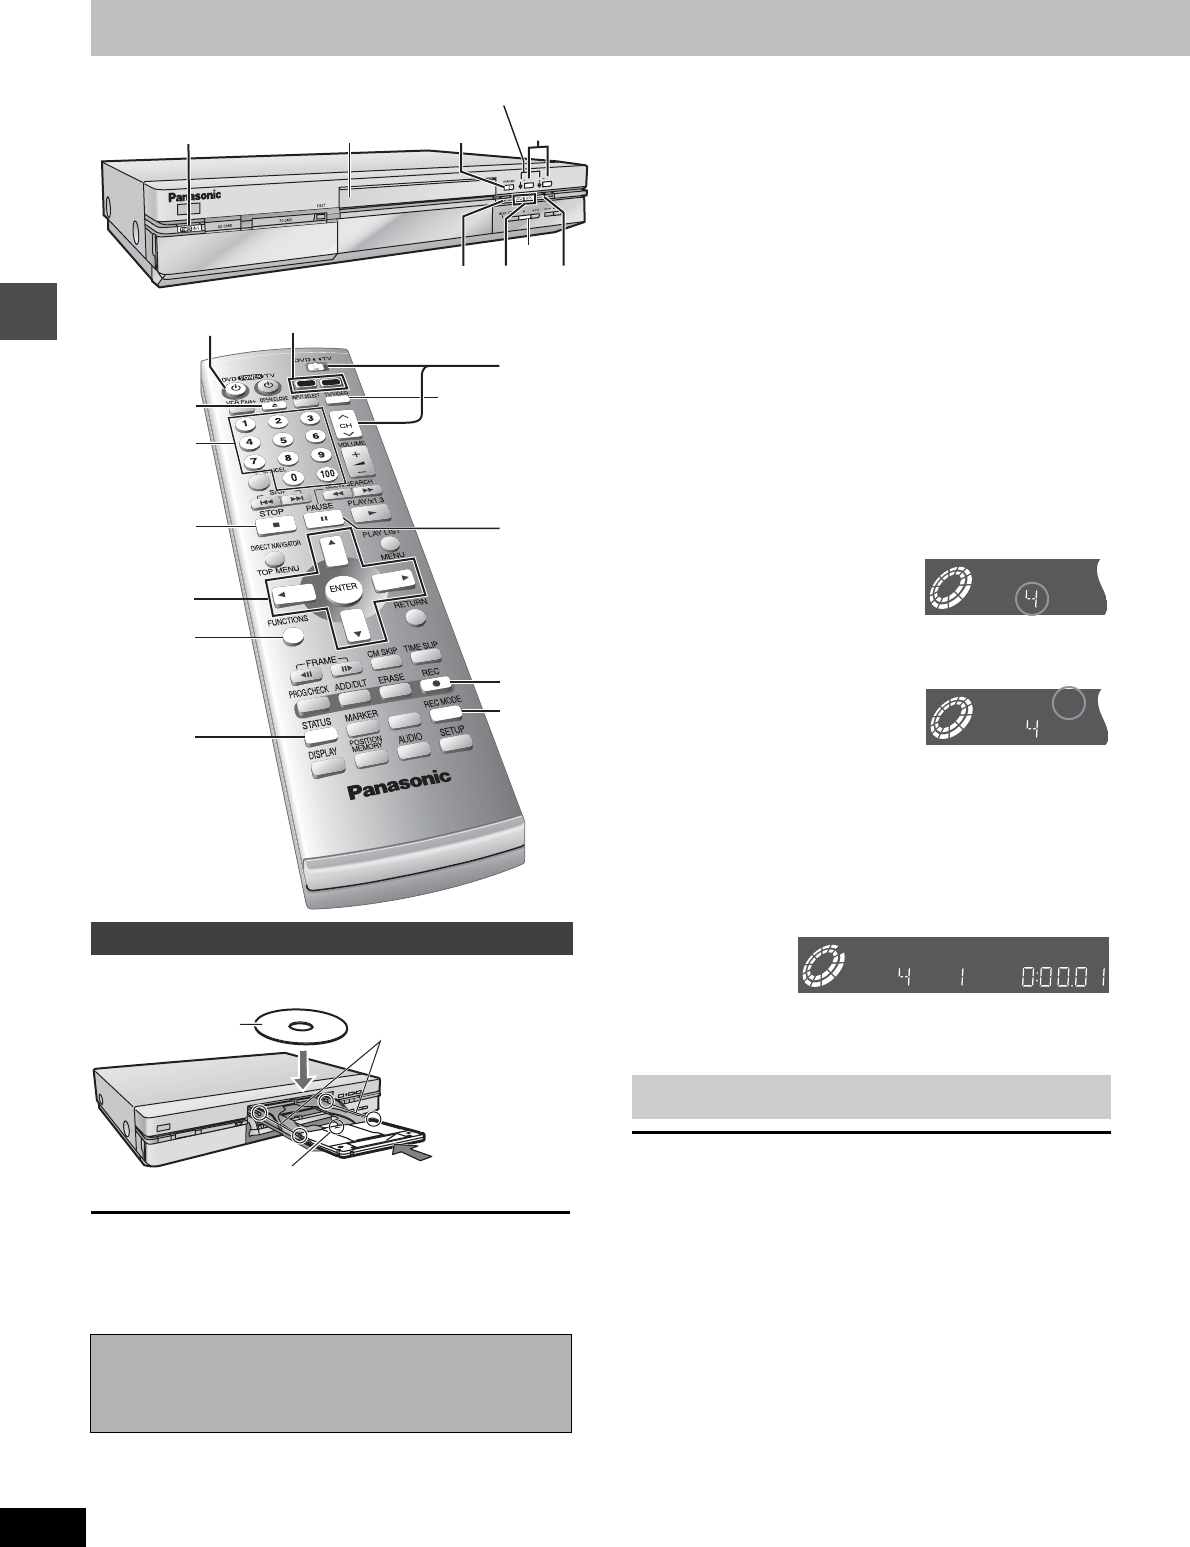
Recording
Recording television programs
You can insert a cartridge or non-cartridge disc.
[Note]
≥Load double-sided discs so the label for the side you want to
record/play is facing up.
≥When using 8 cm (3″) DVD-RAM, remove the disc from the car-
tridge and insert it, making sure you align it with the groove.
Auto power-off
The unit switches to standby after about 6 hours in the stop mode.
You can turn this feature off or change the time to 2 hours
(➜page 51, Set Up—Off Timer).
[HDD] [RAM] [DVD-R]
1
Press [
Í
, DVD POWER] to turn the unit on.
2 Press [HDD] or [DVD] to select the
recording drive.
The HDD or DVD button lights up on the unit.
≥It is not possible to record to both HDD (Hard Disk Drive)
and DVD drive simultaneously.
3 If you selected the DVD drive
Press [< OPEN/CLOSE] to open the
tray and insert a disc (➜ left).
≥Press the button again to close the tray.
≥It is not possible to record continuously from one side of a
double sided disc to the other. You will need to eject the disc
and turn it over.
≥If you put a disc in while the HDD is selected, the DVD but-
ton on the unit will flash while the unit reads the disc.
4 Ensure [DVD, TV] is switched to
“DVD” and press [W, X, CH] to select
the channel.
5 Press [REC MODE] to select the
recording mode (➜ next page).
≥When dubbing a program recorded with the high speed
mode to a DVD-R, set “Rec in DVD-R high speed mode” to
“On” before recording. (➜page 52) [HDD]
≥To record sound using LPCM (XP mode only):
From the SETUP menu, set the “Audio Mode for XP
Recording” setting to “LPCM” (the picture quality may go
down slightly). (➜page 53)
6 Press [¥, REC] to start recording.
The HDD or DVD record lamp on the main unit lights up.
≥Recording will be made over unrecorded space on the HDD
or on the disc. Data will not be overwritten.
≥Program information (e.g., time and date) is registered in
the program list (➜page 19, Using the Direct Navigator).
To stop recording
Press [∫].
To pause recording
Press [;]. Press again to continue recording. (Program is not split
into a separate program.)
∫ Enjoying SD VIDEO (MPEG4) programs [HDD]
When you set the “MPEG4 Rec mode” (➜page 52) to either “SF”,
“F”, “N”, or “E” before recording to the HDD, you can also simulta-
neously record programs as SD VIDEO (MPEG4) programs during
recording. When dubbing the simultaneously recorded SD VIDEO
(MPEG4) programs, you can dub to a SD card using high speed
mode (➜page 31).
≥
Set the “SD card capacity” (
➜
page 52) to match the capacity of your
SD card. Programs are divided according to the set capacity. Pro-
grams are also divided when you pause or stop during recording.
≥You cannot directly record to a SD card.
≥Audio of the SD VIDEO (MPEG4) programs becomes monaural.
When recording SAP broadcasts, press [AUDIO] to select the
audio for recording.
≥The video is recorded in a 4:3 aspect irrespective of the video sig-
nal input.
Inserting discs
Should the AC power supply cord come loose by
accident or for any other reason the power supply is
cut off while recording or editing is taking place, the
contents of the HDD or disc may be lost.
13
456
?
1
?
;
TV/VIDEO
4
3
5
6
DUBBING
H
D
D
DV
D
2
REC
HDD
D
VD
REC
2
STATUS
FUNCTIONS
3, 4, 2, 1
ENTER
Disc tray
Numbered
buttons
HDD, DVD record lamp
Insert label-up with the arrow facing in.
Insert completely.
Insert label-up.
Cartridge disc
Non-cartridge disc
[DVD-R]
To play DVD-R on compatible equipment, finalize it (➜page 44).
e.g.,
when you select
channel 4
e.g.,
when you
select “XP”
REC
DVD-RAM XP
CH
PG


