


30
DV2
V2
DV SELECT
V SELECT
1
2
EDIT 8mm
¥
AV4
IN
EDIT CONTR
EDIT CONTR
OL
OL
RECORDER
RECORDER
PRINTER/
PRINTER/
D.STILL PICTURE
.STILL PICTURE
PLA
PLA
YER
YER
PASSIVE
ASSIVE
EDIT
EDIT
DV
8mm
8mm
S-VIDEO
VIDEO
L/MONO-AUDIO-R
MONITOR OUT
DV2
V2
DV SELECT
1
2
EDIT 8mm
¥
AV4
IN
EDIT CONTR
EDIT CONTR
OL
OL
RECORDER
RECORDER
PRINTER/
PRINTER/
D.STILL PICTURE
.STILL PICTURE
PLA
PLA
YER
YER
PASSIVE
ASSIVE
EDIT
DV
8mm
8mm
S-VIDEO
VIDEO
L/MONO-AUDIO-R
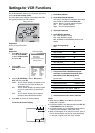
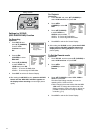
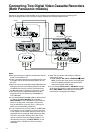
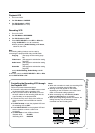
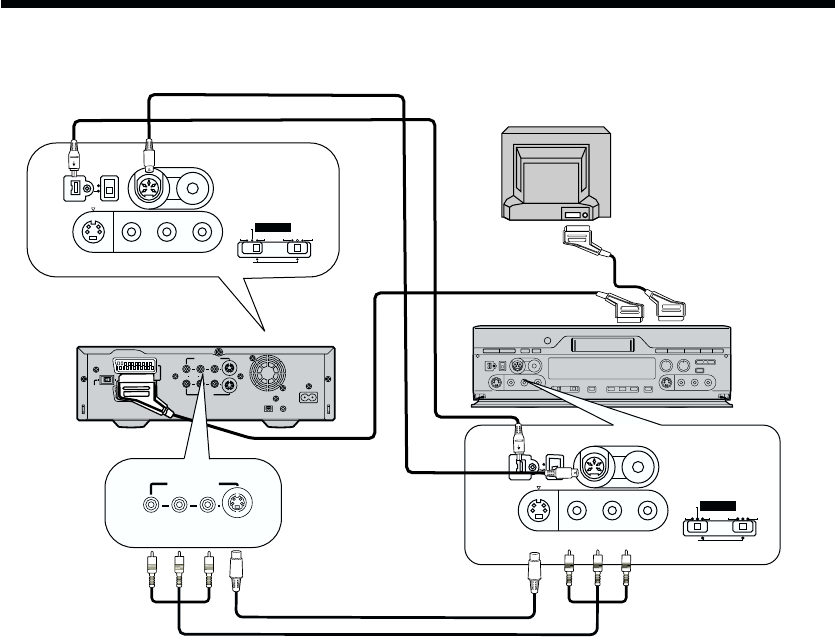
Connecting Two Digital Video Cassette Recorders
(Both Panasonic models)
Notes:
≥ Before connecting any cables, first make sure that the
power for both VCRs is off.
≥ Insert a recorded cassette into the playback VCR, and
a cassette with the closed record prevention tab into
the VCR.
≥ When the units are connected using the DV cable and
editing is performed, some editing functions will differ
compared with when the units are connected using
the AV cable. Refer to Glossary of Terms on [R58].
≥ Use Time codes for programme editing when the
playback VCR is connected to the NV-DV2000 via
only a DV cable.
≥ It is recommended that the DV cable be disconnected
for editing with INPUT SELECT set to A1-A4. If
INPUT SELECT is set to A1-A4 with the connections
shown in the figure left unchanged, the TV picture
may be disturbed or noise may occur. (This has no
effect on the actual editing operations.)
≥ If one of either the 21-pin scart cable or the AV cables
is connected, it is not necessary to connect the other.
If both cables are connected, electronic noise may be
generated when the playback VCR and the recording
VCR are in stop mode. Although this noise will not
have any effect on the actual editing operations, if it
does become annoying, set INPUT SELECT on the
playback VCR to a position for which no cable is
connected.
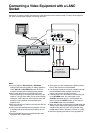
Playback VCR
≥ When the connections and setting are made as
shown above, then:
≥ The 1 (PLAY), 5 (FAST FORWARD),
¥¥
¥¥
¥ (REC/
OTR), and the other such buttons on the playback
VCR or the Editing controller cannot be used to
control the playback VCR directly.
≥ Do not change Edit Terminal or Edit Mode settings
while performing setting or editing operations at SET
UP or EDIT MENU screens. Be sure to quit these
screens before changing these settings.
Recording VCR
AV1
AV2 (Rear)
AV1(Rear)
Example for connecting two NV-DV2000, when controlling the playback VCR through the recording VCR.
Refer to the diagram below and connect the cables required for the desired editing function.
(Front)