


Copying and back-up
07
65
En
English
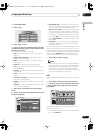
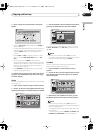
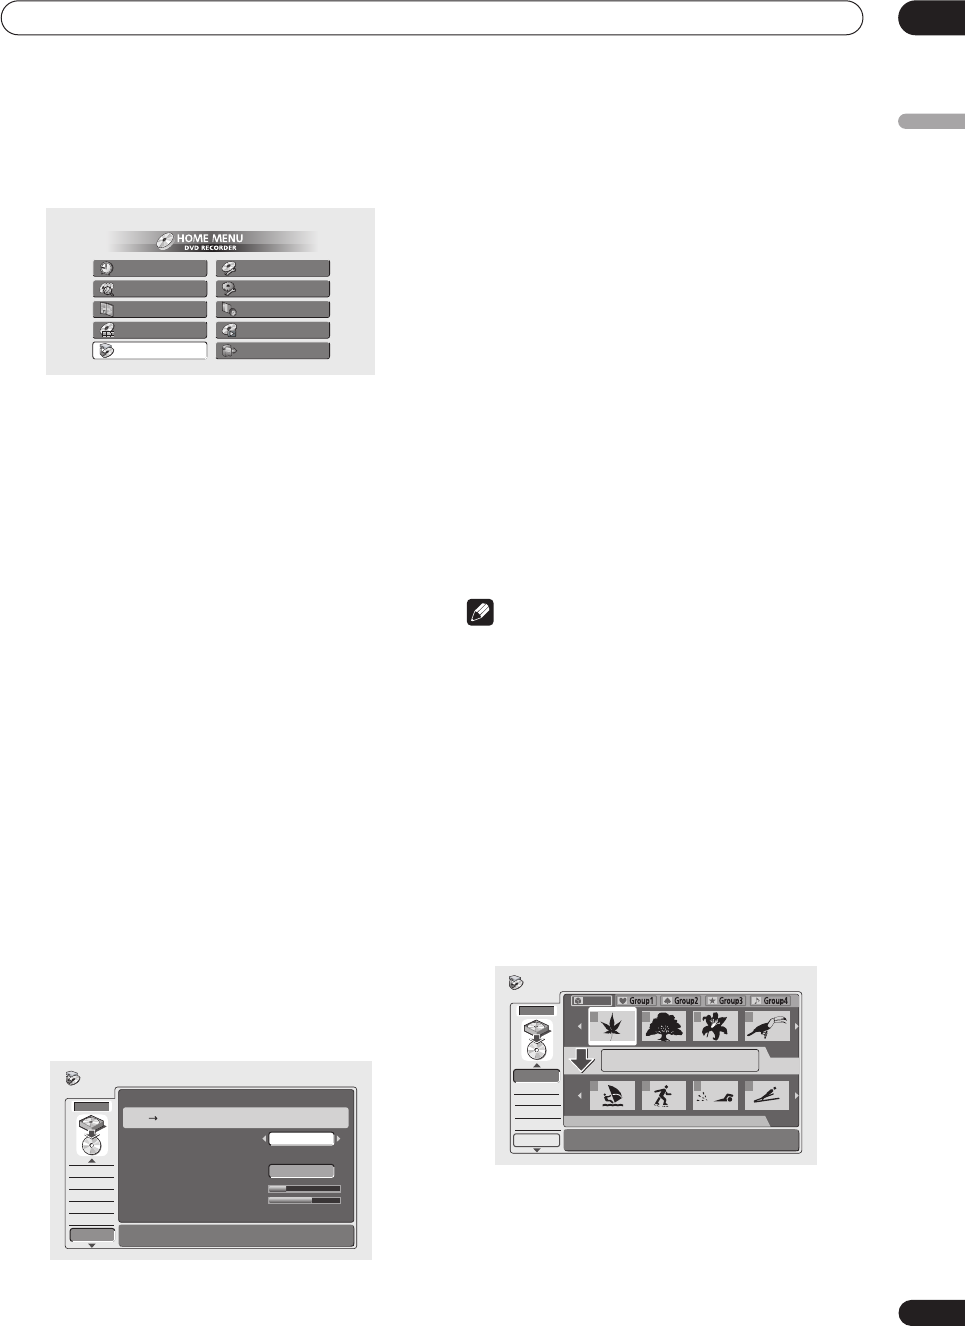
1 Press HOME MENU.
2 Select ‘Copy’.
3 Select ‘HDD
DVD’.
4 Use the
/
(cursor up/down) buttons to select
a command from the Copy List menu options on the
left side of the screen.
The following commands are available:
•
Add
– Select and add titles to the Copy List (see
page 65).
•
Chapter Edit
(
Chpt Edit
) – Edit chapters within a
Copy List title (see page 66).
•
Move
– Change the order of titles in the Copy List
(see page 67).
•
Erase All
– Erase the Copy List (see page 68).
•
Next
– Start recording using the current Copy List
(see step
5
below).
•
Preview
– Check the content of a title in the Copy List
(see page 68).
•
Erase
– Erase individual titles from the Copy List (see
page 68).
•
Title Name
(
Ttl Name
) – Name or rename titles in
the Copy List (see page 68).
•
Divide
– Divide a title in the Copy List into two (see
page 69).
•
Combine
– Combine two adjacent titles in the Copy
List into one (see page 69).
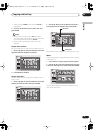
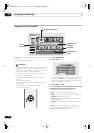
5 Select ‘Next’ to proceed to the copy settings
screen.
6 Use the
/
(cursor left/right) buttons to select
the Recording Mode.
•
High Speed Copy
– The Copy List is copied at the
same recording quality as the original. (See page 62
for more information on high-speed copying.)
•
FINE
,
SP
,
LP
,
EP
,
MN
– The Copy List is copied at the
specified recording quality in real-time. (Note that if
you copy at a higher quality setting than the original,
the copy will not be better quality than the original.)
• If you select
MN
above, you can also change the level
setting (
MN1
–
MN32
) from the Recording Quality box
that appears.
•
Optimized
– The recording quality is automatically
adjusted so that the Copy List fits on to the space
available on the disc.
When you change the recording quality setting, you can
see how much disc space it will require. If this is more
than is available, it shows up in red and you won’t be able
to start copying. In this case, either change the recording
quality, or press
RETURN
to go back to the Copy List
screen and erase one or more titles from the Copy List.
7 Select ‘Start’ to begin copying.
Note
• When the copy mode is set to something other than
High Speed Copy for copying to a Video mode DVD,
the chapter markers of the original are not copied.
Chapter markers are put into the copy at regular
intervals, according to the Auto Chapter setting (see
also
Auto Chapter (Video)
on page 105).
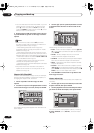
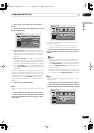
Add
Use this command to add one or more titles to the Copy
List.
1 Select ‘Add’ from the Copy List menu options.
2 Use the
/
(cursor left/right) buttons to select
a title from the HDD to add to the Copy List, then
press ENTER.
The thumbnail appears in the Copy List section in the
lower half of the screen.
• To change the displayed information for the selected
title, press
DISPLAY
.
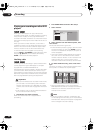
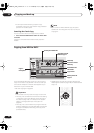
Timer Recording
Disc History
PhotoViewer
Disc Navigator
Copy
Disc Setup
Initial Setup
Video/Audio Adjust
Play Mode
DV Record
HDD
HDD to DVD Copy
Add
Erase
Move
Divide
Combine
HDD DVD-RW VIDEO
Required 0h52m
Recording Mode
Copy List Total
Current DVD Remain
4049MB
4467MB
/ 4467MB
Next
High Speed
Start
Next
HDD
Add
Erase
Move
Divide
Combine
DVD
DVD
HDD
HDD
1
1/3
1/2Copy List
All
16:00 Sun
8/11
Pr 5 LP
Tot al 1h30m
2 3 4
1 2 3 4
HDD to DVD Copy
DVR-03_HDD_EU.book 65 ページ 2003年9月16日 火曜日 午後12時23分