


1-8
PFM-42B1, PFM-42B1E
14
(GB)
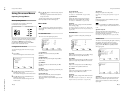
Using On-screen Menus
Using On-screen Menus
Operating Through Menus
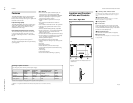
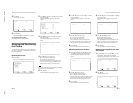
Menu operating buttons
Use the buttons on the monitor or the Remote
Commander for menu operations.
The buttons on the control button section are used for
purposes of explanation in this operating instructions.
The SELECT +M/–m button on the Remote
Commander has the same functions as the v/ V
buttons on the control button section.
Configuration of the menu
To select the language used in the menu, see page
30 (GB).
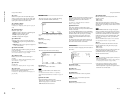
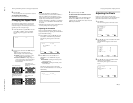
1
Press MENU.
The main menu appears on the monitor screen.
ENTER
MENU
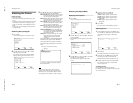
MAIN MENU
INPUT SELECT
PIC CONTROL
PIC SIZE
CONFIG
MEMORY
REMOTE
STATUS
SELECT SET END
2
Press v/ V to move the cursor (B) and press
ENTER to select a menu.
The selected menu appears on the monitor screen.
3
Press v/ V to move the cursor (B) and press
ENTER to select an item.
The menu for the selected item appears on the
monitor screen.
4
Press v/ V to adjust or select the setting and press
ENTER to set.
The setting is registered and the menu returns to
the previous menu.
To return to the normal screen, press the MENU
button repeatedly until the menu disappears.
Menu Guide
Note
“– – – –” appears next to an item when its function is
not available. The availability depends on the types of
input signal.
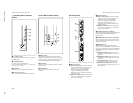
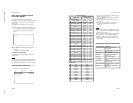
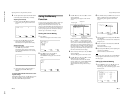
PIC CONTROL menu
This menu is used for adjusting the picture.
ENTER
MENU
PIC CONTROL
CONTRAST : 80
BRIGHTNESS : 00
CHROMA : 00
PHASE : 00
PICTURE AGC : ON
COLOR TEMP : HIGH
SHARPNESS : MID
4
3
2
1
5
6
7
8
RESET
SELECT SET END
1 CONTRAST
Press v to increase the contrast and press V to
decrease it.
2 BRIGHTNESS
Press v to make the picture brighter and press V to
make it darker.
3 CHROMA
Press v to increase color saturation and press V to
decrease it.
4 PHASE
Press v to make the overall picture greenish and press
V to make it purplish.
5 PICTURE AGC
Select ON to automatically increase the brightness
when a low brightness signal is input.
This function works only for VIDEO input or 15 kHz
YUV input.
Remote Commander Control button section
15
(GB)
Using On-screen Menus
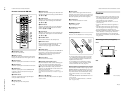
6 COLOR TEMP
Changes the color temperature.
For details, see “COLOR TEMP” on page 22 (GB).
7 SHARPNESS
Changes the outline correction level using the
following three levels (HIGH, MID or LOW).
For details, see “SHARPNESS” on page 23 (GB).
8 RESET
Restores the factory settings in the PIC CONTROL
menu items 1 to 7.
For details on using the reset function, see
“Restoring the
PIC CONTROL Menu Items to Their Original Settings
” on
page 23 (GB).
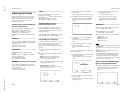
PIC SIZE menu
This menu is used for resizing and positioning the
picture.
ENTER
MENU
PIC SIZE
HSIZE : 00
HSHIFT : 00
VSIZE : 00
VSHIFT : 00
RESET
ASPECT : 4X3
ZOOM : X1
qs
qa
q;
9
qd
qf
qg
qh
PIXEL ADJUST
SELECT SET END
9 H SIZE
Adjusts the horizontal picture size. Press v to enlarge
the horizontal size and press V to diminish it.
q; H SHIFT
Adjusts the horizontal centering. Press v to move the
picture to the right and press V to move it to the left.
qa V SIZE
Adjusts the vertical picture size. Press v to enlarge
the vertical size and press V to diminish it.
qs V SHIFT
Adjusts the vertical centering. Press v to move the
picture up and press V to move it down.
qd RESET
Restores the factory settings in PIC SIZE menu items
9 to qs.
For details on using the reset function, see
“Restoring the
Original Picture Size and Position
” on page 25 (GB).
qf ASPECT
Changes the aspect ratio of the picture.
For details, see “Changing the Aspect Ratio
” on page 26
(GB).
qg ZOOM
Enlarges the image (in order) to double (×2), triple
(×3) and quadruple (×4).
Note
When you set ASPECT to W ZOOM or LB ZOOM,
“– – – –” appears and you cannot set ZOOM to ×2, ×3
or ×4.
qh PIXEL ADJUST
Adjusts the dot phase and the total number of
horizontal pixels when you see noise on the edges of
the characters and the vertical lines.
For details, see “Adjusting the Pixels
” on page 27 (GB).
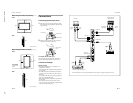
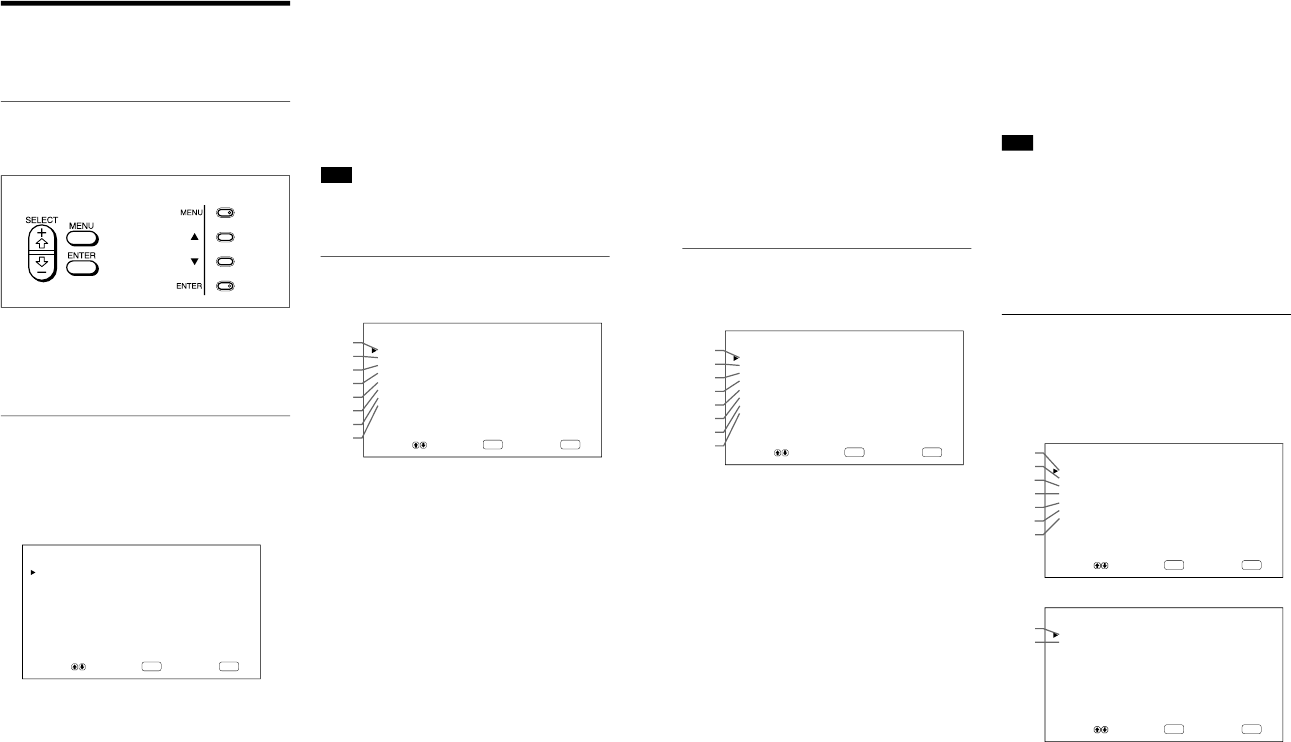
CONFIG menu
This menu is used for adjusting the signal or selecting
the language. This menu consists of two pages;
CONFIG (1/2), CONFIG (2/2). To toggle between
pages, press the v/ V buttons repeatedly until the
other page appears.
ENTER
MENU
CONFIG(1/2)
DISPLAY : ON
W-VGA : OFF
CLOSED CAPTION: OFF
COLOR SYSTEM : AUTO
SCREEN FILL :CENTER
POWER CONTROL
SCREEN SAVER
w;
ql
qk
qj
wa
ws
wd
SELECT SET END
ENTER
MENU
CONFIG(2/2)
TIME SET
LANGUAGE
wg
wf
SELECT SET END
qj DISPLAY
Select ON to display the input signal information for
about five seconds at the top of the monitor screen
when the power is turned on or when switching the
input signal.