


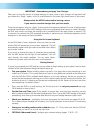

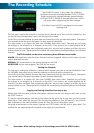


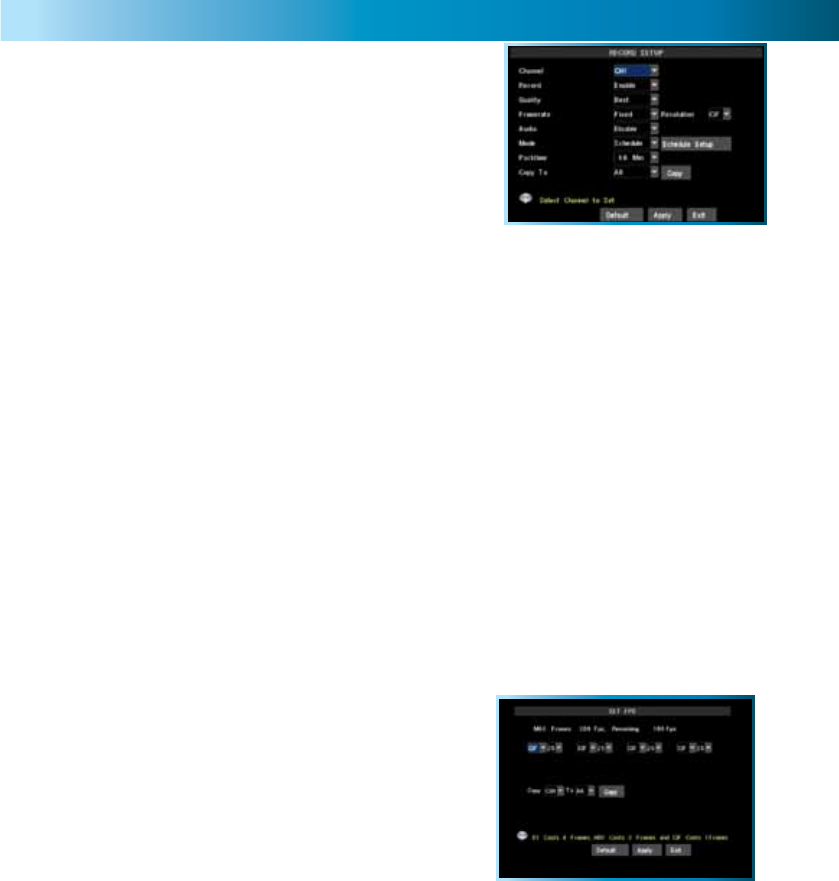
The Record Setup Menu
Remember: After making changes to the settings press/click the APPLY button.
15
In the RECORD SETUP menu you can choose which
channels will be active during recording, change the
recording quality, enable & disable audio, select record
mode and pack time (the maximum size of each recorded
file). This menu contains many of the most important
settings on the DVR, and correctly configuring them is
important to its ongoing smooth operation.
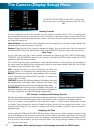
Enabling / Disabling Recording
Choose whether the channel you’ve selected will be recorded or not here. A channel which is “disabled”
will still appear in live viewing mode, but won’t be recorded. This is a “master” setting, and will override
the recording schedule or manual recording modes (i.e. pressing the REC button).
Enabling / Disabling Audio
You can choose whether the associated audio channel will be recorded. Unless you have an audio
device connected that you want to record, we recommend disabling the audio as this will save a small
amount of hard drive space.
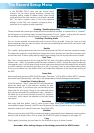
Quality
The “quality” setting determines how much hard drive space the DVR will use when recording images.
The higher the quality, the more detail your images will contain but you won’t be able to store as much
on the hard drive. A lower quality setting means more footage, but will reduce the amount of detail.
Pack Time
Pack Time is a measurement of how long the DVR will record for before splitting the output file into
discrete units. “Packs” are something like the scene numbers on a DVD - though the video is broken up
into separate units, it will still play through as one continuous movie (unless interrupted by the schedule
or motion detection turning the recording on or off). If you don’t want to worry about setting Pack
Times, you can leave it on the default value; it will make little difference to the day-to-day running of
the DVR.
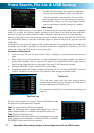
Frame Rate
How many frames per second (FPS) the DVR records. “Real-time” is 25 fps (PAL) or 30 fps (NTSC). However,
even lower frame rates are okay - even 3fps is still the equivalent of three photographs per second.
Frame Rate: Fixed or Manual
If the FPS setting is “fixed”, then the DVR will automatically
adjust the frame rate to the maximum possible for your
selected resolution. If you choose, you can manually set the
frame rates for all channels. Doing so is an advanced option
and only recommended for experienced users - however, it
will allow you to set some channels to record D1 resolution
in real-time, which cannot be selected via the fixed frame
rate option.
Resolution
How many little dots (called “pixels”) make up your image. More pixels mean a better looking and
more detailed image. However, the DVR can only process so many of pixels at once, so increasing the
resolution means you’ll need to lower your Frame Rate (FPS).
Schedule
Where you can program the DVR to record constantly or automatically (upon detecting motion or alarm
events) at the times you’d like. Click or select the SCHEDULE button to program it (see page 16).
Copy
Quickly apply the settings you’ve chosen for this channel to any or all other channels.