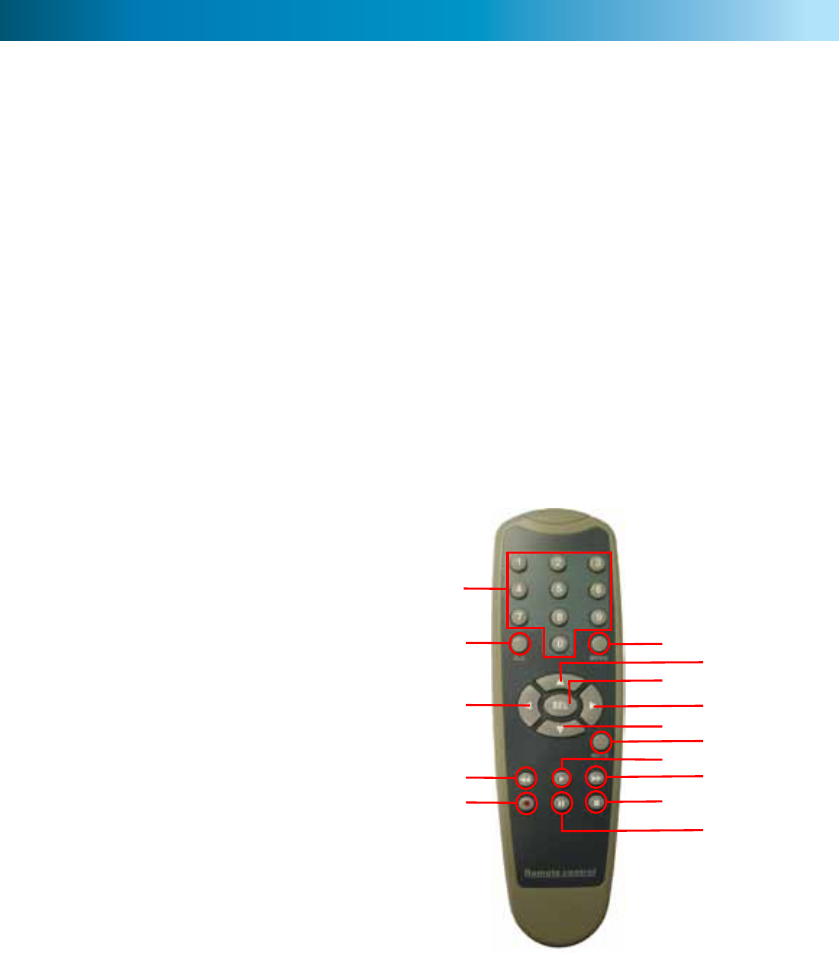
1) 0 ~ 9 (Numeric Buttons): Used to input
numbers. 1 ~ 4 can be used as quick channel
changing buttons in a similar manner to a
television, and these will work during either
live-viewing mode or playback. Additionally, the
numeric buttons will be used when inputting
any numerical information – most often, your
password.
2) ALL: Activates or deactivates the entire
area shown on screen to be armed for Motion
Detection recording mode. Motion Detection will
need to be correctly configured for this button to
function as described.
3, 7, 8, 9 & 10) Arrow Buttons: Moves the cursor
in the appropriate direction when navigating
menus.
5) Record: Press to immediately start recording.
This acts as a manual override to the schedule
and motion recording modes. For a channel to be
recorded in this mode (or any other) it must listed
as ‘active’ in the Camera Setup and Record Setup
menus.
6) Menu: One of the primary controls for
navigating through the menus. When in live-
viewing mode, it will enter the main menu. When
pressed in the main menu, it will return the DVR
to live-viewing mode. Finally, when in a submenu,
this button will return you to the main menu.
7) SEL (Select): The equivalent of Enter/Return on
a computer keyboard. Use this button to (as the
name suggests) select an option in the menus, or
to confirm an entry.
11) Mute: Will not affect the function of this DVR
in live viewing mode. Toggles the audio on or off
during playback.
12) Play: If pressed in live-viewing mode, this will
take you directly into playback mode, and begin
playing the most recent recording. In playback
mode, use it to resume playback after pausing or
stopping a recording.
4) Rewind: During playback, this will reverse
the footage. Press multiple times to increase the
speed of the reversing.
13) Fast-Forward: During playback, this will
increase the speed of playback. Press multiple
times to increase the speed of playback further.
14) Stop: In playback mode, pressing this button
will stop playback.
15) Pause: During playback, will pause the current
recording and leave a still-frame on screen. In
live-viewing mode, this will activate the auto-
sequence mode, where the display automatically
cycles through the available camera signals (this
must be correctly configured and enabled to
function correctly).
Layout of Remote Control
1
2
3
4
5
6
8
10
12
14
7
9
11
13
15
8


