Playing Backed Up Footage on a PC
21
The video files which the DVR backs up are not playable by standard multimedia software. This means
that your usual media player is not going to be able to open or display footage from the DVR. The main
reason for this is that footage from the DVR is always made of multiple channels of video which are
synchronised into one data stream.
Fortunately, the DVR automatically copies the program you need to play back the footage to the same
USB flash drive you back up footage to. All you need to do is install this program, and use it to access
the other data on the thumb drive.
Installing the Playback Software
To install the playback software, locate the file on the included CD
named “Playback-vX”. We are constantly making updates and
improvements to our software, so “X” will be the version number.
Run this setup file.
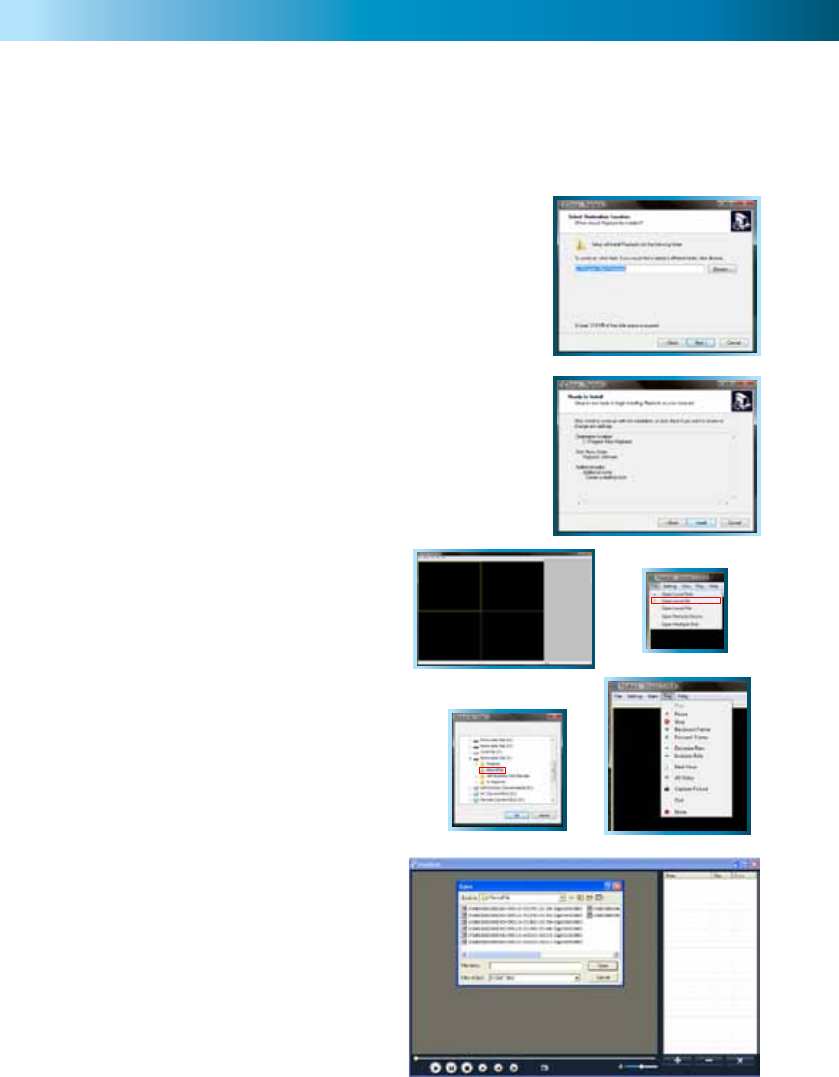
Follow the installation prompts - you’ll be asked where you’d like to
install the software and the shortcuts to access it. We suggest that
the default options are usually the best choice - only change these
if you have a very specific idea about where you want the software
to be installed. Once you’ve made these choices, simply wait while
the installation is processed.
NOTE: This software is compatible with Windows operating systems
only (XP and more recent versions). Also, it will only operate on
32-bit versions of Windows (not 64-bit - the incompatibility is due
mostly to incompatible drivers).
The Playback Interface
Assuming that you’ve used the default
installation paths, you can access the playback
software by selecting the desktop icon named
Playback Software, or finding the program
group of the same name in your Start Menu.
This will take you to the default interface of the
playback software, as shown to the right.
Opening Files:
Open the File menu, and choose “Open Local
Folder”. Navigate to the USB drive you have
backed up footage to, and select the folder on
that drive called “RecordFile”.
Playback Controls:
The playback controls are located in the menu
named “Play”. The Play, Pause, and Stop
options work as their counterparts would
on a DVD player. Decrease Rate and Increase
Rate work like fast-forward and slow motion
functions.
Use the Backward Frame and Forward Frame for
precise control - they will move back or forward the
smallest amount possible (the frame rate is determined
by the settings used to record the video).
Use the Capture Picture function to save a
single picture as a bitmap (BMP) file. The Mute
function will disable audio playback. OSD refers
to the on-screen display.


