


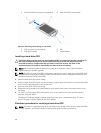
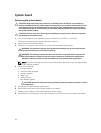


Installing the hard-drive/SSD backplane
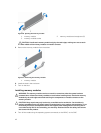
1. Align the slots on the hard-drive/SSD backplane with the hooks on the chassis.
2. Lower the backplane into the chassis until it is firmly seated and the release tab clicks into place.
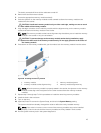
3. Connect the power cable and SATA cables to the backplane.
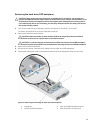
4. Install the hard drives/SSDs in their original locations.
5. Install the sled in the enclosure.
6. Turn on the sled.
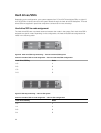
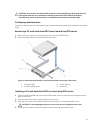
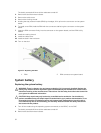
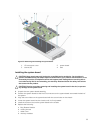
SSD cage assembly
The eight 1.8 inch SSD system supports two SSD backplanes in two SSD cage assemblies.
Each SSD cage assembly includes:
• an SSD cage that supports four 1.8 inch SSDs
• one SSD backplane
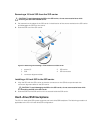
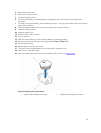
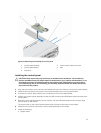
Removing the SSD cage assembly
CAUTION: Many repairs may only be done by a certified service technician. You should only
perform troubleshooting and simple repairs as authorized in your product documentation, or as
directed by the online or telephone service and support team. Damage due to servicing that is
not authorized by Dell is not covered by your warranty. Read and follow the safety instructions
that came with the product.
1. Turn off the nodes using the operating system commands, or the iDRAC, or the CMC.
The sled is powered off when all the nodes are turned off.
2. Remove the sled from the enclosure.
3. Remove the SSDs.
4. Remove the SATA and power cables from the SSD backplane of the cage assembly.
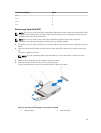
5. Loosen the spring-loaded screw that secures the SSD cage assembly to the sled chassis.
6. Slide the SSD cage assembly out of the sled.
50