


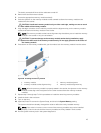
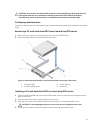
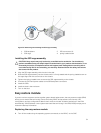
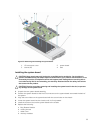

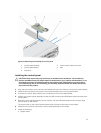
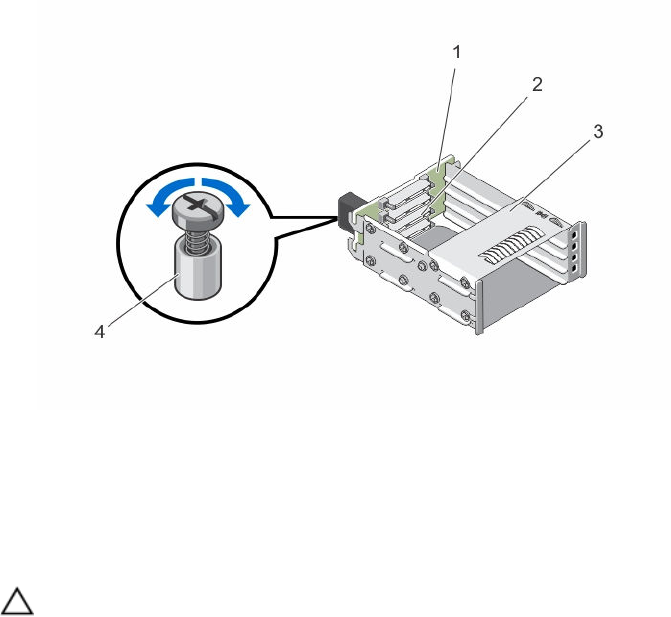
Figure 26. Removing and installing the SSD cage assembly
1. SSD backplane 2. SSD connectors (4)
3. SSD cage 4. spring-loaded screw
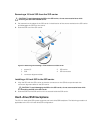
Installing the SSD cage assembly
CAUTION: Many repairs may only be done by a certified service technician. You should only
perform troubleshooting and simple repairs as authorized in your product documentation, or as
directed by the online or telephone service and support team. Damage due to servicing that is
not authorized by Dell is not covered by your warranty. Read and follow the safety instructions
that came with the product.
1. Align the SSD cage assembly with the slot in the sled.
2. Slide the SSD cage assembly into the chassis until it is firmly seated and the spring-loaded screw on
the cage aligns with the screw hole on the chassis.
3. Tighten the spring-loaded screw to secure the SSD cage assembly to the chassis.
4. Connect the SATA and power cables to the SSD backplane connectors.
5. Install the SSDs.
6. Install the sled in the enclosure.
7. Turn on the sled.
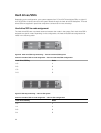
Easy restore module
If you do not have a system service tag after system board replacement, the easy restore module (ERM)
allows you to restore the service tag, license (including iDRAC and processor core license), UEFI
configuration, and the configuration data for each node in the sled. All data is backed up in the ERM
automatically. If BIOS detects a new system board and the service tag in the ERM, BIOS prompts you to
restore the backup information.
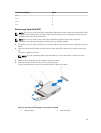
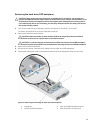
Replacing the easy restore module
1. Turn off the nodes using the operating system commands, or the iDRAC, or the CMC.
51