


30 31
CHAPTER 4 BASIC OPERATION
You cannot use Copy/Paste in Motion Detection because each channel will have a different
display. Right-clicking will exit the screen and your settings will be saved.
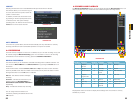
Sensitivity – The system supports six levels of sensitivity with Level 6 being the most
sensitive.
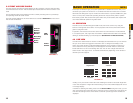
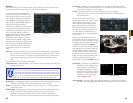
VIDEO LOSS
By default, this is enabled. In the event that the DVR detects a loss of signal from a camera,
it will send out a notification or activate other functions based on your settings in the lower
portion of the Detect window.
CAMERA MASKING
This is also enabled by default. If the system detects that something has covered a camera, it
will respond based on your settings in the lower portion of the window.
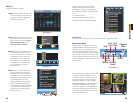
EVENT RESPONSE
The lower portion of the Detect window determines what actions the DVR will initiate upon
detection of one of the three event types. Responses to a specific type of event can be
individually tailored to each camera, but the response to different types of events must be set
independently of each other. (ie: The response settings for a motion detection event do not
change the settings for a video loss event – even if you’ve set identical responses.)
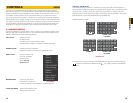
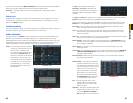
The Set button will appear when either
Work Day or Free Day is selected in the
drop-down. This allows you to arrange the
schedule to reflect your business’ weekly
schedule.
PICTURE 4-20
PICTURE 4-21
PICTURE 4-22
PICTURE 4-23
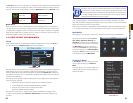
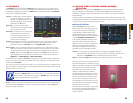
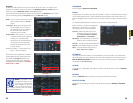
Period - This is where you set the schedule
of when you want the DVR to record
motion events. It operates in the
same manner as the Schedule menu
as described in Section 4.6 with
six blocks of time that can be laid out
for recording to occur during a day.
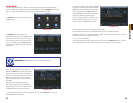
Not all blocks have to be configured
or enabled. You can configure each
day individually, or you can make
separate schedules for week days
and weekends.
The Copy and Paste buttons allow you to duplicate a day’s settings on another day while the
Default button returns the DVR to recording Motion Detection events 24/7.
Once you have made your settings, select OK to save them and you will be returned to the
Detect menu. Hitting Cancel or right-clicking to exit the menu will not save your changes.
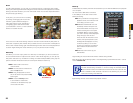
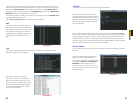
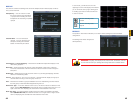
Anti-Dither – This is the length of time that the DVR will delay before recording a motion
event. The delay can be from 0 to 600 seconds.
Latch – This is the “hold time” that the system waits after a motion detection event ends
before resuming motion detection searches. The delay can be set from 10 to 300
seconds (5 minutes).
Alarm Out – To utilize this feature you must connect have at least one external alarm attached
to the DVR. You may have up to three separate alarms.
Show Message – When this is enabled, the system will bring up the Alarm Status window
whenever an event is detected. You can configure this to display when motion, video
loss or masking is detected.
Alarm Upload – The system can upload the alarm to the network including to an alarm
monitoring service.
Send E-mail – E-mail notifications can be sent a single e-mail address. Please see Network
in Section 5.3 Setting Menu for instructions on how to set up the e-mail alerts
including recipient address.
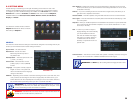
Record Channel – When one camera detects an event, you can set the DVR to activate
recording on other cameras.
PTZ Activation – If you have Pan-Tilt-Zoom
cameras connected to the DVR, you
can cause them to be activated when
the system detects an event. You can
further instruct it to perform one of
255 pre-set activities. You can also
allow a delay of 0 to 300 seconds
before the PTZ camera(s) activates.
See Section 6.2 for full instructions
on programming these functions.
Tour – This will cause the DVR to cycle
through selected channels on the
display in live view. It will not affect
what is recorded.
Snapshot – The DVR is capable of taking still
images which can be sent via e-mail
or FTP (See Network in Section
5.3 Setting Menu for full instructions.)