


56 57
CHAPTER 7 ALARMS
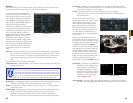
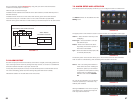
The accompanying diagram (Picture 7-2), along with your alarm’s manual should be
consulted to ensure proper connection.
• Normal open or Normal close type
• Parallel connect COM end and GND end of the alarm detector (Provide external power to
the alarm detector).
• Parallel connect the Ground of the combo DVR and the ground of the alarm detector.
• Connect the NC port of the alarm sensor to the combo DVR alarm input(ALARM)
• Use the same ground with that of combo DVR if you use external power to the alarm device.
PICTURE 7-2
+12V GND COM PC
GND
ALARM
Alarm input public end should jump out with device power end.
Alarm Device Connection Terminal
Alarm Device
Connection Terminal
+12V GND
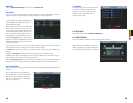
7.2 ALARM OUTPUT
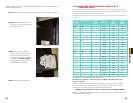
The alarm output port should not be directly connected to a higher power load (greater than
1A) to avoid high current which may damage the relay. Use the co-contactor to establish the
connection between the alarm output port and the load.
• 2 way relay alarm output (NO contact). Provides external power to external alarm device.
• To avoid overloading, please read the following relay parameters sheet carefully.
• RS485 A/B cable is for the A/B cable of the PTZ camera.
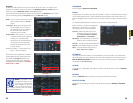
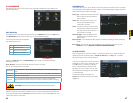
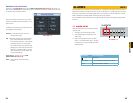
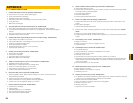
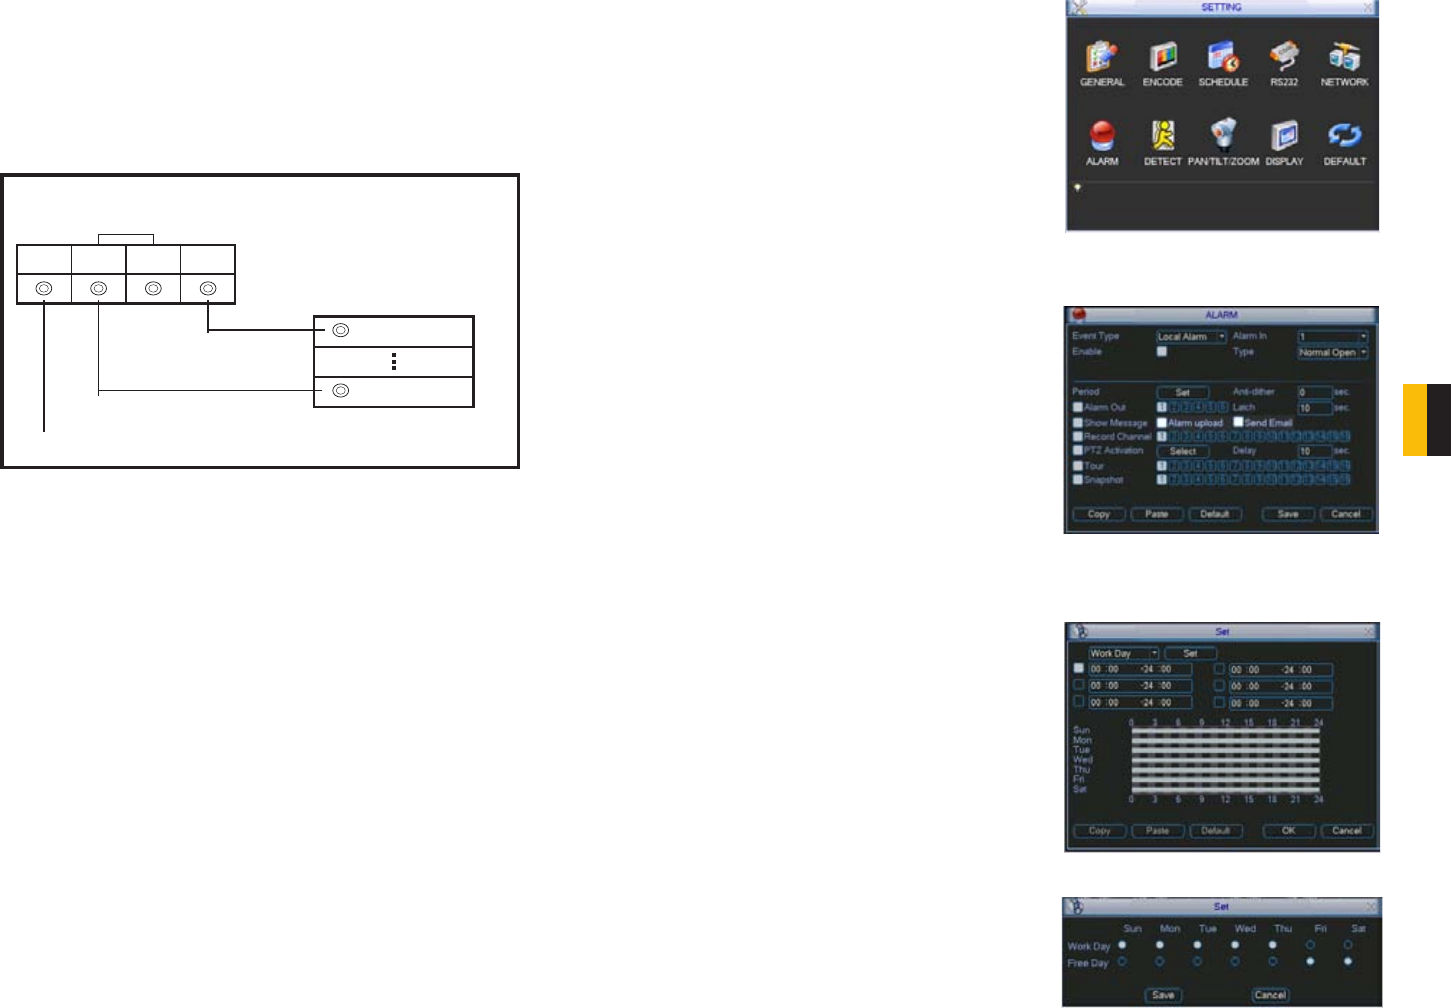
7.3 ALARM SETUP AND ACTIVATION
Once external alarms are properly connected, you can configure the DVR to activate them.
The Alarm interface can be selected from the
Setting menu.
The upper portion of this window is used to choose an alarm, its configuration and its type.
PICTURE 7-2
PICTURE 7-3
PICTURE 7-4
PICTURE 7-5
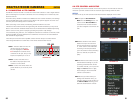
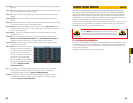
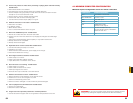
Alarm In – Select the alarm channel you are
configuring.
Event Type – Choose between Local Input
and Network Input
Enable – When this is selected the alarm
response(s) in the bottom portion of
this window are enabled.
Type – Alarms are either Normally Open (NO)
or Normally Closed (NC)
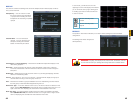
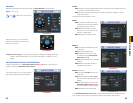
The bottom portion of the window allows you to choose what actions the DVR will initiate
when an alarm is activated along with scheduling when the alarms are active.
Period – This is for setting the schedule for
when alarms are active. Clicking the
Set button opens up a new window.
Its operation is exactly like the setting
window used to schedule motion
detection and covered in Section
4.7.
You can set the schedule in up to six blocks
of time for specific days of the week or by
weekday and weekend.
Clicking the Set button next to the day drop
down allows you to specify which days are
work days and which are not.