


42 43
CHAPTER 5 MENUS
SCHEDULE
This is covered in Section 4.6 Schedule
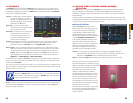
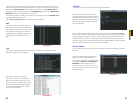
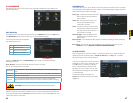
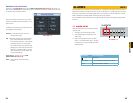
RS232
The RS232 port on the back of the DVR can be used to connect to selected devices including
a Point of Sale (POS) system or network keyboard. When integrated with a POS system, the
DVR can integrate the text component and can conduct searches within the records using this
info.
If a network keyboard (NKB) is connected, it can be used to operate the DVR.
When connecting a component through the
RS232 port, you will need to consult the
manual of that device for proper settings.
Function – Select the device that you’ve
attached to the port. Your choices
are; Console, Keyboard, Adapter,
NetKeyboard and PTZ Matrix
Baud Rate – this should be set to match the
baud rate of the connected device.
Data Bit – The value ranges between 5 and 8.
Stop Bit – The available values are 1 and 2
Parity – Choose between parity values of
None, Odd, Even or Space
PICTURE 5-21
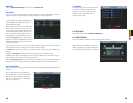
NETWORK
Accessing the DVR from within a Local Area Network, over the Internet or via a Smartphone
along with setting up e-mail notifications and other online features will be covered in full in the
Remote Monitoring Guide included on the CD that came with your DVR or available for
download from www.Q-See.com.
ALARM
The connection, configuration and operation of alarms with this system is covered in Chapter
7 “Alarm.”
DETECT
Please see Section 4.7 for instructions on using the features in this window.
PAN/TILT/ZOOM
Connecting and operating PTZ cameras with this DVR is covered in Chapter 6 “Pan/Tilt/
Zoom.”
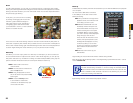
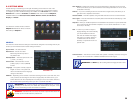
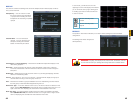
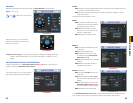
Snapshot
In addition to taking video of an event, the DVR can be set to record - and transmit - still
images from whichever cameras you select in the Schedule, Detect and Alarm windows
which are covered in Sections 4.6, 4.7 and 7.3 respectively.
The actual settings for the Snapshot feature are configured in the Snapshot window which
can be opened by pressing the Snapshot button in the Encode window.
PICTURE 5-17
PICTURE 5-18
PICTURE 5-19
PICTURE 5-20
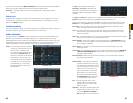
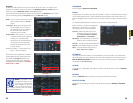
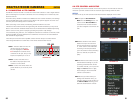
Mode - You can chose to have each camera
take a snapshot based on Timing or
Trigger
Image Size - D1 produces an image twice
the size of CIF . You can chose to
use a different format for snapshots
than the format that camera is
configured to record video.
Image Quality - With a range of 1 to 4, this
controls the quality of the snapshot(s).
A setting of “4” provides better
images, but at an increased file size.
You may have to lower the quality
if the file size exceeds your e-mail
in-box’s capacity.
Snapshot Frequency - This will allow you to
take 1-7 shots in sequence.
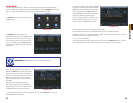
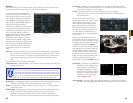
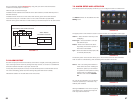
Each camera can be individually configured.
These settings are what will be used when
you enable the Snapshot feature in any
window that offers that option. Examples
are highlighted with Red Boxes in Pictures
5-18, 5-19 and 5-20.
NOTE! It is possible to have
the Snapshot feature set to
occur both on schedule and
when triggered by an event
such as Motion Detection.
The triggered activation will take priority
over the scheduled event.