


Page 55
Installing a DISH 500 Antenna
12. You should see the Point Dish/Signal menu. If not, open the Main Menu,
select
System Setup, then Installation, then Point Dish/Signal (press
MENU and then press 6-1-1 on the remote).
13. Select
Check Switch. The Check Switch screen will open.
14. Select
Test. The receiver shows you a message that it is checking the
switches.
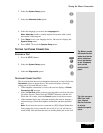
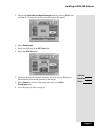
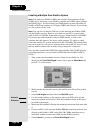
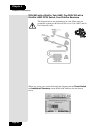
15. When the check switch procedure finishes, you will see an installation
summary screen similar to the one below. In the
Satellite line, you will see
“Conn.” In the
Device line, you will see “Twin” twice. This indicates that
your receiver has confirmed the connection with your DishPro Twin LNBF
is working. The Transponder line may show two “Xs.” This is OK and does
not indicate a problem with the receiver.
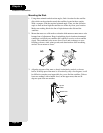
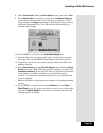
16. Select
Cancel or OK to return to the Point Dish/Signal screen. Make sure
the check mark is next to
119 West. If not, move the highlight to 119 West
and press SELECT. Notice the signal strength bar. This is used to help you
aim the dish by showing the strength of the signal you are receiving. Look
at the signal strength bar while you aim the dish.
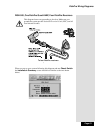
Don’t stand in front of the dish while you aim it, because your body will
block the satellite signal. After you adjust the aim, let go of the dish so that
you can get a good signal reading after the dish settles back in place by
itself. Do not change the skew setting.
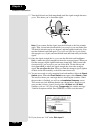
Tip: Have one
person aim the
dish while another
watches the signal
strength or listens
to the signal tone.