


Page 56
Chapter 4
Installation Instructions
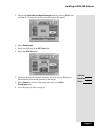
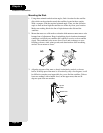
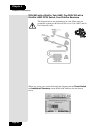
17. Turn the dish back and forth very slowly, until the signal strength bar turns
green. This shows you’ve found the signal.
Note: If you cannot find the signal, turn the dish back to the first azimuth
angle. Then, loosen both elevation bolts just enough so you can tilt the dish.
Tilt the dish elevation up by two degrees, and then tighten both bolts. Now,
turn the dish back and forth again. If you still can’t find the signal, tilt the
dish up again very slightly and turn the dish back and forth until you find the
signal.
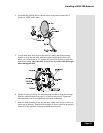
18. Once the signal strength bar is green, turn the dish back and forth just a
little, to where the signal strength bar shows the strongest signal. When you
find the strongest signal, tighten both mast clamp bolts. Then loosen both
elevation bolts, just enough so you can tilt the dish. Tilt the dish up and
down just a little, to where the signal strength bar shows the strongest
signal. Do not adjust the skew. When you find the strongest signal, tighten
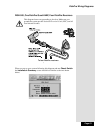
all bolts in the dish assembly so the dish cannot be moved.
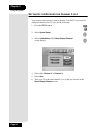
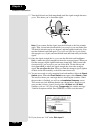
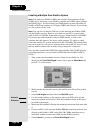
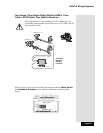
19. You are now ready to verify reception from both satellites. Select the
Check
Switch
option. When the Check Switch menu opens, select Check or Test.
The receiver shows you a message that it is checking the switches. When
the procedure is finished, you will see an Installation Summary screen.
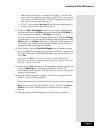
This screen may look different than the one shown below. However, you
must see that you have signals from both the 110 West and 119 West
Satellites, you see “All” twice in the Transponder line, and the message
“Satellite reception verified. Press CANCEL or OK to exit this menu.”
20. If you do not see “110” under
Dish Input 2: