


Page 59
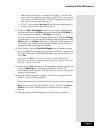
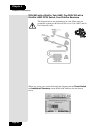
Installing a DISH 500 Antenna
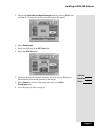
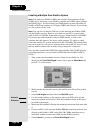
8. Select Check Switch. When the Check Switch screen opens, select Test.
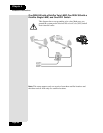
9. When
Check Switch is complete, you will see an Installation Summary
screen similar to the one shown next. It will show a connection (“Conn”
next to satellite) and
Single device under 1 (Dish Input). It may also show
an X on the Transponder line. This is OK and does not mean there is a
problem with the system.
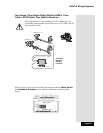
10. Press CANCEL to exit back to the Point Dish/Signal menu.
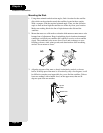
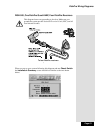
11. Point the dish for the strongest possible signal, following the instructions
that came with it and the DishPro wiring diagrams that start on page 60.
12. Connect any switches in your system, using the instructions which came
with the switch(es).
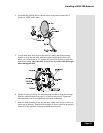
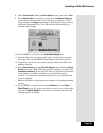
13. Select
Check Switch from the Point Dish/Signal menu. When the Check
Switch
menu opens, Test. When the procedure completes, you will see the
Installation Summary screen again. This time you should see confirmation
for all satellites your dishes are pointed at, and “Satellite reception
verified.” You should also see that the switch(es) in your system has been
correctly identified.
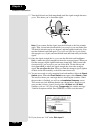
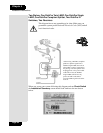
Refer to the DishPro wiring diagrams for examples of installation summary
screens.
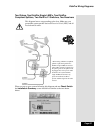
14. Press CANCEL to exit this menu, and then Cancel to exit the Point
Dish/Signal screen. If you have any other receivers in your system, make
sure you run Check Switch on each of them, and allow each to take the
software upgrade, as needed.