Four-Channel Digital Video Recorder
27
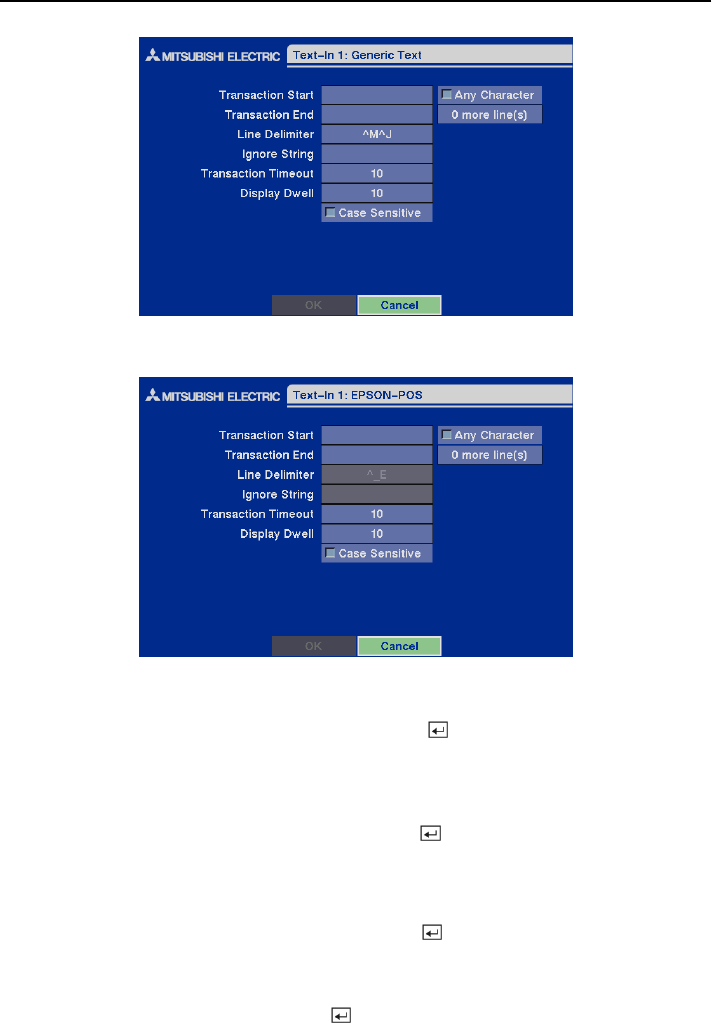
Figure 39 — Text-In (Generic Text) setup screen.
Figure 40 — Text-In (EPSON-POS) setup screen.
Highlight the box beside Transaction Start, and press the button. Use the virtual keyboard to
enter the Transaction Start string. Refer to the device manufacturer’s documentation for the text
string that the device first sends when a transaction starts.
If you want the DVR to react to any character sent from the text-in device, you will want to turn On
Any Character. Highlight Any Character, and press the
button to toggle between On and Off.
NOTE: If Any Character is turned On, you will not be able to enter any text in the Start String
box.
Highlight the box beside Transaction End, and press the
button. Use the virtual keyboard to
enter the Transaction End string. Refer to the device manufacturer’s documentation for the text
string that the device sends when a transaction ends.
Highlight the more line(s) box and press the button. Select the number of additional lines of
text that you want the DVR to record. You can choose from 0 to 10.
