User’s Manual
34
There are several ways to set recording times:
y You can highlight an individual block and toggle it on or off by pressing the button.
y You can change a 30-minute segment for all days by placing the cursor on the time line and
pressing the
button to toggle the segment on or off.
y You can change an entire day by placing the cursor on the day of the week and pressing the
button to toggle the day on or off.
y You can change the entire calendar by placing the cursor in the upper left-hand box (above “S”
and to the left of the time line) and pressing the
button to toggle the entire calendar on or
off.
NOTE: The Holiday (H) schedule applies to the dates you established as holidays when
setting Date/Time.
You can save your changes by highlighting OK and pressing the
button. Selecting Cancel exits
the screen without saving the changes.
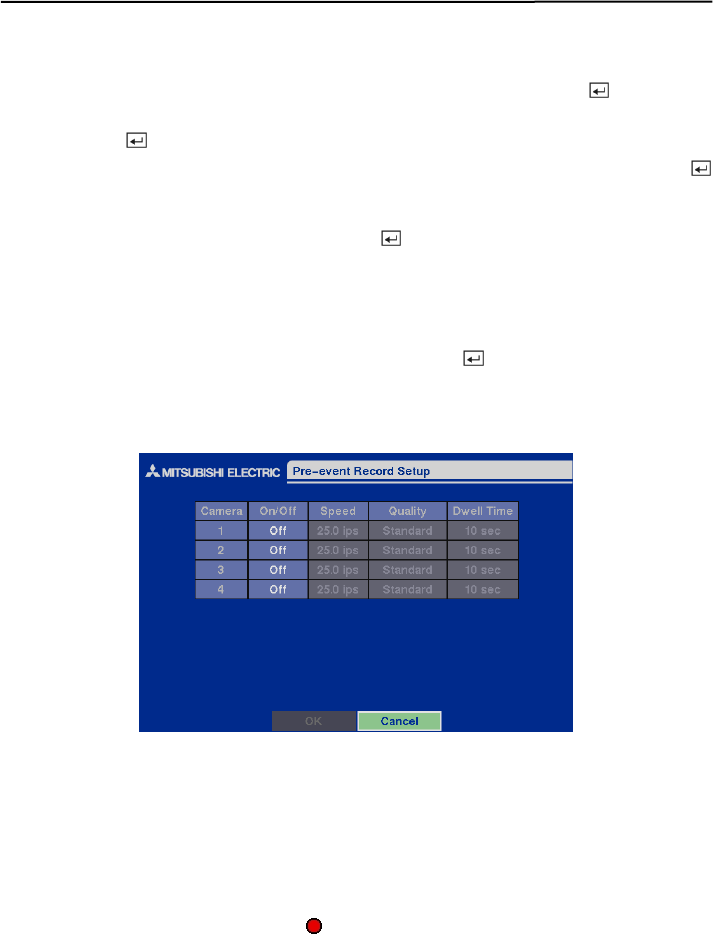
Pre-Event Recording Setup Screen
Figure 48 — Pre-Event Record Setup screen.
When the DVR is in the Event Record mode, it is possible to have it record images before the event
occurs. The Pre-Event Record screen allows you to define how to handle pre-event recording.
You can turn individual cameras On or Off for pre-event recording. The image speed can be set
from 0.5 to 25 ips, and image quality can be selectable from High, Standard and Low.
NOTE: When a camera is set to On, the displays on each camera screen. However, the
DVR will record the video only when events are detected.
NOTE: The pre-event recording speed is 25 images per second when the resolution is set to
Standard. However, when set to High, the recording speed will be decreased to 12.5 images
per second.


