


103
D824/D1624 Reference Manual (Changing the Initial Settings <SETUP mode>)
42
∞
_
OL
0
87654321
30
24
18
12
9
6
3
161514131211109
44.1kHz
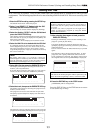
SETUP
SIGNATURE
42
∞
_
OL
0
87654321
30
24
18
12
9
6
3
161514131211109
44.1kHz
SETUP
SIGNATURE
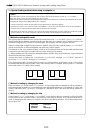
42
∞
_
OL
0
87654321
30
24
18
12
9
6
3
161514131211109
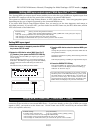
Flashing
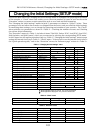
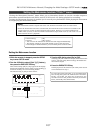
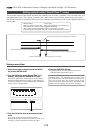
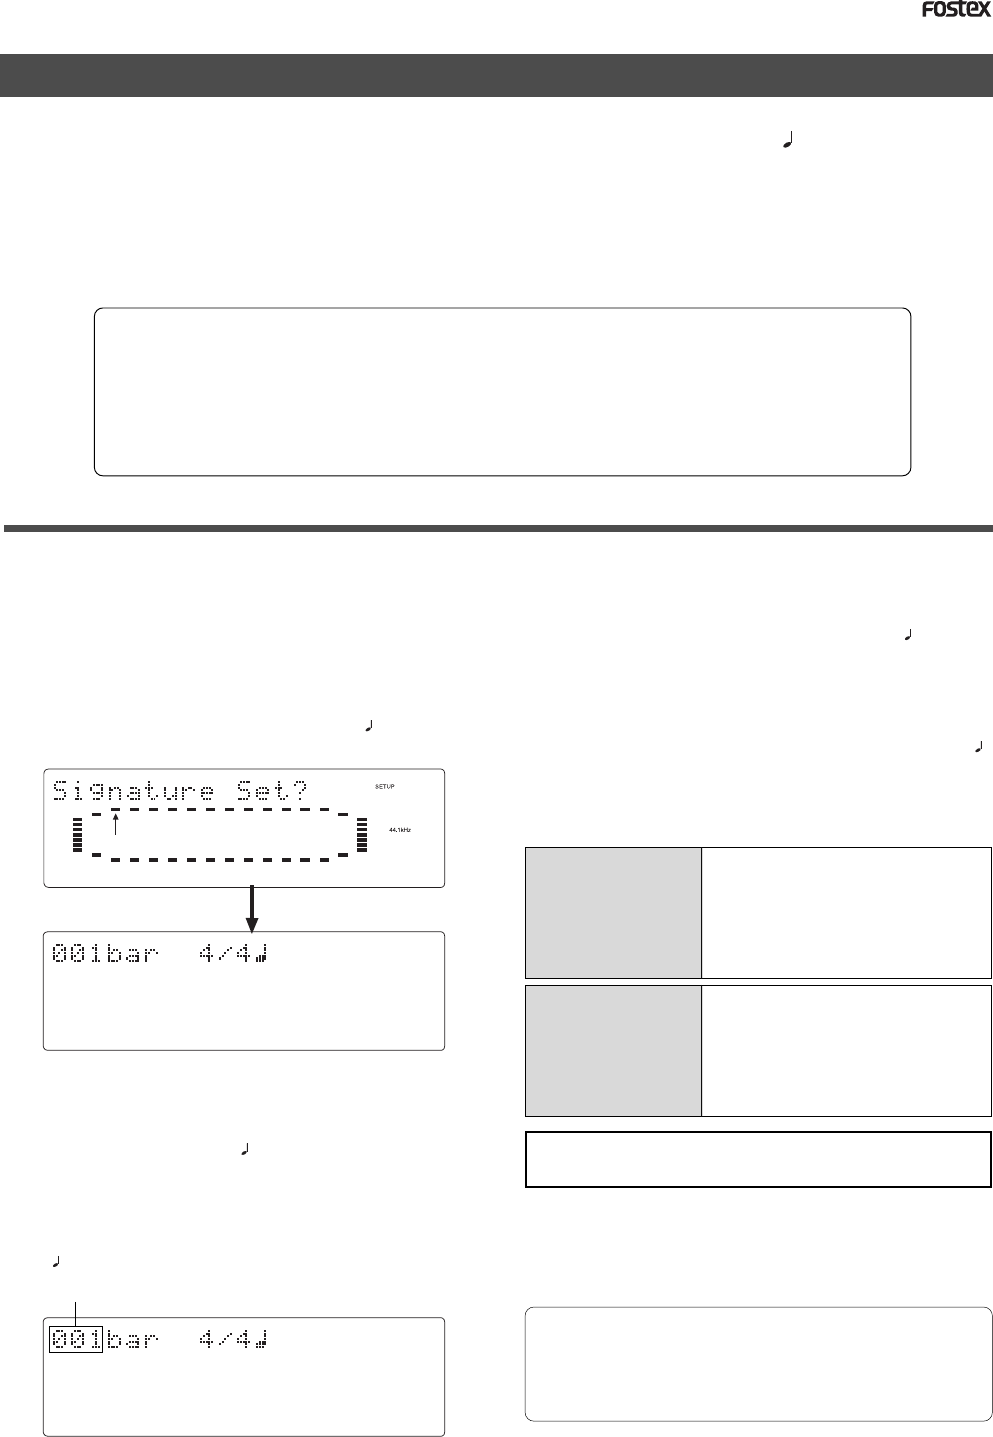
Time Signature Setting (“Signature Set?”)
Using the “Setting a time signature” menu, you can set a time signature of a given measure on the
internal programmable Tempo Map. And also in this setting, the BAR (-002bar, 1
, 00clk) displayed at
the head of the disk in the time base BAR/BEAT/CLK can be set within the range of -009bar ~ -002bar.
For example, you can specify “4/4 for the first and second measures, and 2/2 from the third measure.”
Setting a time signature and tempo will create a Tempo Map, which allows the recorder to manage a
song using the BAR/BEAT/CLK Time Base. You can also use the Metronome function.
A time signature and tempo setting are required when MIDI clock & song position pointer are output to
an external sequencer.
* Initial Setting : 001bar 4/4 beat
* Available bars : 001 ~ 999
* Available time signature : 1/4, 2/4, 3/4, 4/4, 5/4, 1/8, 3/8, 5/8, 6/8, 7/8, 8/8, - -/- - (Delete)
* Maximum setting points : 64
* The setting is applicable song by song.
* The setting can be saved or loaded as a part of the song data
* The setting is memorized even when the power is off.
* Make sure you choose the right program before setting this mode.
Storing a time signature
1.Select a Program for which to set a time signature.
Refer to “Using the Program Change function” on page
“36” for information on selecting a Program.
2. Press the SETUP key, use the JOG dial to select
the [Signature.Set ?] menu, then press the
EXECUTE/YES key.
The indication changes to the current time signature
appears. The initial setting is [001bar 4/4 ] (4/4 for
the first measure).
At this time, rotating the JOG dial clockwise enables you
to check the current time signatures in sequence.
With the initial setting, time signatures after the first
measure are all [- - -bar - /- ]. This means that a time
signature of 4/4 applies to all measures.
3.Press the EXECUTE/YES key.
The indication changes to [001 (measure)] of [001bar
4/4 ] flashes. You can enter any time signature here.
• Rotate the JOG dial to enter the desired measure
number.
If you wish to keep the initial setting for the first measure,
enter 002. If you try to enter any number other than
001, the time signature indicator shows [-/- ]. This
means that no time signature is set for any measures
other than the first measure. To change the time
signature for the first measure, follow the steps below,
without entering any other measure number.
• Turn the SHUTTLE dial to display flashing [-/-] of [-/- ]
and enter the time signature using the JOG dial.
The following measure numbers and time signatures can
be entered via the JOG dial.
Measures
Time signatures
001-999, selection of [All Clear?]
indication.
[All Clear?] means that data in its
entirety will be cleared. This is used
to initialize the parameter. (Refer to
“Clearing stored time signature/tempo
data.”)
1/4, 2/4, 3/4, 4/4, 5/4, 1/8, 3/8, 5/8,
6/8, 7/8, 8/8, -/-
[-/-] means no time signature assigned,
and is used to delete time signature
data. (Refer to “Modifying (or deleting)
stored time signatures” for more
information.)
<Note>
You cannot assign “- - -” to measure 001.
4.Press the EXECUTE/YES key whenever you enter
a pair of measure/time signature values.
Repeat this step to specify the necessary time signature
for the measures.
To cancel the setting operation, or to exit SETUP mode
after storing data, press the STOP button or the EXIT/
NO key. Each time you press one of these keys, the
recorder returns to the previous hierarchy level of the
menu, and finally exits SETUP mode.