User Guide
26
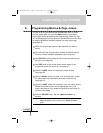
9 Navigate to your new macro device and press your newly
named macro button to enter the MACRO edit page.
The MACRO edit page will appear. If you had any previously
programmed commands in this button, they will appear for you
to edit.
10 Working from your written list, navigate through the desired
device and page to program all of the steps in the Macro.
(see page 43)
Commands - When you tap a button, you will record an RC
command step. (see page 43)
Jumps - When you select a device from the Device Overview
while holding down the Left Function button (now labeled
“Jump”), you will record a page jump to the first page of that
device. (see page 44)
Device Action - When you select a device from the Device
Overview while holding down the Right Function button (now
labeled “Action”), you will record a Device Action of that device.
(see page 44)
Delays - When you select a “Delay”, use the “+” and “-” buttons
to set the length of delay. (see page 43)
Beeps - When you select a “Beep”, you will record a beep.
(see page 43)
Note Use the Page + / - buttons, Device Overview or Page Overview
to navigate through pages; the Tab buttons will work as a Jump.
If you accidentally record a Tab button as a macro step, it is
better to delete it.
11 Once all steps have been programmed, test your macro by
tapping the “Test” button on the page.
Customizing Your RC9500
DFU RC9500 Ver1_2.qxd 5/28/2004 10:33 AM Page 30


