


Digital Video Recorder
21
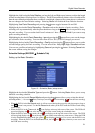
Highlight the slide bar beside Auto Deletion, and use the Left and Right arrow buttons to adjust the length
of time recorded data will be kept from 1 to 99 days. The DVR automatically deletes video recorded earlier
than the user-defined period under three conditions: at midnight, whenever the system reboots or whenever
the user changes the Auto Deletion settings. Selecting Never will disable the Auto Deletion function.
Highlighting Use Panic Recording and pressing the button toggles between On and Off.
Highlight the box beside Panic Recording – Duration and set the duration of panic recording. Panic
recording will stop automatically after the preset duration as long as the
Panic button is not pressed to stop
the panic recording. You can set the dwell from 5 minutes to 1 hour. Select No Limit if you want to stop
panic recording manually.
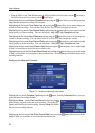
Highlighting the box beside Panic Recording – ips and pressing the button allows you to set the images
per second for Panic recording. You can select from 0.10 to 30.0 (25.0 PAL) images per second.
Highlighting the box beside Panic Recording – Quality and pressing the button allows you to set the
recorded image quality for Panic recording. You can select from: Very High, High, Standard and Low.
You can save your Record settings by highlighting Save and pressing the button. Selecting Cancel exits
the screen without saving the changes.
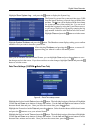
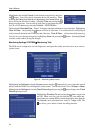
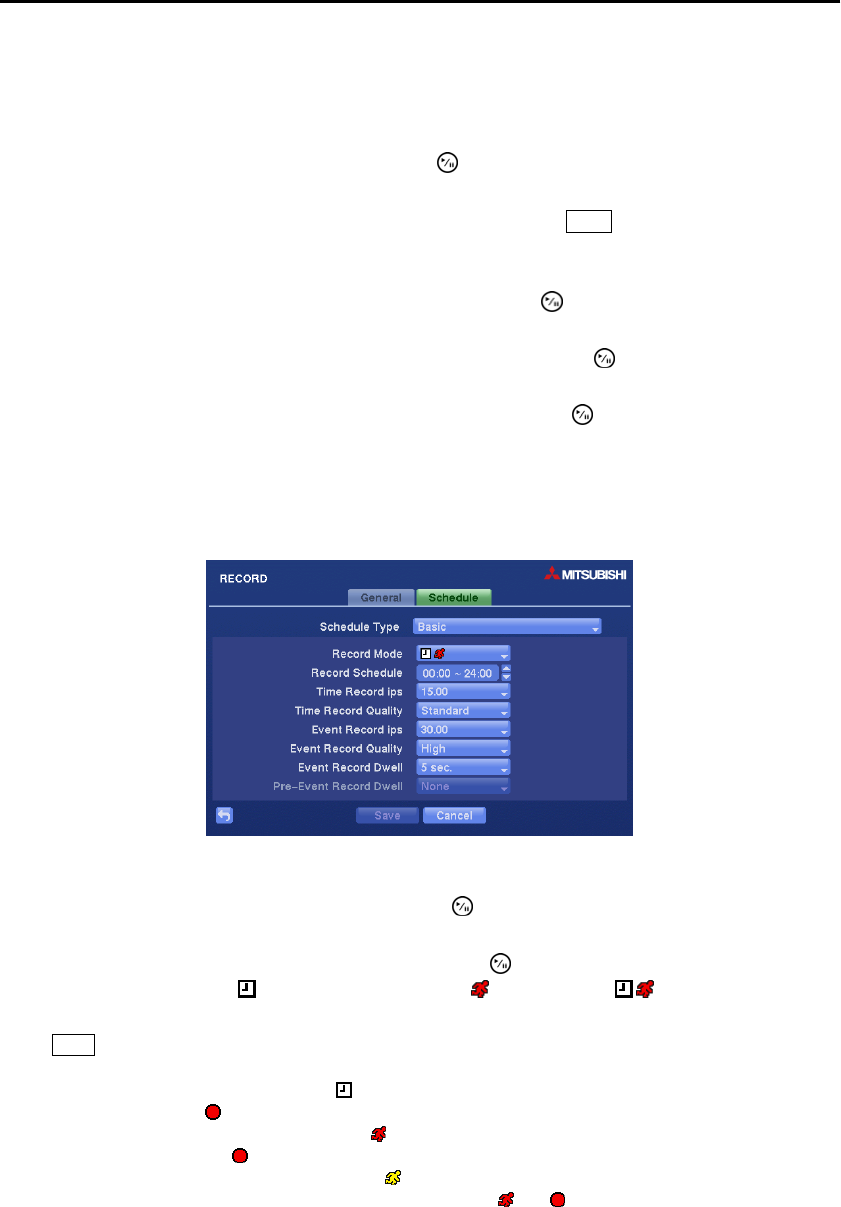
Schedule Settings (RECORD Schedule Tab)
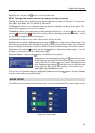
Setting up the Basic Schedule…
Figure 12 ─ Schedule (Basic) setup screen.
Highlight the box beside Schedule Type and press the button. Selecting Basic allows you to set up
the Basic recording schedule.
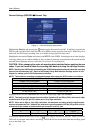
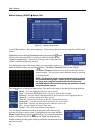
Highlighting the box beside Record Mode and pressing the button allows you to select the desired
recording mode. (– : No record, : Time (Time-lapse) recording, : Event recording,
: Time & Event recording)
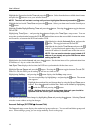
When the DVR is in the No Record mode, it will not record during the preset day and time range as long as
the
Panic button is not pressed. Use the No Record mode when you do NOT want the DVR to record during
certain times.
When the DVR is in the Time mode, the
icon displays at the top-left corner of the screen. The DVR will
record and displays the
icon at the top-left corner of the screen during the scheduled times.
When the DVR is in the Event mode, the red
icon displays at the top-left corner of the screen. The DVR
will record and displays the
icon at the top-left corner of the screen when any event occurs. When the DVR
is in the Pre-Event recoding mode, the yellow
icon displays when there is no event, and the DVR is not
recording. When the DVR is in the Pre-Event mode, the red
and display when any event occurs and
the DVR starts recoding.