


44 Chapter 3. NetCommand Setup and Editing
Edit NetCommand®: Adding an A/V Receiver, continued
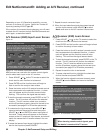
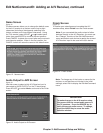
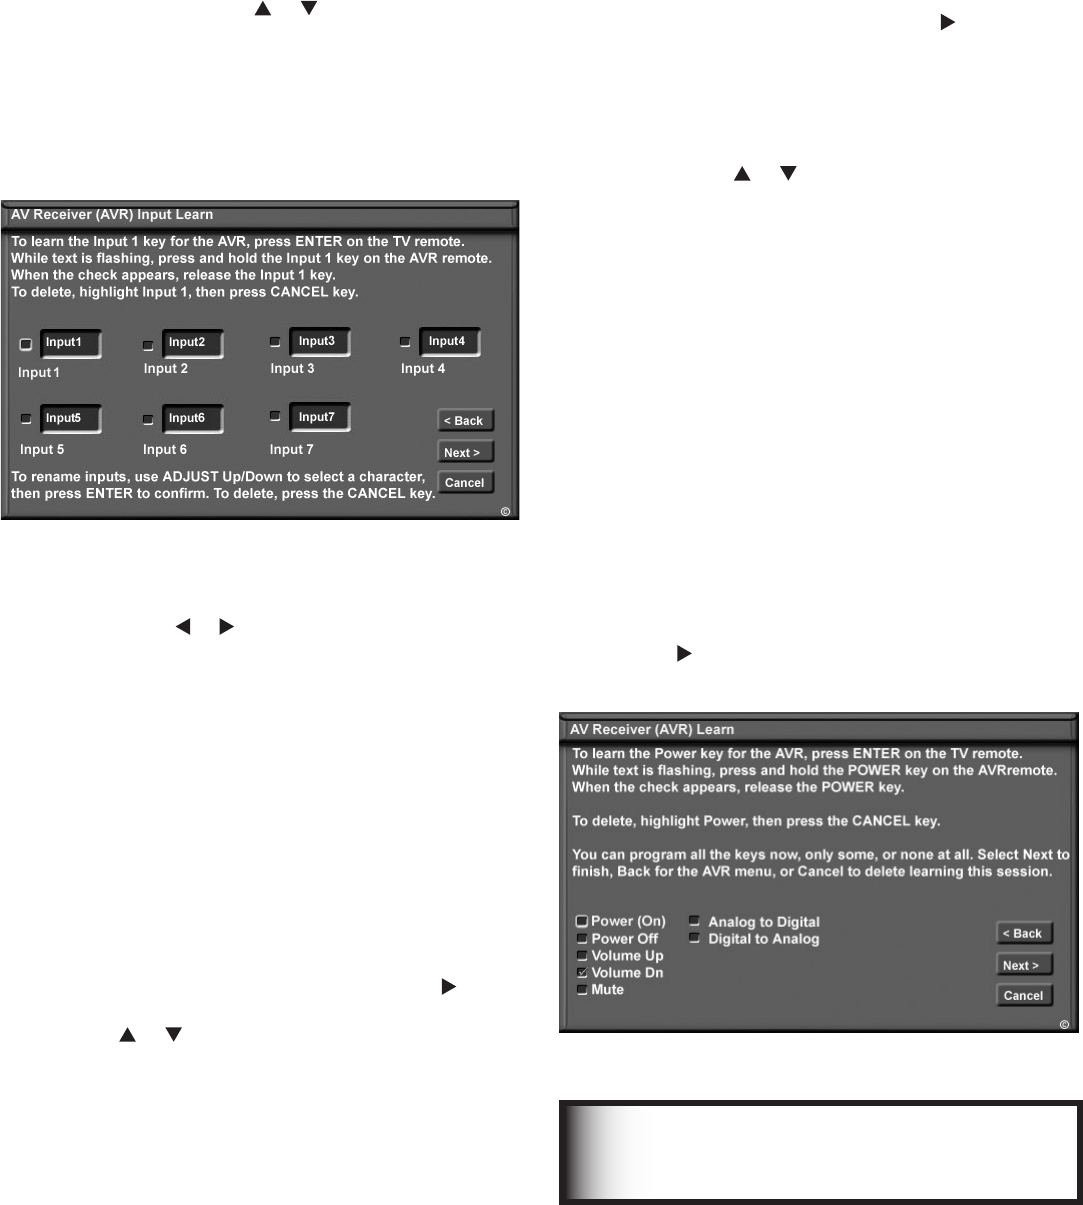
A/V Receiver (AVR) Learn Screen
Figure 11
1. Press ADJUST or on the TV remote to select the
check box for each function to be learned.
2. Press ENTER and the function name will begin to flash
to confirm the ready-to-learn status.
3. Press the button on the A/V receiver’s remote control
that corresponds to the selected function, A check
mark will appear and the function name will stop
flashing. This confirms the signal learned status.
4. To test the learned command, press ENTER on the TV
remote. The A/V receiver will perform the selected
function. The A/V receiver needs to be turned on
and the IR emitters properly placed for the test to be
successful (see page 31 for IR emitter placement).
5. Repeat for each function to be learned.
6. To erase a learned function, highlight the check box
for that function and press CANCEL.
7. When the function signals have been learned, press
ADJUST to select Next> and move to the Name
screen.
Figure 11. A/V receiver Learn screen
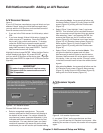
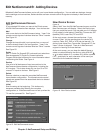
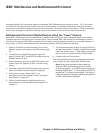
A/V Receiver (AVR) Input Learn Screen
Figure 10
Figure 10. A/V receiver Input Learn screen
NetCommand can now learn the remote control signals
used to select each input on the A/V receiver.
1. Press ADJUST or on the TV remote to select the
check box for each function to be learned.
2. Press ENTER and the function name will begin to
flash to confirm the ready-to-learn status.
3. Press the button on the A/V receiver’s remote control
that corresponds to the selected function. A check
mark will appear and the function name will stop
flashing. This confirms the signal learned status.
4. To test the learned command, press ENTER on the TV
remote. The A/V receiver will perform the selected
function. The A/V receiver needs to be turned on
and the IR emitters properly placed for the test to be
successful (see page 31 for IR emitter placement).
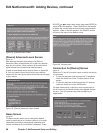
5. To customize the input names, press ADJUST to
move to the Input Name text box and then press
ADJUST or and ENTER to select each letter of
the name. These names will appear on the Review
screen as the A/V receiver’s input names, and should
match the names the A/V receiver shows in its own
display.
6. To erase the learned input signal, highlight the check
box for that input and press CANCEL.
IMPORTANT
When learning remote control signals, point
the device’s remote at the TV screen
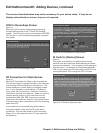
Depending on your A/V Receiver’s capability, you may
connect up to seven A/V inputs. Select the number of
inputs by pressing ADJUST or .
If the number of connected inputs changes, you will need
to delete the A/V receiver through Edit NetCommand and
add it again, as described above.
7. Repeat for each connected input.
8. When the input selection signals have been learned
and the inputs named, press ADJUST to select
Next> and move to the A/V receiver Learn screen.