


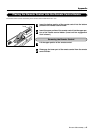
PLASMA MONITOR
ⅥⅥⅥ
† 43
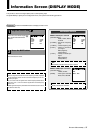
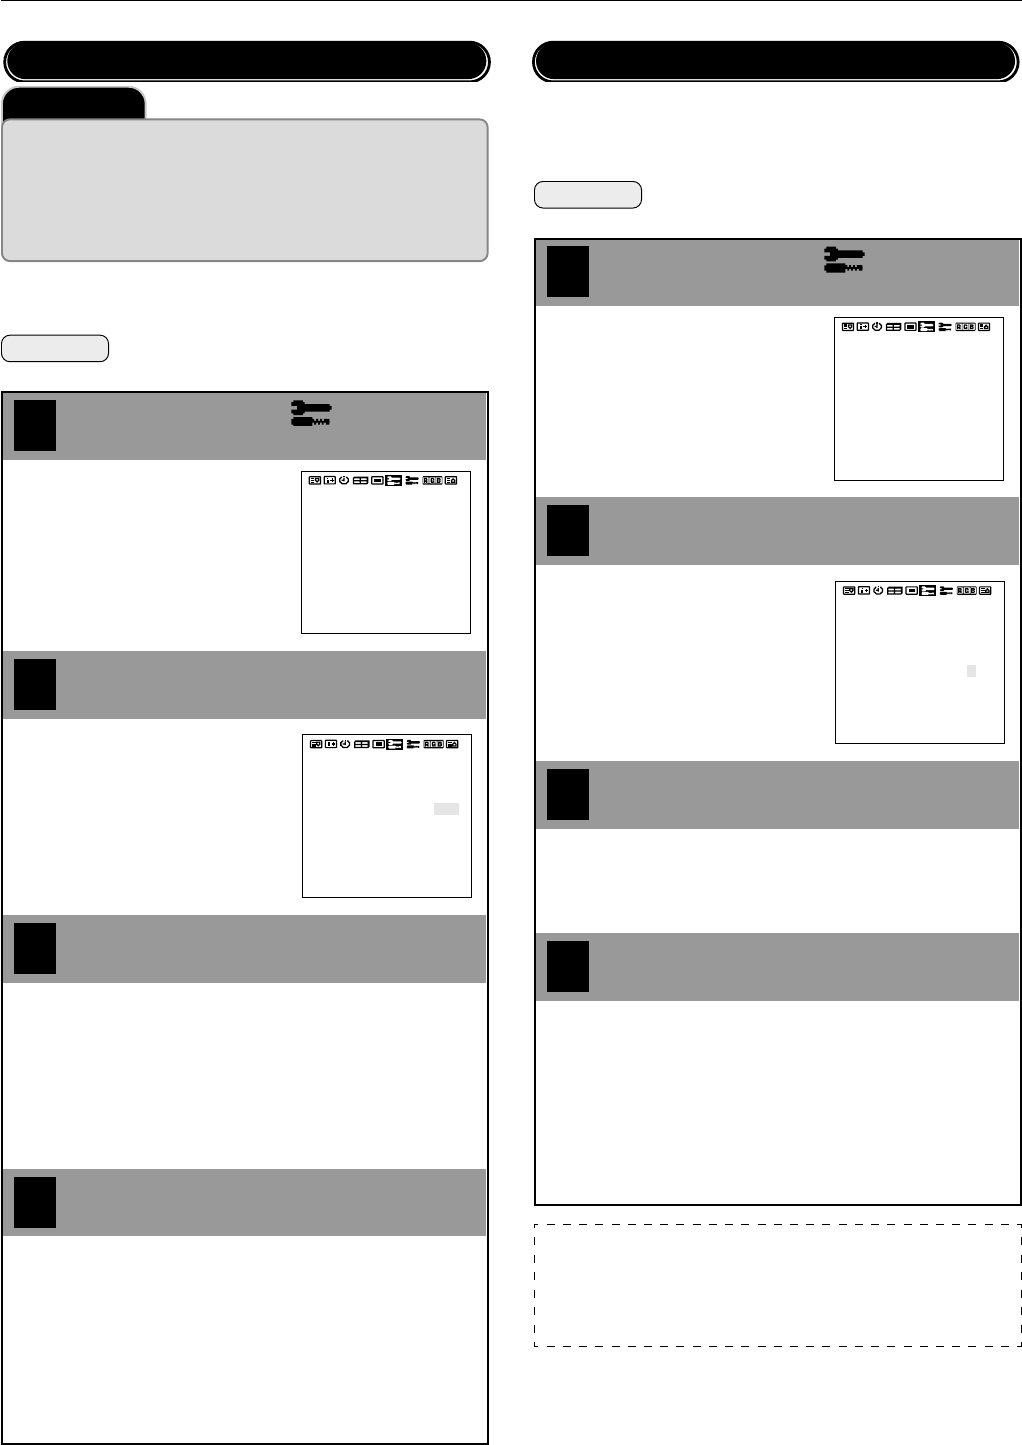
Other Functions (OTHER SETTINGS)
Set [OSD MODE] to [PRO] on the configuration menu, then per-
form the following operations.
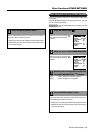
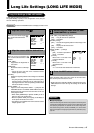
Preparation Press the PROCEED button to display the main
menu.
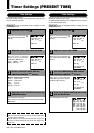
4
1
Align the cursor with
2
3
Move the cursor left and right with
the POSITION/CONTROL
ᮤ ᮣ
buttons.
COLOR SYSTEM
P-ON MODE
POWER MANAGER
SET ID NO
RGB3 ADJUST
CINEMA PULLDOWN
STD/CINEMA
ALL RESET
: AUTO
: OFF
: ALL
: 1
: ON
: STD
: LAST MEM
: AUTO
: OFF
: ALL
: 1
: ON
: STD
COLOR SYSTEM
P-ON MODE
POWER MANAGER
SET ID NO
RGB3 ADJUST
CINEMA PULLDOWN
STD/CINEMA
ALL RESET
: LAST MEM
Align the cursor with SET ID NO
Set the ID number with the
POSITION/CONTROL
ᮤ ᮣ
buttons
Move the cursor up and down with
the POSITION/CONTROL ▲▼
buttons.
Press the EXIT button 2 times
Press the EXIT button one time to return to the main menu.
One further press removes the menu.
* Aligning the cursor with [ALL RESET] and pressing the PRO-
CEED button will return all the settings of the other functions
to the default settings. (The ID number will become [ALL].)
ID Number Setting (SET ID NO)
[ALL] : ID number will not be set.
[001 to 256]: ID number will be set.
Adjust this setting when the RGB 3 image is not stable.
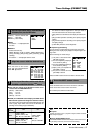
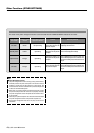
Set [OSD MODE] to [PRO] on the configuration menu, then per-
form the following operations.
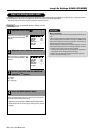
Preparation Press the PROCEED button to display the main
menu.
1
Align the cursor with
2
3
Move the cursor left and right with
the POSITION/CONTROL
ᮤ ᮣ
buttons.
COLOR SYSTEM
P-ON MODE
POWER MANAGER
SET ID NO
RGB3 ADJUST
CINEMA PULLDOWN
STD/CINEMA
ALL RESET
: AUTO
: OFF
: ALL
: 1
: ON
: STD
: LAST MEM
: AUTO
: OFF
: ALL
: 1
: ON
: STD
COLOR SYSTEM
P-ON MODE
POWER MANAGER
SET ID NO
RGB3 ADJUST
CINEMA PULLDOWN
STD/CINEMA
ALL RESET
: LAST MEM
Align the cursor with RGB 3 ADJUST
Use the POSITION/CONTROL
ᮤ ᮣ
buttons to set
the number that provides the best image
Move the cursor up and down with
the POSITION/CONTROL ▲▼
buttons.
RGB 3 Adjustment (RGB 3 ADJUST)
4
Press the EXIT button 2 times
When the screen is not stable at [1] (the initial value), set the
adjustment to [2] or [3].
Press the EXIT button one time to return to the main menu.
One further press removes the menu.
* Aligning the cursor with [ALL RESET] and pressing the PRO-
CEED button will return all the settings of the other functions
to the default settings.
Note:
Making this adjustment will cause the display position to change. To com-
pensate, set [AUTO PICTURE] (of the [Auto Picture/Wide Screen Settings])
to [OFF] and then to [ON], or readjust the display position.
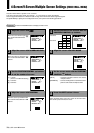
Important
When using more than one of these monitors, this function sets ID numbers
so that operation of the remote control does not cause multiple monitors to
operate at the same time.
(These ID numbers can also be used for control with RS-232C.)
The optional remote control is required to operate the plasma monitors for
each ID number independently. (These ID numbers also need to be assigned.)