


36
Connecting—Continued
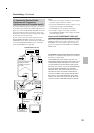
Connecting Several i.LINK Components
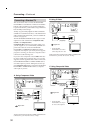
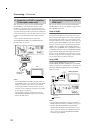
With i.LINK it’s possible to connect up to 17 compo-
nents together, making the digital audio and control sig-
nals of each component available to all the other
components. By using what’s called an i.LINK repeater,
it’s possible to connect up to 63 components together.
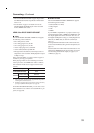
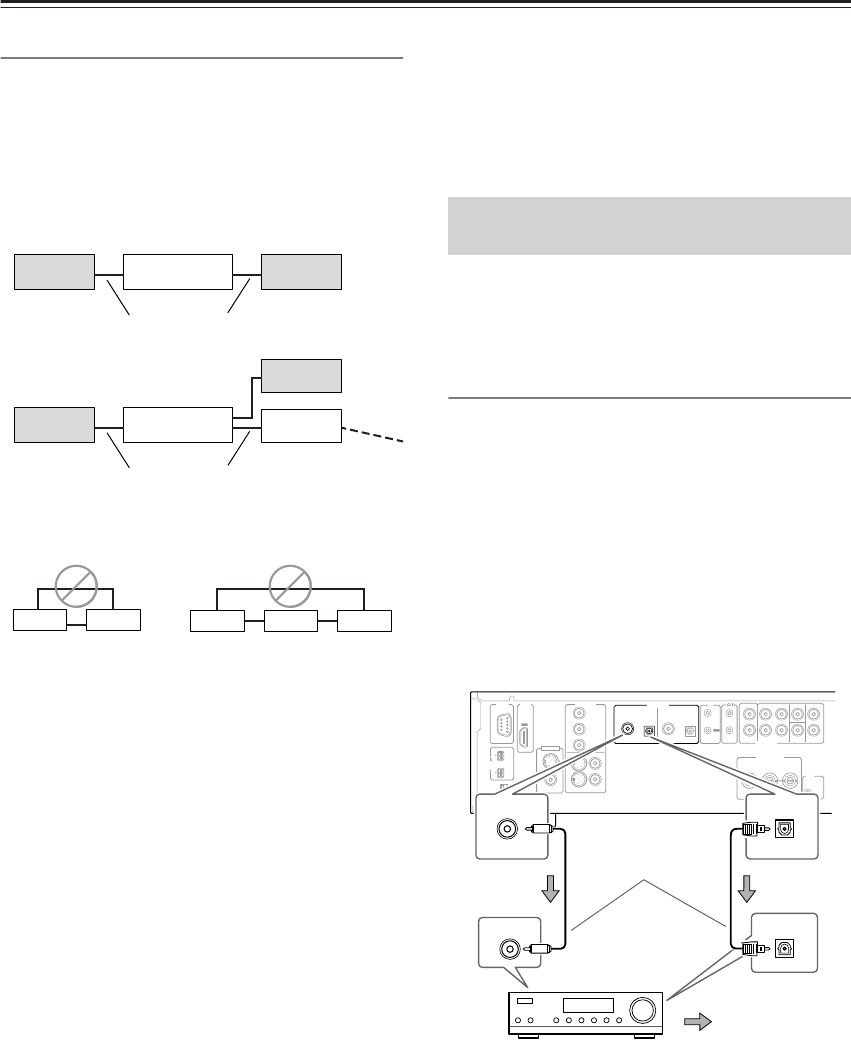
Multiple i.LINK components must be connected in
series (Fig. 1) or in a tree-like system (Fig. 2).
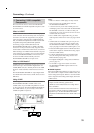
i.LINK will not work if any of the connections form a
loop, as shown below.
Notes:
• The DV-SP1000/DV-SP1000E is fully compatible
with i.LINK Audio and works with other i.LINK
Audio-compatible components, such as AV receivers,
CD players, and so on. It may not work reliably when
connected to DV camcorders or computers with
i.LINK or IEEE 1394 sockets. Refer to the manuals
supplied with your other components for compatibil-
ity information.
• Components must support DTCP (Digital Transmis-
sion Content Protection) in order to play DVD-Video,
DVD-Audio, and SACD over i.LINK. The
DV-SP1000/DV-SP1000E does.
• i.LINK currently supports three transmission speeds:
S100 (100 Mbps), S200 (200 Mbps), and S400
(400 Mbps). The DV-SP1000/DV-SP1000E supports
S400. Components of any speed can be connected
together, although for best performance, slower com-
ponents should be connected at the edges of the sys-
tem (as shown by the shaded components in Fig. 1 and
Fig. 2).
• When several i.LINK components are connected
together, i.LINK may not work properly if certain
components are on standby. i.LINK will work prop-
erly while the DV-SP1000/DV-SP1000E is on
standby. However, the system will not work at all if
any component is fully shutdown (i.e., power switch
set to off). Refer to the manuals supplied with your
other components for more information.
• i.LINK operation may be interrupted if a connected
component is turned on or off, or its i.LINK settings
are turned on or off.
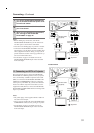
This section shows how to connect the DV-SP1000/
DV-SP1000E’s audio outputs to an AV receiver’s audio
inputs.
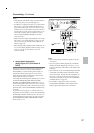
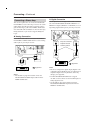
K. Digital Audio Connection
(Dolby Digital & DTS)
To fully enjoy the Dolby Digital and DTS soundtracks
available on most DVD-Video discs, you need to connect
one of the DV-SP1000/DV-SP1000E’s digital audio out-
puts (DIGITAL 1 or DIGITAL 2) to a digital audio input
on an AV receiver that supports Dolby Digital and DTS.
You can also enjoy Dolby Surround, if your receiver sup-
ports Dolby Pro Logic.
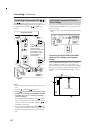
Use an optical or coaxial digital audio cable to connect
one of the DV-SP1000/DV-SP1000E’s DIGITAL 1 or
DIGITAL 2 outputs (OPTICAL or COAXIAL) to a cor-
responding digital audio input on your AV receiver, as
shown.
i.LINK cables
Fig. 1
Fig. 2
i.LINK cables
Connecting to an AV Receiver’s
Audio Inputs
OUT
D. MIX FRONT SURR
1
CENTER SURR
2
L
R
L
R
SUB
WOOFER
IN
REMOTE
CONTROL
VIDEO OUT
COMPONENT
S VIDEO VIDEO
Y
P
B
PR
1
+
21
RS
232
IR
SURR MODE
(
AUDIO OUT
)
IN
12
V
TRIGGER
YPB PR
COAXIAL OPTICAL OPTICALCOAXIAL
DIGITAL
1
DIGITAL
2
VIDEO
S VIDEO
HDMI
VIDEO IN
AUDIO OUT
HD VIDEO OUT
COMPONENT
AUDIO OUT
S400
(
AUDIO
)
OUT
COAXIAL
COAXIAL IN
OPTICAL
OPTICAL IN
DIGITAL
1
DIGITAL
1
Signal flow
AV receiver
Only one connection
required! Choose
coaxial or optical