


45
Recording / Dubbing
Before you
start
Recording /
Dubbing
Playback
Editing
Connections
Other Setups
VCR functions
Others
Español
Initial Setups
Recording & Playback Navigator (Cont’d)
Programming a Recording with
the
Recording & Playback
Navigator
Before programming,be sure to select the desired Rec
Mode.(See page 36 on how to select the Rec Mode.)
1
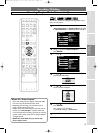
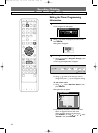
Press PROGRAM RECORDINGS.
Switches to the HDD mode, and the Programmed
Recordings Screen will appear.
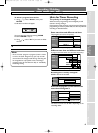
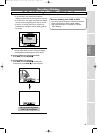
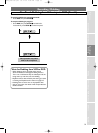
2
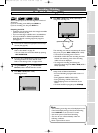
Using / / / ,select the desired cell.
• For example, to record from 4:00 pm two days
from the present day, choose the cell as follows.
There are two ways to program a recording.
1) Direct Program---Press CHANNEL / or
the Number Buttons to select a channel. Press
ENTER.The cell turns pink indicating that the
timer programming is now set in that cell.
Press
PROGRAM RECORDINGS to exit.
2) Detailed Program---Press ENTER
“New Program”
will appear.With “New
Program”
selected, press ENTER again.
Timer Programming Window will appear.
Enter the necessary information by following the
instructions described in ‘Timer Recording’ on pages
40-43.
8
CHEnd TimeStart Time
LPHDDFri 3 9 : :AM00FEB/
0:39HDD LP
10 AM00
Rec To
Mode
Date
3
4
5
PM
ordings Scheduled Recordings
THU FRI SUN MON TUE WED THU FRI
TODAY
SAT
Present day
Tomorrow
Day after tomorrow
Cell
HDDHDDHDD
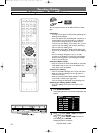
To Change or Cancel the
Program
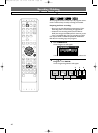
1
Repeat steps 1-2 above.
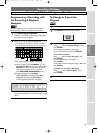
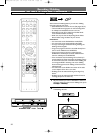
2
Press ENTER to call up the menu window.
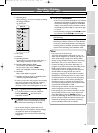
3
To change the program
Using / ,select “Program Change”, then
press
ENTER.
Timer Programming Window will appear.
Correct the information, then press
ENTER.
To cancel the program
Using / ,select “Timer Program”, then
press
ENTER.
Timer Programming List will appear.
Press
CLEAR .
Confirmation window will appear. Select “Ye s”, and
press
ENTER.
To program a new Timer Recording
Using / ,select “New Program”, then
press
ENTER.
4
Press TIMER PROG. to exit.
DisplaDisplay
ProgProgram Changeam Change
Timer ProgTimer Programam
NeNew Progw Programam
HDDHDDHDD
4380_029-065.qx3 05.11.16 2:28 PM Page 45