


23
RQT9131
Recording television programmes [HDD]
Refer to “Important notes for recording” (
➡
28) and
“Advanced recording” (
➡
30) for detail information.
This operation will only record to HDD.
To record to a disc (➡ 25)
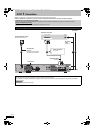
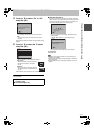
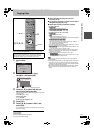
Preparation
≥Turn on the television and select the appropriate video input to suit
the connections to this unit.
≥Turn on this unit.
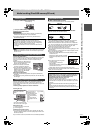
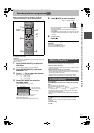
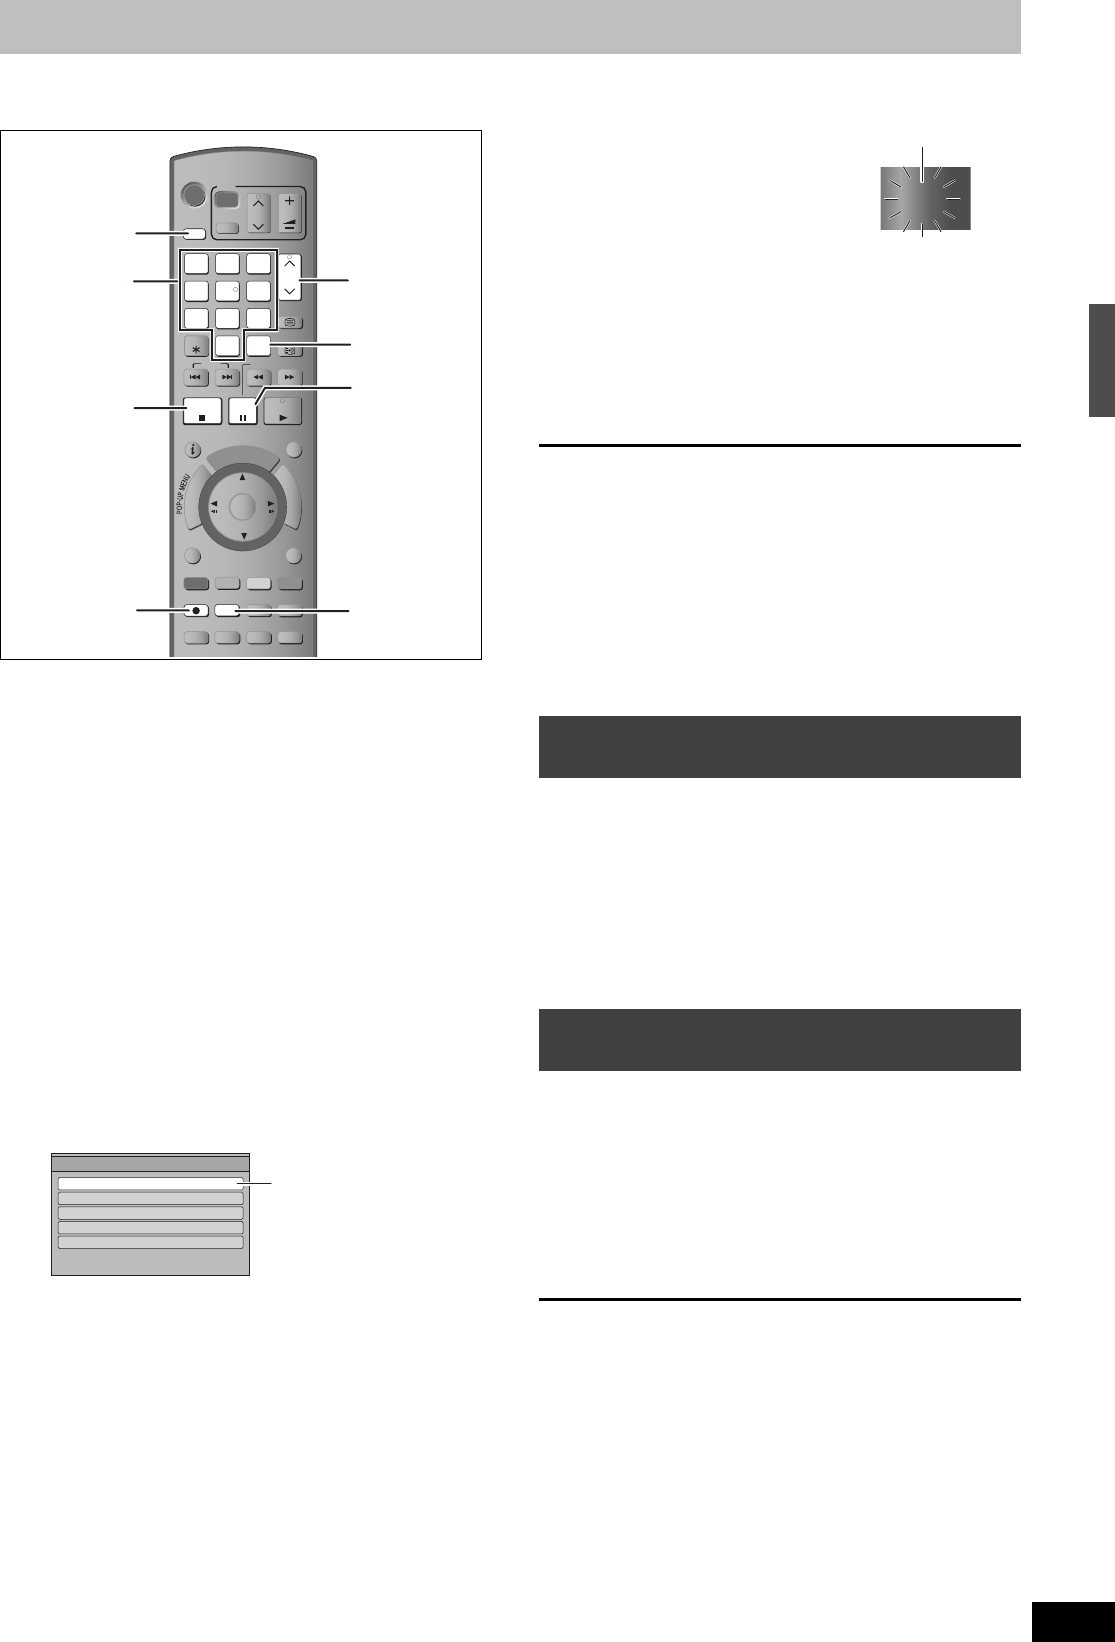
1 Press [DRIVE SELECT] to select the
HDD drive.
The HDD indicator lights up on the unit’s display.
2 Press [INPUT SELECT] a few times
and select “TV”.
3 Press [WXCH] to select the channel.
To select with the numbered buttons:
4 Press [REC MODE] to select the
recording mode.
≥It will switch every time it is pressed.
≥It will switch when the display is turned off.
(It will switch faster by pressing [OK])
≥Recording modes (➡ 30)
≥To record 2 programmes simultaneously (➡ 31)
5 Press [¥ REC] to start recording.
Recording will take place on open space on the HDD. Data
will not be overwritten.
≥Recording mode cannot be changed while recording a
programme.
≥When [¥ REC] is pressed while a drive other than the HDD
is selected, it will automatically switch to HDD and start the
recording.
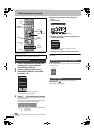
6 To stop recording
Press [∫].
∫ To pause recording
Press [;].
Press again to restart recording.
You can also press [¥ REC] to restart.
(Title is not split into separate titles.)
If a programme to record has subtitle or multiple audio, there are
following differences depending on the recording modes.
≥When recording in DR mode
All subtitles and multiple audio are recorded. It is possible to switch
them after recording.
≥When recording in XP, SP, LP, or EP modes
Subtitles cannot be recorded. Multiple audio will be recorded with
the contents selected when the recording starts, and the switching
cannot be done after the recording.
Select the audio to be recorded with “Audio Mode for Digital
Broadcast” in the Setup menu prior to the recording. (➡ 86)
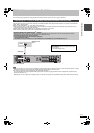
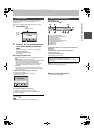
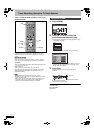
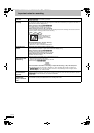
During recording
Press [¥ REC] on the main unit to select the recording
time.
≥You can specify up to 4 hours later.
≥The unit display changes as shown below.
≥This does not work during timer recordings (➡ 24, 34) or while
using Flexible Recording (➡ 32).
≥The unit turns off automatically after the time to stop recording is
reached.
To cancel
Press [¥ REC] on the main unit several times until the counter
appears.
≥The time to stop recording is cancelled; however, recording
continues.
To stop recording
Press [∫].
e.g., 5: [0] ➡ [0] ➡ [5]
15: [0] ➡ [1] ➡ [5]
115: [1] ➡ [1] ➡ [5]
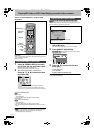
MANUAL SKIP
DISPLAY
STATUS
AUDIO
PROG/CHECKTIME SLIPREC MODE
REC
CREATE
CHAPTER
F
U
N
C
T
I
O
N
M
E
N
U
D
I
R
E
C
T
N
A
V
I
G
A
T
O
R
G
U
I
D
E
RETURN
PLAY/x1.3
PAUSE
STOP
SLOW/SEARCH
SKIP
TEXT
CH
PAG E
SELECT
INPUT
0
9
8
7
6
54
3
2
1
CH
AV
TV
DRIVE
SELECT
BD
VOL
DELETE
STTL
EXIT
OK
OPTION
F Rec
1
5
3
4
2
6
Numbered
buttons
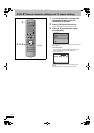
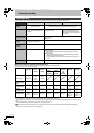
Rcording Mode
Remain in DR mode 45:53
Remain in XP mode 115:02
Remain in SP mode 230:02
Remain in LP mode 460:53
Remain in EP mode 917:51
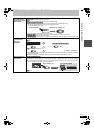
Recording Mode
It can be recorded
with the same quality
of the broadcast.
e.g.,
When recording digital broadcast with
subtitle or multiple audio
To specify a time to stop recording—
One Touch Recording
OFF 0:30 ""# OFF 1:00 ""# OFF 1:30 ""# OFF 2:00
^" Counter (cancel) ,"" OFF 4:00 ,"" OFF 3:00 ,}
REC1
“REC1” or “REC2” will light
Playing BD-Video or DVD-Video/Playing recorded video contents/Recording television programmes
[HDD]
DMRBW500GN-RQT9131-L_eng.book 23 ページ 2008年5月12日 月曜日 午前9時37分