RAM
-R +R
-RW(V)
+R DL
-R DL
+RW
RETURN
SELECT
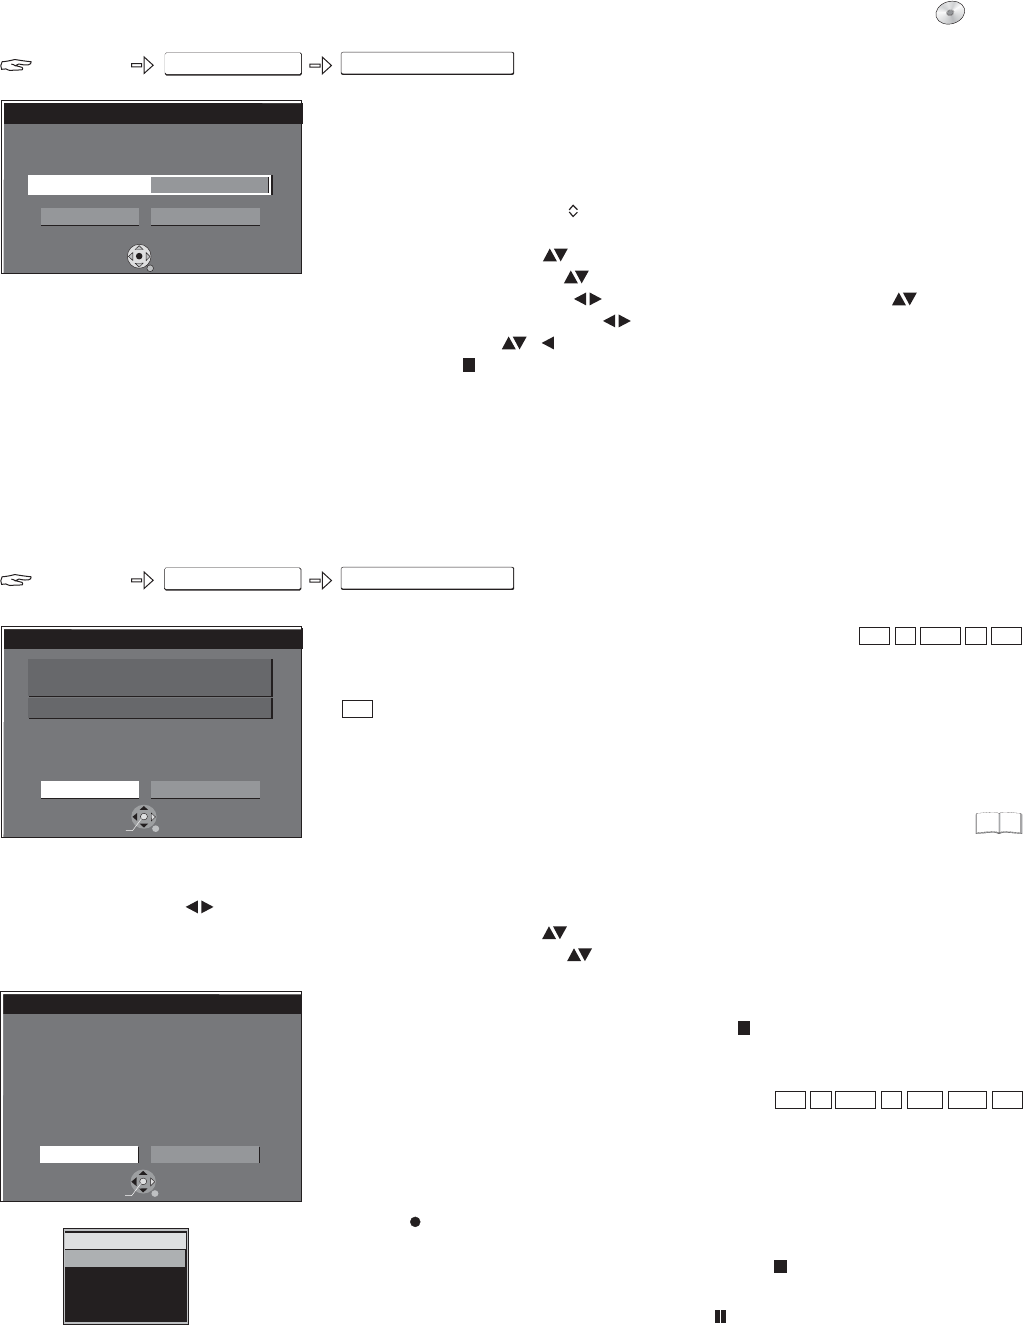
Remain
DVAuto Rec
Start DV automatic recording ?
Model of DV
Panasonic
NV-DX100
3:50 (LP)
Rec
Cancel
ENTER
DVD-RAM
DV
LR
DVAUTO REC
RETURN
SELECT
DVAuto Rec
DV unit is connected.
Record from the DV unit ?
Rec to DVD
Cancel
ENTER
RAM
-R +R
-RW(V)
+RW
FUNCTIONS
DV Auto Rec
To Others
RETURN
SELECT
Set rec. time
Flexible Rec
Record in FR mode.
Maximum rec. time
7 Hour 51 Min.
7 Hour 51 Min.
Start
Cancel
FUNCTIONS
FUNCTIONS
Flexible Rec
DVD
To Others
Flexible recording mode (FR)
The unit calculates the best possible recording quality between XP and EP.
It is adjusted for the space available on the disc.
This function is not available during an EXT LINK recording.
Displaying the available recording time
STATUS
!
Press multiple times.
Recording via DV input
This unit cannot be controlled from a connected DV unit. The DV input of this unit is
only designed for DV units. (A computer etc. cannot be displayed.) The name of the
DV unit may not be displayed correctly. Some DV units do not enable proper input of
the picture and sound signal. The date and time information on the tape in the DV
unit is not recorded. Simultaneous recording and playback is not possible.
Manual recording via DV input
!
!
Start playback on your external DV unit.
Press Pause at the desired start position.
!
!
!
!
!
!
Select the DV channel with .
Select the recording mode with .
Press on the DVD Recorder.
Start playback on the external DV unit.
End the recording on the DVD Recorder with .
End playback on the DV unit.
INPUT SELECT
REC MODE
REC
STOP
Recording cannot be cancelled with .PAUSE
It is not possible to copy from DV IN to VHS cassette. The programmes (e.g. via a
digital video unit) are recorded as one title.
Each time the picture is interrupted, a chapter is created and a playlist is
automatically created.
Switch off this unit and the DV unit (e.g. digital camcorder) before you connect it to
the DV socket.
If the VHS drive is selected, change to the DVD drive with .DRIVE SELECT
!
!
!
!
!
!
!
!
!
Select the station with or the number buttons.
Press .
Select [To Others] with and confirm with .
Select [Flexible Rec] with and confirm with .
Select [Hour] or [Min.] with and change the recording time with .
Go back to [Set rec. time] with .
Select [Start] with , and confirm with . Recording begins.
Press to cancel the recording before it has ended.
The channel and recording mode cannot be changed in mode.
CH
FUNCTIONS
ENTER
ENTER
ENTER
STOP
PAUSE
!
!
!
!
!
!
!
!
In the Setup menu under Audio Mode for DV Input, select [Stereo 1/2]
or [Mix].
Set the DV unit to Pause at the desired start position.
Press to select the recording mode SP, LP, EP, XP.
Press .
Select [To Others] with and confirm with .
Select [DV Auto Rec] with and confirm with .
Confirm [Rec] with . Recording begins.
Confirm the message at the end of the recording with .
REC MODE
FUNCTIONS
ENTER
ENTER
ENTER
ENTER
!
To prematurely stop the recording, press . Confirm the message to
prematurely stop the recording with or .
STOP
ENTER RETURN
RAM
When a timer recording starts, recording in
FR mode is cancelled.
45
With a DVD-RAM, the DV Auto Rec. screen
appears after connecting the unit.
Confirm [Recording] with .
Recording begins.
!
!
Select [Rec to DVD] with and confirm
with .ENTER
ENTER
49


