


VQT2J51
7
Media Handling
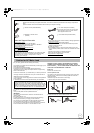
Holding a disc
Handle discs by the edges to avoid inadvertently scratching or
getting oil from your fingers on the disc. Do not touch the signal
surface of discs (the shiny side).
Cleaning discs
Discs are not indestructible and occasionally dirt or
condensation may appear. Clean by gently wiping with a soft,
dry lint-free cloth in a straight line from the centre of the disc to
the edge of the disc.
Return discs to their cases when not in use; this helps to protect
against scratches and dirt.
Storing discs
≥ Do not place or store discs in the following locations:
– Direct sunlight
– Very dusty or humid areas
– Near a heat source
– Places that undergo extreme shifts in temperature
(condensation can occur)
– Where static electricity or electromagnetic waves occur
Discs to avoid
≥ Discs that are not perfectly circular in shape
≥ Warped discs, which may not balance properly in your unit,
causing improper operation or damage to the unit
≥ Cracked discs
≥ Discs with exposed adhesive (from removed stickers or
labels, such as may occur with rental discs or improperly
cared-for discs that were previously labelled or re-labelled)
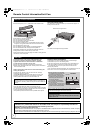
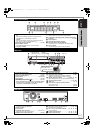
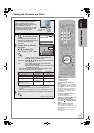
1 Press [< OPEN/CLOSE] to open the tray.
– Insert a disc.
2 Press [< OPEN/CLOSE] to close tray.
Automatic drive select function
[DVD-V] [VCD] [CD]
≥ If the unit is stopped, it automatically switches to the DVD
drive when a disc is inserted.
Inserting the USB memory
≥ Before inserting any USB memory to this unit, ensure that the
data stored therein has been backed up.
≥ Check the orientation of the USB connector and insert it
straight in.
≥ Insert an USB device while the unit is stopped, so the “USB
device” screen is displayed. Select an item, then press [OK]
to switch to the USB-related operations (> 42, 60).
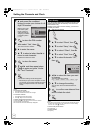
Removing the USB memory
≥ Complete all USB-related operations and pull the USB
memory straight out.
≥ If a USB memory being accessed is pulled out, then the data
may be damaged.
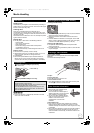
Insert a video cassette.
(The surface on which you can see a roll of tape should
face up.)
The unit is automatically turned on.
To eject:
From the main unit
≥ Press [< EJECT] on the main unit.
From the remote control
≥ Press [DRIVE SELECT] to select VHS drive and then press
and hold [∫] for about 3 or more seconds.
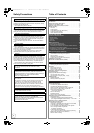
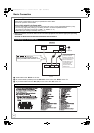
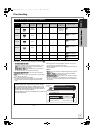
Video cassettes
≥ Break off the video cassette’s tab to
prevent accidental erasure.
Cover the hole with a double layer of
adhesive tape when you want to use the
video cassette for recording again.
≥ You can use video cassettes with the
VHS and S-VHS marks, but the unit is
unable to make full use of the
characteristics of S-VHS video
cassettes.
Video cassette care
≥ Poor quality or damaged video cassettes can cause the
heads to become dirty and malfunction. Store your video
cassettes carefully and discard them when they become dirty
or damaged.
≥ Never use video cassettes on which juice has been spilled or
those that are extremely damaged since this will not only
cause the heads to become dirty, but will also make the unit
malfunction.
Disc Care
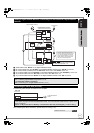
Inserting Discs
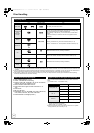
Notes
≥ Ensure the disc is flat in the tray.
≥ When using DVD-RAM or DVD-R, remove the disc from the
cartridge. Cartridge discs cannot be used.
≥ It is not possible to record or play continuously from one
side of a double sided disc to the other. You will need to
eject the disc and turn it over.
Insert label-up.
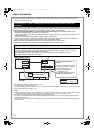
Inserting/Removing the USB memory
Inserting a video cassette
Video Cassette Information
Tab
DMR-EZ49VEB_VQT2J51.book 7 ページ 2009年12月21日 月曜日 午後5時40分