


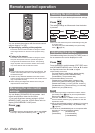


Remote control operation
32 -
ENGLISH
Basic Operation
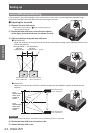
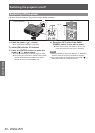
You can operate the projector with the remote control
within a range of 7 m (23').
z
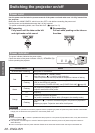
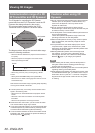
Operating by pointing at the projector
Ensure the remote control transmitter is facing the remote
control signal receiver on the front of the projector during
use.
z
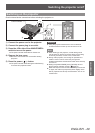
Facing to the screen
Ensure the remote control transmitter is facing the screen
and press the required buttons to operate the projector.
The signal will be reected off the screen. The operating
range may differ due to the screen material. This function
may not be effective with a translucent screen.
Note
z
Do not let strong light shine onto the signal receiver. The
remote control may malfunction under strong light such
as uorescent light.
z
If there are any obstacles between the remote control
and the remote control signal receiver, the remote control
may not operate correctly.
z
When viewing 3D images the remote control may not
respond well in some cases.
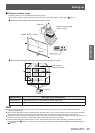
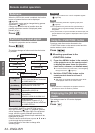
Managing the lens control
settings
You can display [ZOOM/FOCUS] test pattern 1 and
adjust the projection video size and focus.
If you have saved lens memory settings in [LENS
MEMORY SAVE], press the <LENS> button twice to
display [LENS MEMORY LOAD] menu.
Press
Note
z
For details regarding the adjustment method, see [ZOOM/
FOCUS] in the [LENS CONTROL] menu. (
page 73)
Selecting the picture mode
You can switch to your desired picture mode settings.
Press
The settings change as follows each time the button
is pressed.
[NORMAL] [DYNAMIC] [REC709]
[GAME] [CINEMA2] [CINEMA1] [D-CINEMA]
Note
z
You can also switch the picture mode settings using the
on-screen menu.
For details see [PICTURE MODE] in the [PICTURE]
menu. (
page 40)
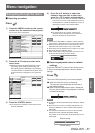
Adjusting the picture
Switchable setting items from the [PICTURE] menu of
the on-screen menu can be displayed in a list.
Press
Press the button to switch between [PICTURE] menu
and [ADVANCED MENU] menu. Press ▲ ▼ to select
the required menu item and ◄ ► to adjust.
z
[PICTURE] menu items
[PICTURE MODE], [CONTRAST], [BRIGHTNESS],
[COLOR], [TINT], [COLOR TEMPERATURE],
[SHARPNESS ] and [DYNAMIC IRIS]
z
[ADVANCED MENU] menu items
[GAMMA HIGH], [GAMMA MID], [GAMMA LOW],
[CONTRAST], [BRIGHTNESS], [NR], [MPEG NR],
[FRAME CREATION], [x.v.Color], [DETAIL CLARITY],
[CINEMA REALITY], [SUPER WHITE], [TV-SYSTEM],
[RGB/YC
B
C
R
] and [RGB/YP
B
P
R
]
Note
z
For details regarding the adjustment method, see the
[PICTURE] menu (
page 40) and the [ADVANCED
MENU] menu (
page 45).
z
Press the <RETURN> or <MENU> button or wait for 7
seconds without performing any operation to clear the
adjustment screen.
z
Set the [ADJUSTMENT MODE] to [SIMPLE] for adjusting
[GAMMA HIGH], [GAMMA MID], and [GAMMA LOW]
(
page 50).
z
The items for [SHARPNESS] that can be adjusted differ
depending on the [ADJUSTMENT MODE].
[SIMPLE]: [SHARPNESS]
[ADVANCED]: [H-SHARPNESS]
[V-SHARPNESS]
Remote control operation