


[OPTION] menu
ENGLISH
- 83
Settings
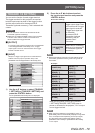
[OTHER FUNCTIONS]
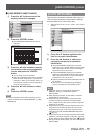
Press the <ENTER> button.
z
The [OTHER FUNCTIONS] menu is displayed.
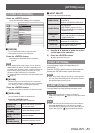
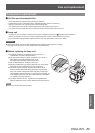
OTHER FUNCTIONS
FREEZE
BLANK
VIERA LINK
INPUT SELECT
HDMI1 IN
HDMI2 IN
HDMI3 IN
COMPUTER IN
COMPONENT IN
S-VIDEO IN
VIDEO IN
PICTURE
POSITION
LANGUAGE
3D SETTINGS
LENS CONTROL
OPTION
■
[FREEZE]
You can temporarily freeze the projected video
independently of external device playback.
Press the <ENTER> button.
z
Pressing the <RETURN> button cancels the
function.
Note
z
While displaying the frozen image, you can enter the
[AREA SELECT] mode of the [SPLIT ADJUST] menu
by pressing the <ENTER> button. However, when a 3D
signal is being input (including converting 2D to 3D),
transition to [SPLIT ADJUST] is not possible.
For details see [SPLIT ADJUST] in the [PICTURE] menu.
(
page 44)
■
[BLANK]
When the projector is not being used for a brief period,
such as during a break in a meeting or during preparation
for a meeting, the video can be stopped temporarily.
Press the <ENTER> button.
z
Press any button to escape from the blank mode.
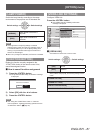
■
[VIERA LINK]
You can operate an HDMI-connected device.
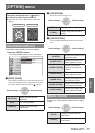
Press the <ENTER> button.
z
The [VIERA LINK] menu is displayed.
[VIERA LINK
CONTROL]
Selects the device to operate
and switches input
[HOME THEATER
VOLUME]
Adjusts the theater volume
[HOME THEATER
MUTE]
Mutes the theater
[OPERATE
OTHER DEVICE]
Operates third-party device
z
For details, see “Using VIERA Link”. (
page 96)
■
INPUT SELECT
The input can be switched directly.
[HDMI 1/2/3 IN]
HDMI signal from the device
connected to
HDMI IN 1/HDMI IN 2/HDMI IN 3.
[COMPUTER IN]
RGB signal and
COMPONENT signals (YC
B
C
R
/
YP
B
P
R
) from the device connected
to COMPUTER IN.
[COMPONENT
IN]
COMPONENT signals (YC
B
C
R
/
YP
B
P
R
) from the device connected
to COMPONENT IN.
[S-VIDEO IN]
S-VIDEO signal from the device
connected to S-VIDEO IN.
[VIDEO IN]
VIDEO signal from the device
connected to VIDEO IN.
1) Use the ▲ ▼ buttons to place the cursor
on the input to be switched.
2) Press the <ENTER> button.
z
Switch to the selected input.
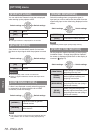
[TEST PATTERN]
You can display 5 types of image patterns for
conrmation.
Press the <ENTER> button to switch to the other patterns.
Pressing the <RETURN> button cancels the
function.
Note
z
When 3D is being displayed (including converting 2D to
3D), the [TEST PATTERN] cannot be executed. Perform
the operation after switching to 2D.
[LAMP RUNTIME]
You can check how long the lamp has been used.
Attention
z
When replacing the lamp, follow the “Lamp unit
replacement procedure” (
page 91) and set the runtime
to [0].
Note
z
When the lamp unit has reached the end of its lifespan
the [LAMP RUNTIME] menu will provide the usage
time notication by ashing red and gray. See “When to
replace the lamp unit” (
page 90) about the lifespan.