


Remote control operation
34 -
ENGLISH
Basic Operation
Submenu
When the VIERA Link control is enabled, the function
menus of external devices can be displayed.
(
page 96)
The operation mode can be changed during gamma
adjustment. (
page 47)
Change the detection level of parallax when the
parallax adjustment monitor is displayed (when
[Mode3] is set).
Press
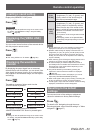
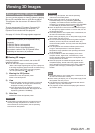
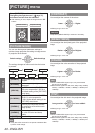
Switching the input signal
The input for projection can be switched.
Press
The settings change as follows each time the button
is pressed.
[COMPONENT IN]
[COMPUTER IN]
[S-VIDEO IN]
[HDMI 3 IN]
[VIDEO IN]
[HDMI 2 IN]
[HDMI 1 IN]
[COMPONENT
IN]
COMPONENT signals (YC
B
C
R
/
YP
B
P
R
) from the device connected
to COMPONENT IN.
[S-VIDEO IN]
S-VIDEO signal from the device
connected to S-VIDEO IN.
[VIDEO IN]
VIDEO signal from the device
connected to VIDEO IN.
[HDMI 1/2/3 IN]
HDMI signal from the device
connected to
HDMI IN 1/HDMI IN 2/HDMI IN 3.
[COMPUTER IN]
RGB signal and
COMPONENT signals (YC
B
C
R
/
YP
B
P
R
) from the device connected
to COMPUTER IN.
When [INPUT GUIDE] on the [OPTION] menu is
set to [DETAILED] (
page 77), graphical guidance
will be displayed on the upper right of the projected
image, and the currently selected input terminal
can be checked. (The selected input method will be
highlighted in yellow.)
Press the button several times or press ▲ ▼ ◄ ► to
cycle through the input methods.
It may take time for the video to change after
switching input.
Attention
z
Input a signal noted in the “List of compatible signals”.
(
page 100)
Note
z
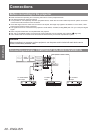
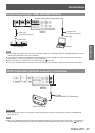
See “Connecting terminals” regarding input ports.
(
page 20)
z
If no operations are performed for approximately 3
seconds, the input guidance display automatically
disappears.
z
If a port that has no input is selected, the whole input port
graphic ashes. This graphic is displayed until an input is
present.
Using the <FUNCTION> button
Functions used often can be allocated to the
<FUNCTION> button on the remote control and this
can be used as a short cut button.
Press
■
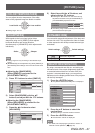
Allocating operations to the
<FUNCTION> button
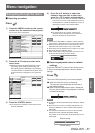
1) Press the <MENU> button in the controls
of the projector or on the remote control
to display the menu items for allocation
(main menu, submenu, or detailed menu).
z
For how to use the on-screen menu, see “Navigating
through the menu”. (
page 37)
2) Hold the <FUNCTION> button on the
remote control down for at least 3
seconds.
z
After setup is complete the allocated menu items
are displayed under the on-screen menu.
Note
z
While the menu is displayed, the projector does not
operate even when the button is pressed.
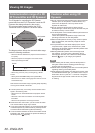
Displaying the [3D SETTINGS]
menu
The settings screen for 3D can be displayed.
(
page 64)
Press