


The Video/Audio Adjust menu
13
105
En
English
•
White Level
– Adjusts the intensity of white.
1
•
Black Level
– Adjusts the intensity of black.
•
Black Setup
– Corrects the standard reference black
level (NTSC video only).
• Gamma Correction
– Adjusts the brightness of
darker images.
•
Hue
– Adjusts overall balance between red and
green.
•
Chroma Level
– Adjusts how rich the colours
appear.
4 Use the
/
(cursor left/right) buttons to adjust
the currently selected picture quality setting.
5 When you have all the settings as you want
them, press HOME MENU to exit.
You can now use the preset for any other input or the
built-in TV tuner.
Tip
• To see more of the picture as you adjust different
settings, press
ENTER
after selecting the setting you
want to adjust.
Setting the picture quality for disc
playback
This setting determines how the picture will look when
playing discs.
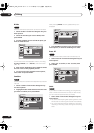
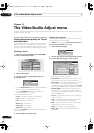
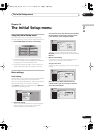
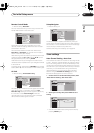
Choosing a preset
1 With a disc playing (or paused), press HOME
MENU and select ‘Video/Audio Adjust’.
2 Select ‘Video Adjust’
3 Use the
/
(cursor left/right) buttons to
change the setting.
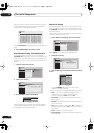
There are six presets available:
•
TV(CRT)
– suitable for standard cathode-ray tube TVs
•
PDP
– suitable for plasma display screens
•
Professional
– suitable for professional monitors
•
Memory1
– user preset 1
•
Memory2
– user preset 2
•
Memory3
– user preset 3
You can press
DISPLAY
to see the individual settings for
the current preset (
TV(CRT)
,
PDP
or
Professional
).
4 Press ENTER to select the preset.
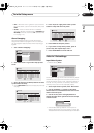
Creating your own set
There are three user presets in which you can save your
own set of picture quality settings for disc playback.
1 Follow
Choosing a preset
above and select one of
the user presets (Memory 1, 2 or 3).
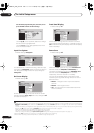
2 Move the cursor down and select ‘Detailed
Settings’.
3 Select the picture quality setting you want to
adjust.
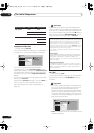
You can adjust the following settings:
• Prog. Motion
– Adjusts the motion and still picture
quality when video output is set to progressive.
• PureCinema
– This setting optimizes the picture for
film material when the video output is set to
progressive scan. Usually this is best left set to
Auto 1
; try switching to
Auto 2
or
Off
if the picture
appears unnatural.
• Subtitle Adjust
– When the video output is set to
progressive scan, it’s possible that the subtitles in
some movies will disappear unnaturally. In this case
select the
On
setting.
•
YNR
– Adjusts the amount of noise reduction (NR)
applied to the Y (brightness) component.
•
CNR
– Adjusts the amount of noise reduction (NR)
applied to the C (colour) component.
• MNR
– Adjusts the amount of noise reduction (NR)
applied to the mosquito noise (artefacts visible
around the edge of an image, caused by MPEG
compression).
Note
1 When
White AGC
is
On
, the
White Level
setting can’t be adjusted.
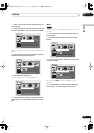
TV(CRT)
Detailed Settings
Memory1
Detailed Settings
Memory1
Subtitle Adjust
Prog. Motion
PureCinema
Fast
Slow
Off Max
Off Max
YNR
CNR
Off Max
Off Max
MNR
BNR
Auto 1
On
DVR-04_HDD_UK.book 105 ページ 2004年9月10日 金曜日 午後7時3分