


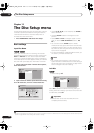
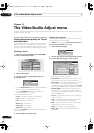
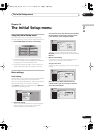
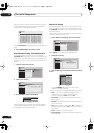

The Video/Audio Adjust menu
13
106
En
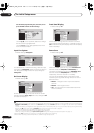
• BNR
– Adjusts the amount of noise reduction (NR)
applied to the block noise (artefacts visible in areas of
flat color, caused by MPEG compression).
• Sharpness High
– Adjusts the sharpness of the high-
frequency (detailed) elements in the picture.
• Sharpness Mid
– Adjusts the sharpness of the mid-
frequency (less detailed) elements in the picture.
•
Detail
– Adjusts how sharp edges appear.
•
White Level
– Adjusts the intensity of white.
•
Black Level
– Adjusts the intensity of black.
•
Black Setup
– Corrects the standard reference black
level (NTSC video only).
• Gamma Correction
– Adjusts the brightness of
darker images.
•
Hue
– Adjusts overall balance between red and
green.
•
Chroma Level
– Adjusts how rich the colours
appear.
•
Chroma Delay
– Adjust to correct the gap between
the Y and C components in the video signal.
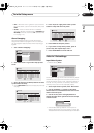
4 Use the
/
(cursor left/right) buttons to adjust
the currently selected picture quality setting.
5 When you have all the settings as you want
them, press HOME MENU to exit.
Tip
• To see more of the picture as you adjust different
settings, press
ENTER
after selecting the setting you
want to adjust.
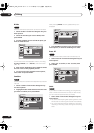
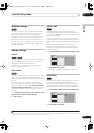
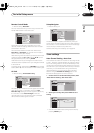
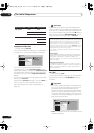
Audio DRC
• Default setting:
Off
When watching Dolby Digital material at low volume, it’s
easy to lose low level sounds completely—including
some of the dialog. Switching on Audio DRC (Dynamic
Range Control) can help by bringing up the low level
sounds, while controlling high level peaks.
1 During playback or when paused, press HOME
MENU and select ‘Video/Audio Adjust’.
2 Select ‘Audio Adjust’.
3 Use the
/
(cursor left/right) buttons to adjust
DRC from ‘Off‘ to ‘Max’.
Exactly how much difference you can hear between the
settings will depend on the material.
Remember
• Audio DRC is not effective when listening to a disc via
the digital output when
Dolby Digital Out
is set to
Dolby Digital
. In this case adjust the dynamic range
from your AV amplifier/receiver.
Off Max
Audio DRC
Audio Adjust
DVR-04_HDD_UK.book 106 ページ 2004年9月10日 金曜日 午後7時3分