


Getting started
04
32
En
Making your first recording
This quick guide shows you how to make a basic
recording of a TV program on either the HDD, or to a
recordable DVD.
Recording is covered in much more detail in chapter 7
(
Recording
).
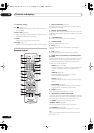
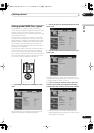
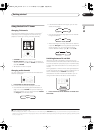
1 If they aren’t already on, switch on your TV and
this recorder.
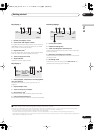
Press
STANDBY/ON
to switch on.
• Make sure that the video input on your TV is set to this
recorder.
2 Press HDD to record to the HDD, or DVD to record
to a recordable DVD.
If you choose to record to the HDD, skip to step
5
now.
3 Press
OPEN/CLOSE to open the disc tray.
4 Load a blank DVD-R or DVD-RW disc with the
label side face-up, using the disc guide to align the
disc.
• When you load a new, blank DVD-RW disc, the
recorder will take a moment to initialize it for
recording.
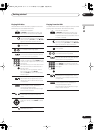
5 Use the CHANNEL +/– buttons to select the TV
channel you want to record from.
• You can also use the
+/–
buttons on the front panel if
the recorder is stopped.
• Channel presets are numbered 1–99.
• If the recorder is connected to your TV using a SCART
cable and your TV supports Direct Recording, it’s
possible to quickly start recording whatever channel
your TV is tuned to. See
Direct recording from TV
on
page 63 for detailed instructions.
6 Press
ì
REC to start recording.
• By default, the recording will be in
SP
(standard play)
mode, which will give you around two hours of
recording from a blank DVD disc.
• You can pause recording by pressing
PAUSE
.
Press
ì
REC
or
PAUSE
again to restart recording.
7 When you want to stop recording, press
STOP REC.
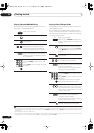
Playing back your recording
The TV program you just recorded should be on the HDD
or DVD disc as a single title with one or more chapters.
• Press
PLAY to start playback.
If you want to stop playback before the end of the
recording, press
STOP
.
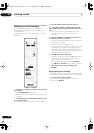
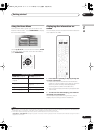
DVD RECORDER
STANDBY/ON
OPEN/CLOSE
HDD DVD
CHANNEL
PAUSE
REC STOP REC
STOP
PLAY
DVR-04_HDD_UK.book 32 ページ 2004年9月10日 金曜日 午後7時3分