


Recording
07
65
En
English
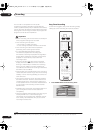
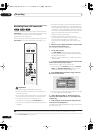
2 Set the TV channel and recording quality.
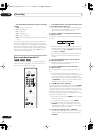
• Use the
CHANNEL +/–
buttons to set the channel you
want to record.
• Use the
REC MODE
button to set the recording
quality. Press repeatedly to switch between
FINE
,
SP
,
LP
,
EP
,
SLP
and
AUTO
(and
MN
if manual recording
mode is on).
•
DVD recording:
The
AUTO
option automatically sets
the best recording quality for the space available on
the disc loaded at the time of recording.
•
HDD recording:
The
AUTO
option automatically sets
the best recording quality that would fit on to a blank
DVD disc.
• Press
DVD
to record to DVD disc, or
HDD
if you want
to record to the hard disk drive.
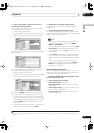
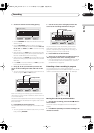
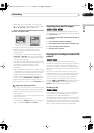
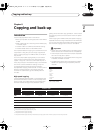
3 Use
///
(cursor buttons) to move the
cursor to the recording start date and time on the
grid.
• You can move the cursor forward or back an hour at
a time using the
and
buttons.
Each row of the grid is one day (you can set the timer
recording for up to a month in advance). Each column is
a 15 minute interval.
The darker area represents time that has already passed
and can’t therefore be selected. The lighter area is time
that’s available.
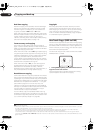
4 Press ENTER to set the start time.
The start date and time is displayed in the middle of the
screen.
• You can go back and reset the start time if you need
to by pressing
RETURN
.
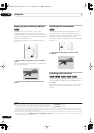
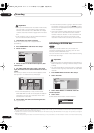
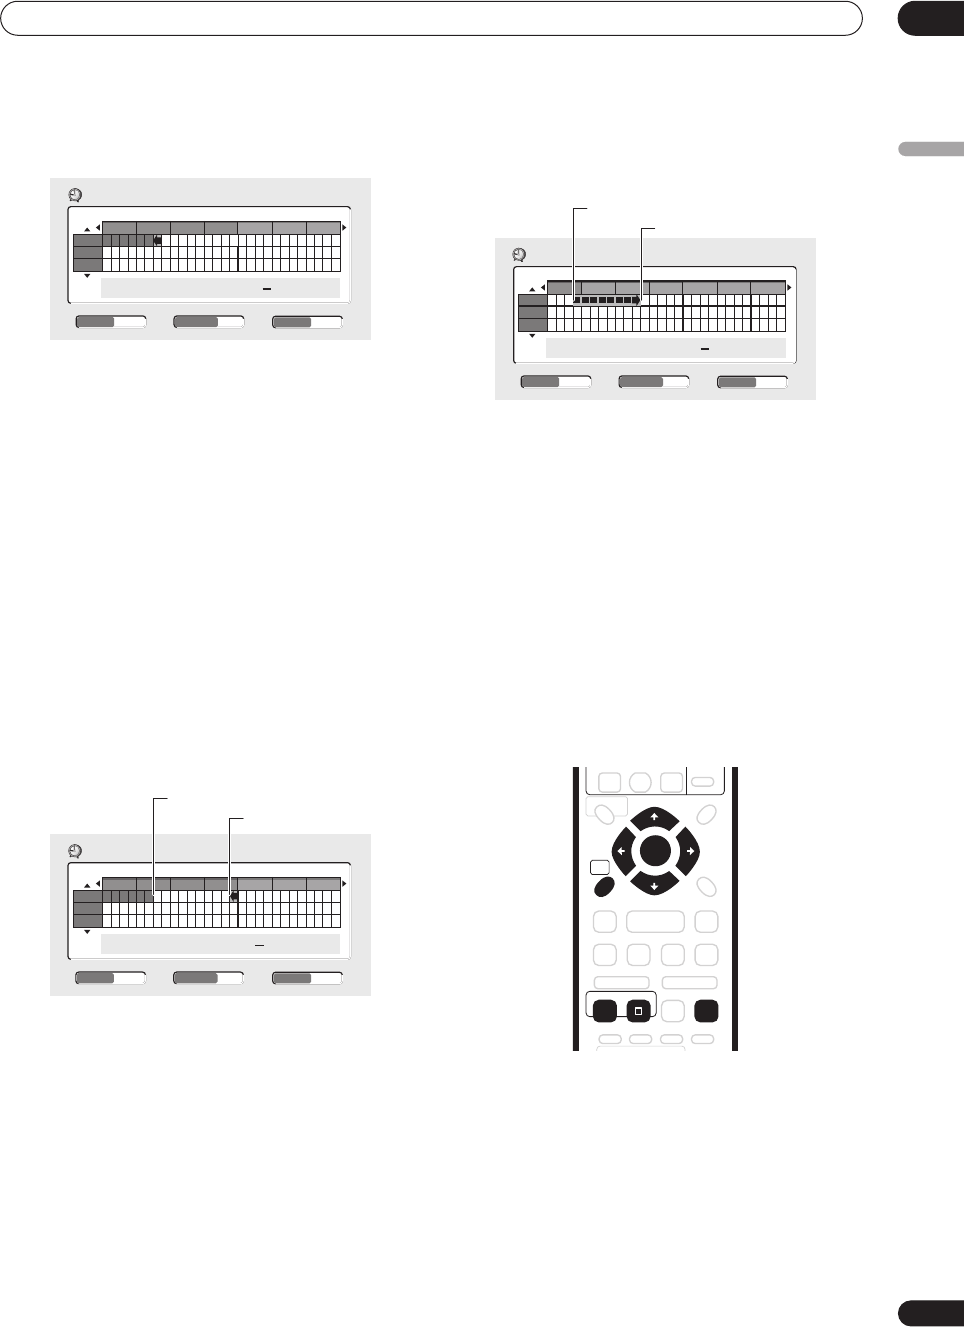
5 Use the
/
(cursor left/right) to move the
cursor to the recording end time on the grid.
As you move the cursor around the grid, an arrow
stretches from the start time to the current cursor
position, representing the length of the recording. A
recording of up to six hours can be set.
6 Press ENTER to set the end time.
7 Select ‘Yes’ to set the timer recording and exit, or
‘No’ to go back to the timer recording screen.
• You can check the timer recording details you just set
from the Schedule Area in GUIDE Plus+; see
The
Schedule Area
on page 45).
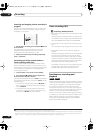
Extending a timer recording in progress
You can extend a timer recording beyond the
programmed end time in two different ways. This can be
useful if a broadcast program overruns, for example.
Moving the end time by 30-minute blocks
1 During timer recording, press and hold
ì
REC for
three seconds.
The timer indicator disappears from the front panel
display.
2 Press
ì
REC repeatedly to extend recording in 30
minute increments.
8:00 9:00 10:00 11:00 12:00 13:00 14:00
13/12
14/12
15/12
Easy Timer Recording
FINEPr 7
13/12
MON
--:--
9:30
HDD
CHANNEL
+
/
–
REC MODE HDD/DVD
Easy Timer Recording
8:00 9:00 10:00 11:00 12:00 13:00 14:00
13/12
14/12
15/12
11:45
FINEPr 7
13/12
MON
HDD
- -:- -
Current time
Recording start time
CHANNEL
+
/
–
REC MODE HDD/DVD
13/12
14/12
15/12
Easy Timer Recording
FINEPr 7
HDD
11:45 13:45
13/12
MON
Recording start time
Recording end time
11:00 12:00 13:00 14:00 15:00 16:00 17:00
CHANNEL
+
/
–
REC MODE HDD/DVD
HOME
MENU
ENTER
CLEAR
REC
PREV NEXT
STOP REC
TIMER REC
ì
DVR-04_HDD_UK.book 65 ページ 2004年9月10日 金曜日 午後7時3分