English
5
Connecting Alarm Input/Output
3-6
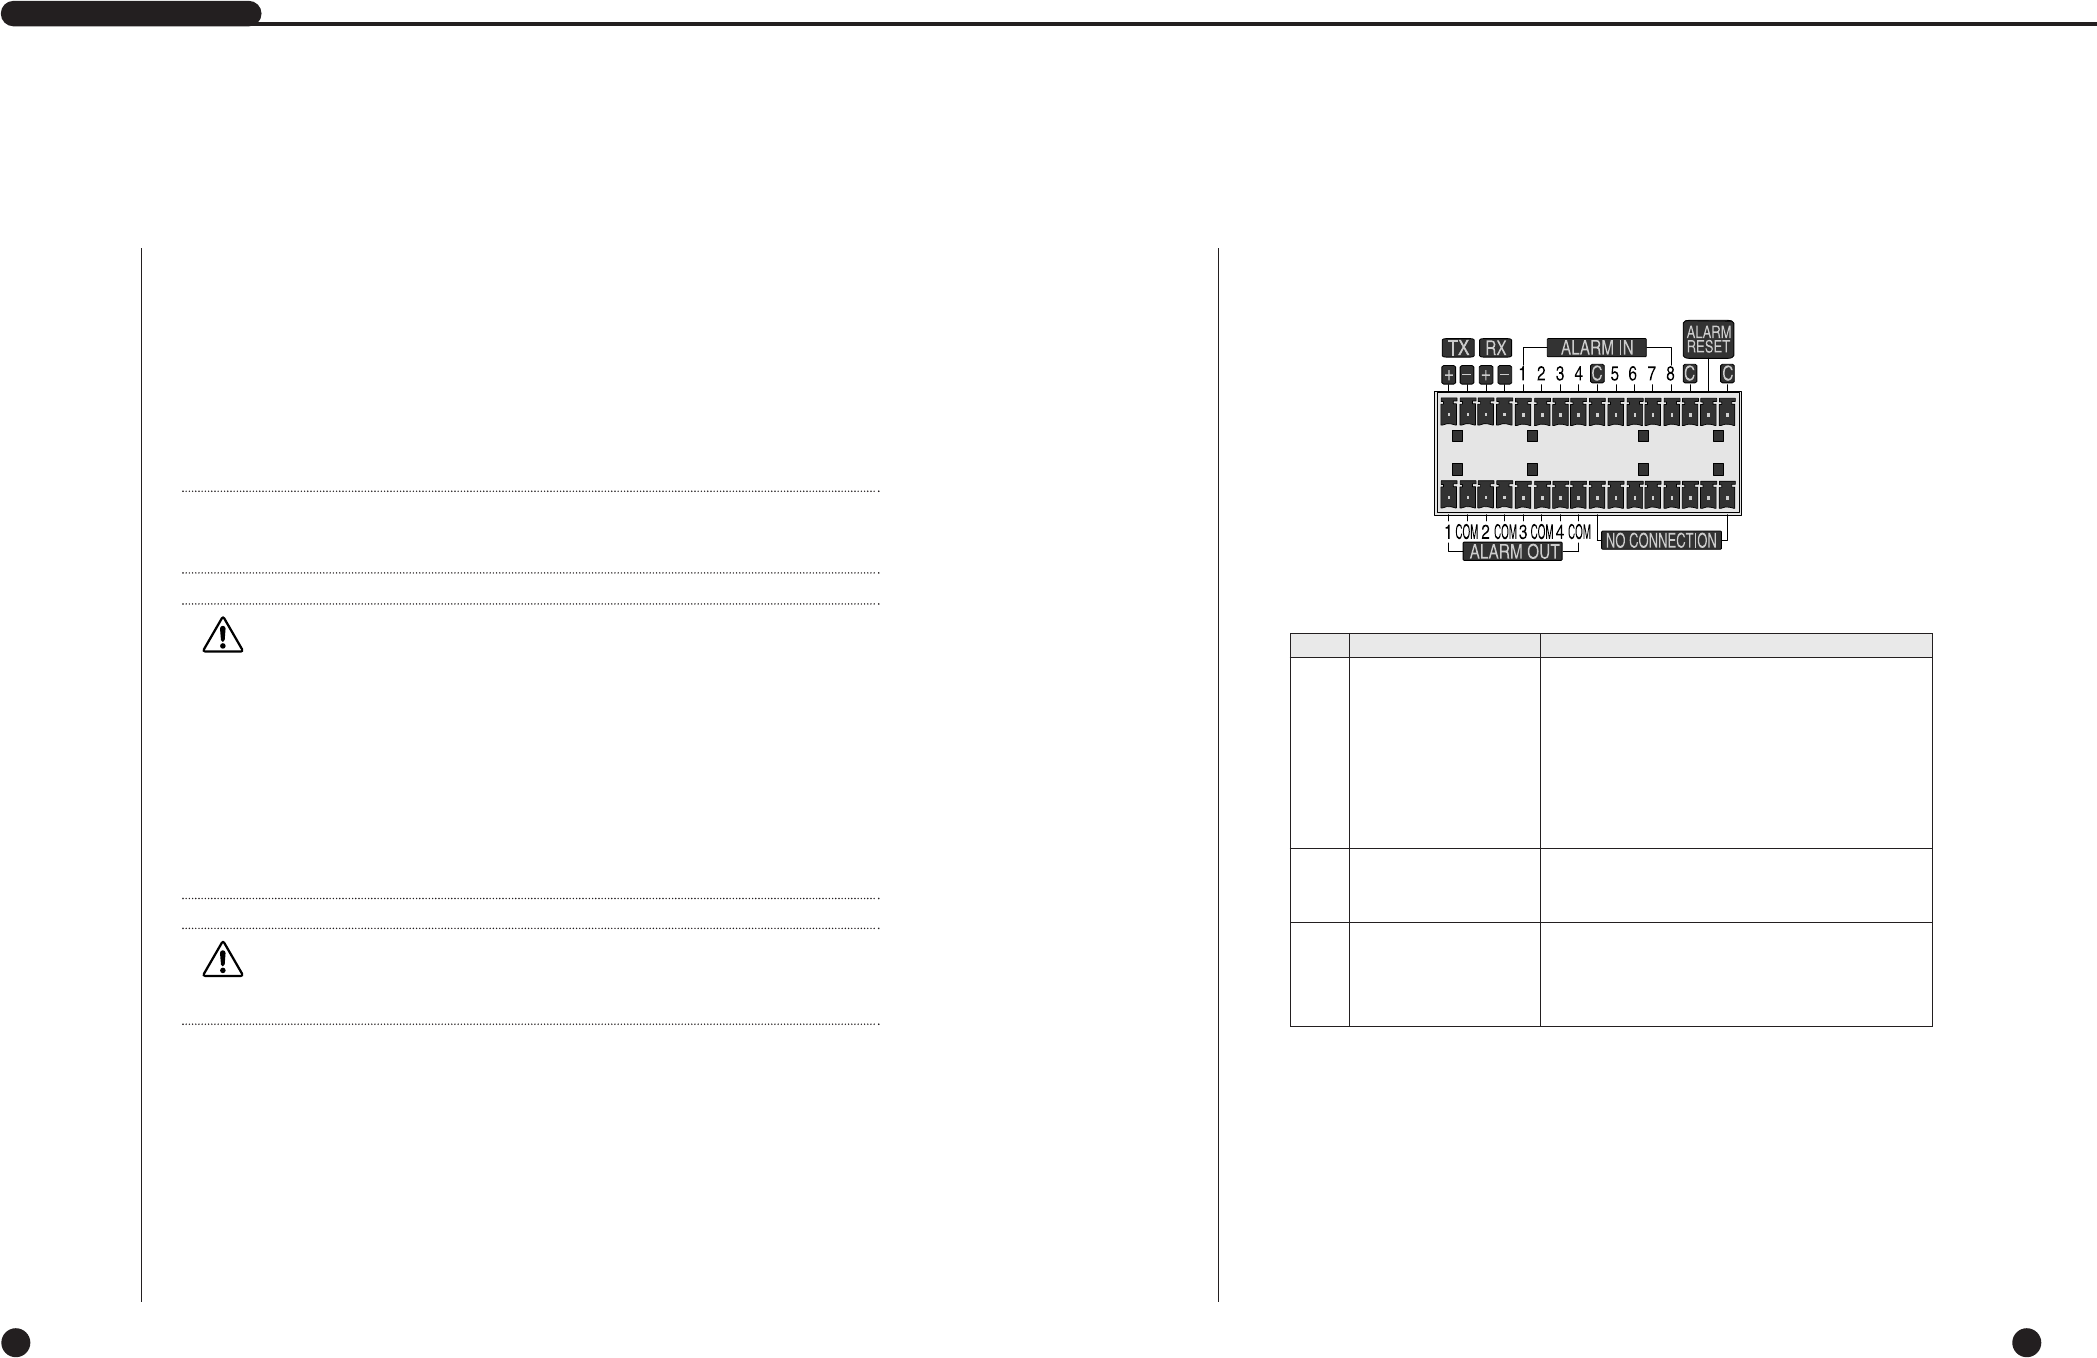
The Alarm IN/OUT port in the back of SHR-4081N/P is composed of the following
elements.
English
● ALARM IN/OUT Connection
SHR-4081N/P USER’S MANUAL
3-5
Name Function
- ALARM IN1
- ALARM IN2
- ALARM IN3
1 - ALARM IN4
- ALARM IN5
- ALARM IN6
- ALARM IN7
- ALARM IN8
On receiving an ALARM RESET signal, the
2 - ALARM RESET IN system cancels the current ALARM input or
output signal and resumes sensing.
- ALARM OUT1
- ALARM OUT2
3
- ALARM OUT3
- ALARM OUT4
4
Connecting USB Device
1.
A total of 2 USB connecting terminals are placed in front of and behind SHR4081N/P each.
2. Connect USB HDD, USB CD/DVD, and USB Memory through the ports in front and
behind SHR-4081N/P respectively.
3. Only one USB device can be assigned to each USB connection port.
4. To recognize/ignore USB HDD, follow the procedure of Menu - System - HDD
Setup upon connecting.
5. Supply the HOT PLUG function to connect/disconnect the USB device.
6. To recognize/ignore the HOT PLUG function, press Connect/Disconnect from Menu
- System - HDD Setup.
Caution
Caution
- After enough time is given to the stabilization of the USB device connected by
HOT PLUG, press Connect from SHR-4081N/P Menu.
- To disconnect the USB device, be sure to click Disconnect from SHR-4081N/P
Menu. Otherwise, the USB device may be in trouble.
- Available to use with connecting the same kinds of USB device to the USB terminal
on the front and back of SHR-4081N/P. (For example, 2 CD-RW or 2 USB
memories can be connected to thefront and back of SHR-4081N/P.)
- If the USB memory is used, it should be set to the format supported by
SHR-4081N/P. Although it is formatted with FAT32 in the PC, it is re-formatted
when it is connected to SHR-4081N/P.
Caution
Caution
- The USB device HDD shall be set to Master.
Note
Note
Refer to User’s Manual 5-8, SYSTEM(HDD Setup).
ALARM Output Port
ALARM Input Port


