27
Hookups and Settings
Controlling TVs with the remote
You can adjust the remote control’s signal to
control your TV.
If you connected the recorder to an AV amplifier
(receiver), you can also use the supplied remote to
control the AV amplifier’s (receiver’s) volume.
Notes
• Depending on the connected unit, you may not be able
to control your TV or AV amplifier (receiver) with
some or all of the buttons below.
• If you enter a new code number, the code number
previously entered will be erased.
• When you replace the batteries of the remote, the code
number may be reset to the default setting. Set the
appropriate code number again.
1 Slide the TV/DVD·VIDEO switch to TV.
2 Hold down "/1.
3 Enter your TV’s manufacturer code (see
below) using the number buttons.
4 Release "/1.
When the TV/DVD·VIDEO switch is set to
TV, the remote performs the following:
Code numbers of controllable TVs
If more than one code number is listed, try
entering them one at a time until you find the one
that works with your TV.
Press To
"/1 Turn your TV on or off
VOL +/– Adjust the volume of
your TV
CH +/– Select the channel on
your TV
TV/VIDEO Switch your TV’s input
source
Number buttons and
SET
Select the channel on
your TV
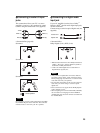
TV/DVD·VIDEO
switch
"/1
VOL +/–
Number
buttons,
SET
TV/VIDEO
CH +/–
Manufacturer Code number
Sony 01 (default)
Akai 04
AOC 04
Centurion 12
Coronado 03
Curtis-Mathes 12, 14
Daewoo 04, 22
Daytron 03, 12
Fisher 11
General Electric 04, 06, 10
Hitachi 02, 03, 04
J.C.Penney 04, 10, 12
JVC 09
KMC 03
LG/Gold Star 03, 04, 17
Magnavox 03, 04, 08, 12, 21
Marantz 04, 13
MGA/Mitsubishi 04, 12, 13, 17
NEC 04, 12
Panasonic 06, 19
Philco 02, 03, 04, 08
Philips 08, 21
Pioneer 06, 16
Portland 03
Proscan 10
Quasar 06, 18
Radio Shack 05, 10, 14
RCA 04, 10
Sampo 12
Samsung 03, 04, 12, 20
Sanyo 11, 14
Scott 12
Sears 07, 10, 11
Sharp 03, 05, 18
,continued


