


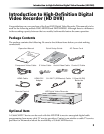
Introduction to High-Definition Digital Video Recorder (HD DVR)
5
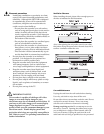
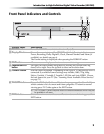
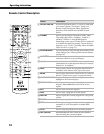
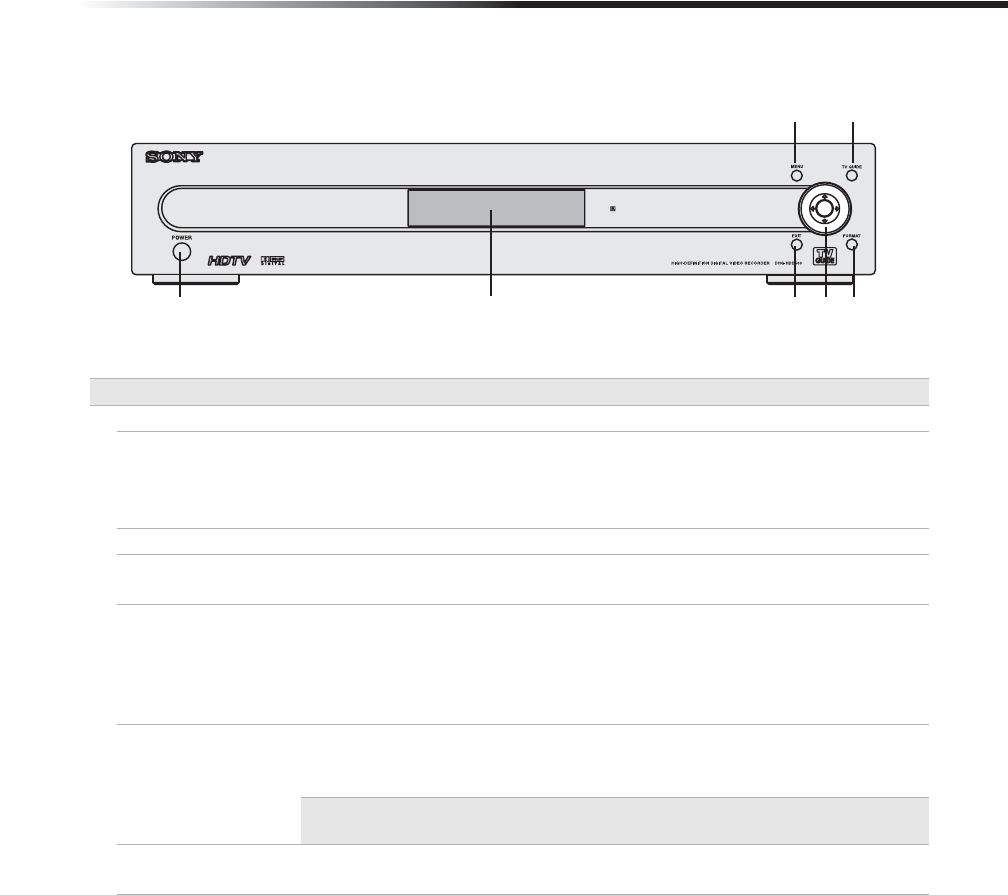
Front Panel Indicators and Controls
Control Panel Description
1
POWER button
Turns the HD DVR on or into inactive standby (off).
2
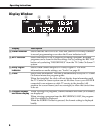
Display Window
Shows the current status of the HD DVR with the following indicators:
Power, Recording, Dolby Digital®, Clock, Channel Number and Name (if
available); see details on page 6.
The Format setting is displayed when pressing the FORMAT button.
3
EXIT button
Clears on-screen displays and returns to normal viewing.
4
Joystick/SELECT
button
Navigate on-screen menus and guides by moving the joystick either up,
down, left or right. Press the joystick to select an on-screen item.
5
FORMAT button
Sets the output resolution. Depending on the type of TV that the HD DVR is
connected to, available Format settings may include; 1080i, 720p, 480p,
Native, Variable 1, Variable 2, Variable 3, SD Out and Auto HDMI. Choose
the best format for your TV (See “Learning About Available Video Services”
on page 73.)
6
TV GUIDE button
Shows the TV Guide On Screen™ interactive program guide (if available)
which contains a list of current and future programs. To return to normal
viewing press TV Guide again or the EXIT button.
✍ The TV Guide™ service requires access to selected broadcasts which may not
be available in all cases.
7
MENU button
Shows the main menu on the screen. To return to normal viewing press the
EXIT button.
76
1
3
4
5
2