14
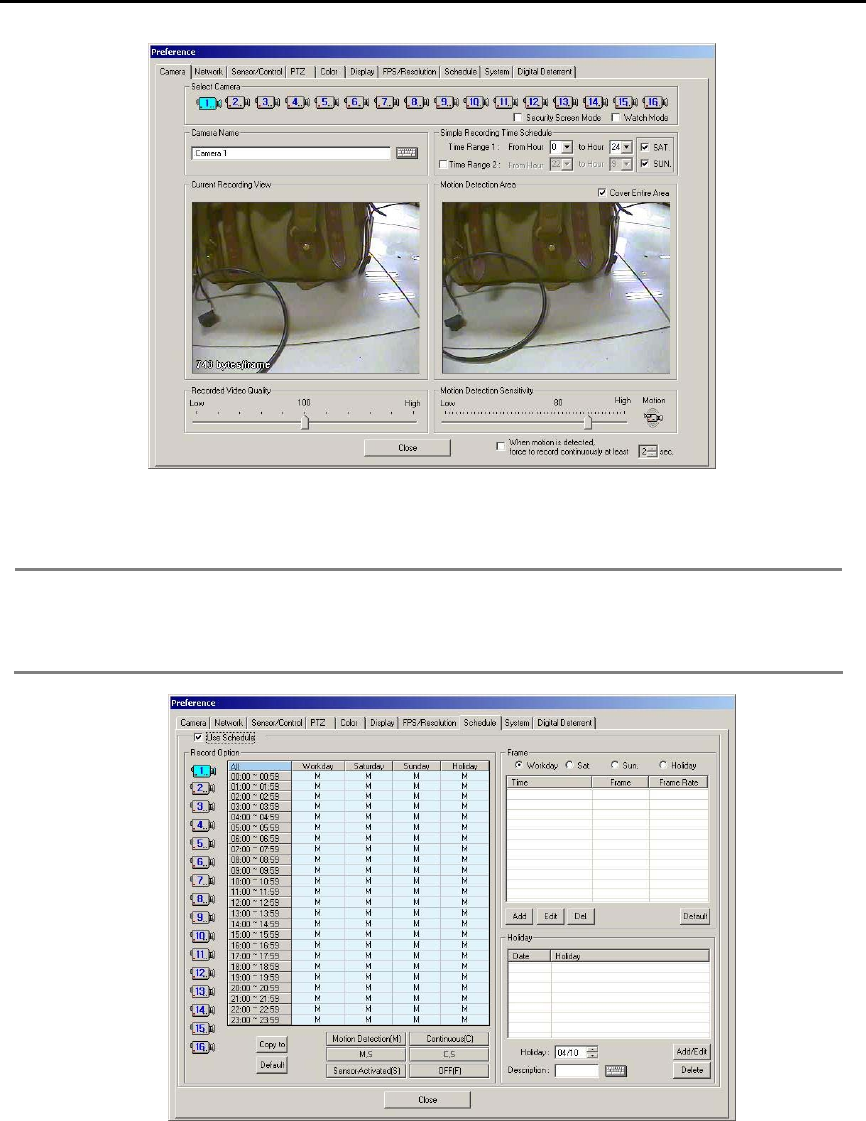
2) Set the simple recording time schedule from the [Camera] tap. If the time schedule is not set, the recording will be
24hours.
3) Set the motion detection area and tick off [Cover Entire Area] to record the camera images only when there is
motion on the selected area. When [Cover Entire Area] is selected, the whole image is active
Note 1. Click left mouse button: Creating one area box.
2. Click left mouse button and drag : Creating area box followed by drag movement.
3. Double click left mouse button : Creating all selected box area.
4. Click right mouse button : Deselect one selected box.
5. Double click right mouse button : Deselect all selected area.
4) To set the recording mode per hour of each day and channel, go to [Preference]→[Schedule]. Recording has to be
stopped in the main menu by pressing the [Stop Recording] button to set the recording schedule. Select camera
number, time and recording mode. Each recording mode will be displayed on the left bottom of each channel
screen on the main screen. For more detail explanation of [Schedule], refer to [Preference→Schedule].
