English - 65
Recording
Set timer recording option.
• The Timer Recording screen is displayed. Fill the
input items using the arrow buttons.
➛❿: Moves to the previous/next item,
➐❷: Sets a value.
• TO : Select the media to record DVD or VCR.
• SOURCE : The video input source (L1 or L2), or
the broadcasting channel you want to
make a timer recording from.
• Date : Set the recording day.
• Start/End Time : Start and end time of the timer
recording.
• Type (Recording cycle).
Once : Records once.
Weekly : Records at a set time every week.
Daily : Records at a set time every day.
• Mode (Recording mode).
2
Making a Timer Recording
1. Check the antenna cable is connected.
2. Check the remaining time of the disc.
3. Check the date and time are correct.
Make sure the Clock has been set (Setup - System Setting)
before you proceed with a timer recording.
Press the MENU button.
! Press the MENU button.
@ Press the➐❷ buttons to select Timer Rec., and
then press the ENTER or
❿ button.
# Select Timer record.
• If the current time is not set. Set the current time
first.
1
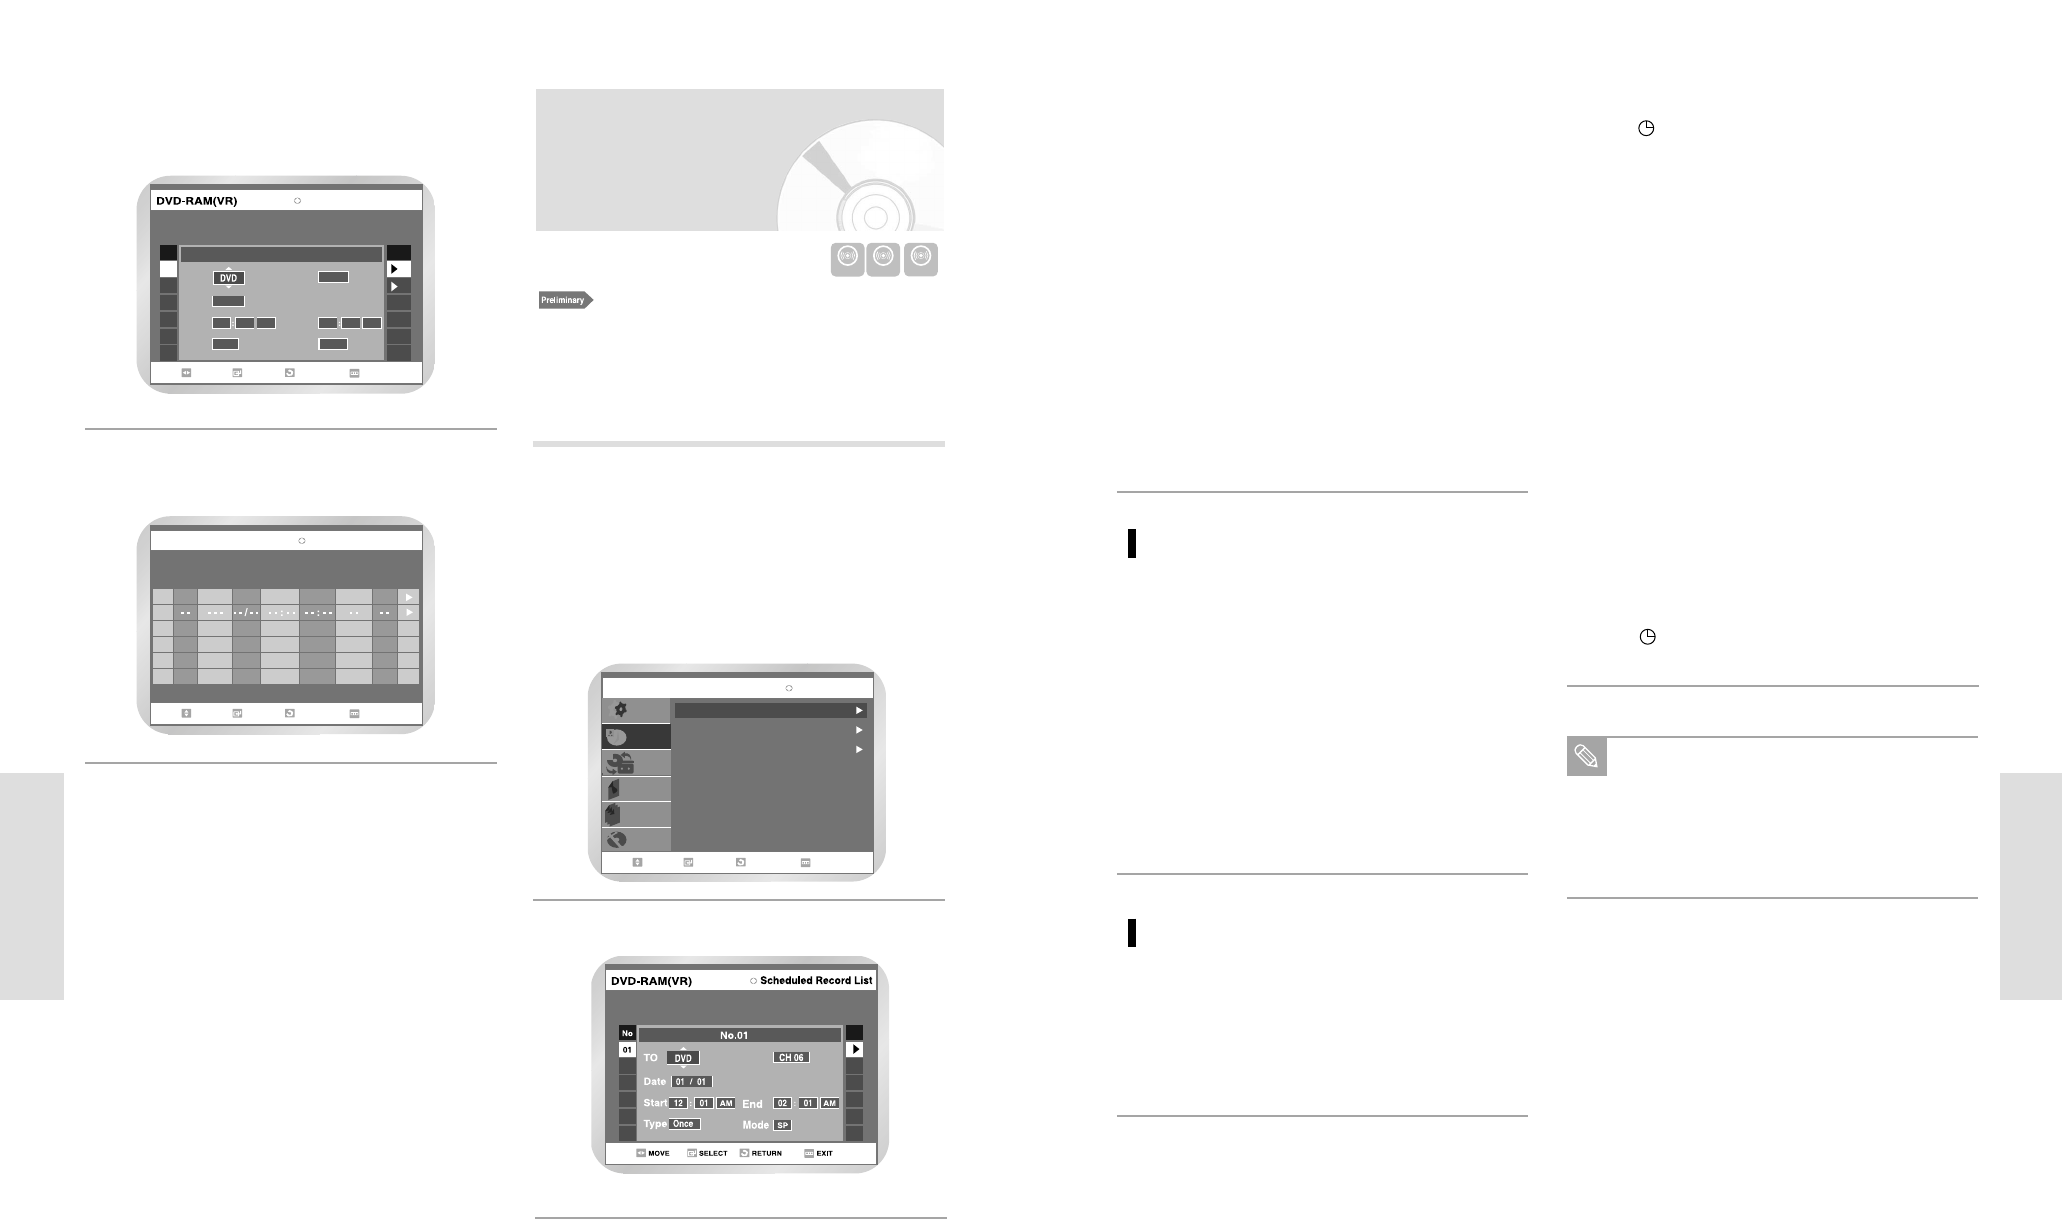
Timer Record
Timer Record
Scheduled Record List
Setup
Timer Rec.
Copy
Title List
Playlist
Disc Manager
MOVE SELECT RETURN EXIT
DVD-RAM(VR)
VCR Plus+ Record
64 - English
Recording
• The Timer Recording screen is displayed.
If you enter VCR Plus+ Code number correctly.,
all recording informations will be set
automatically.
3
No.01
Scheduled Record List
No Edit
02
SourceTo
Type
Date
Start End
AM
AM
01:34
01/04
12 01
SPonce
Modo
MOVE SELECT RETURN EXIT
02 01
01
After check if all record information is right, press
ENTER button.
4
Scheduled Record List
No.
To
Source
Date
Start End Type Mode
Edit
SP01 DVD CH 34 01/04
07:55PM
12:10AM
02
Once
MOVER SELECC. VOLVER SALIDA
DVD-RAM(VR)
Turn the power off to finish the timer recording.
• will blink if disc or tape is not inserted.
4
The timer recording time may differ from the set
time depending on disc status and overall timer
recording status (for example, recording times
overlapping, or when the previous recording ends
within 2 minutes before the start time of the next
recording.)
Note
Press the ENTER button.
• will appear on the front panel. It means that a
timer recording is registered.
If you make a mistake
Press the
➛❿☎
button to select the item you want to
change.
If the timer settings overlap
The programs are recorded in order of priority. If
timer recording is set for the first program and then
again for the second program and both programs
overlap, the following message will appear on the
screen: “This setting is identical with 1”
The message shows that the first program has priori-
ty. After recording of the first program is complete,
the second program starts being recorded.
To exit without saving the current setting
Press the MENU or TIMER REC button.
To return to the previous menu
Press the RETURN button if you don’t want to set a
timer recording.
3
DVD
AUTO : Select when you want to set video quality automati-
cally. It depends on the remaining time on the DVD.
XP (high quality) : Select when audio and video qualities are
important. (Approx. 1 hour)
SP (standard quality) : Select to record in standard quality.
(Approx. 2 hours)
LP (low quality) : Select when a long recording time
is
required.(Approx. 4 hours)
EP (extended mode) : Select when a longer recording time is
required. (Approx.6 hours about 1.2
Mbps)
VCR
AUTO : Select when you want to set video quality automati-
cally. It depends on remaining time of VCR tape.
SP : Standard Play, for best picture quality and for long
preservation.
SLP : Super Long Play, for maximum recording time (3
times SP).


