


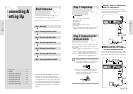

Getting Started
English - 13
Getting Started
12 - English
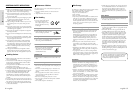
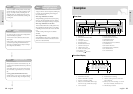
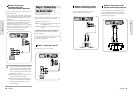
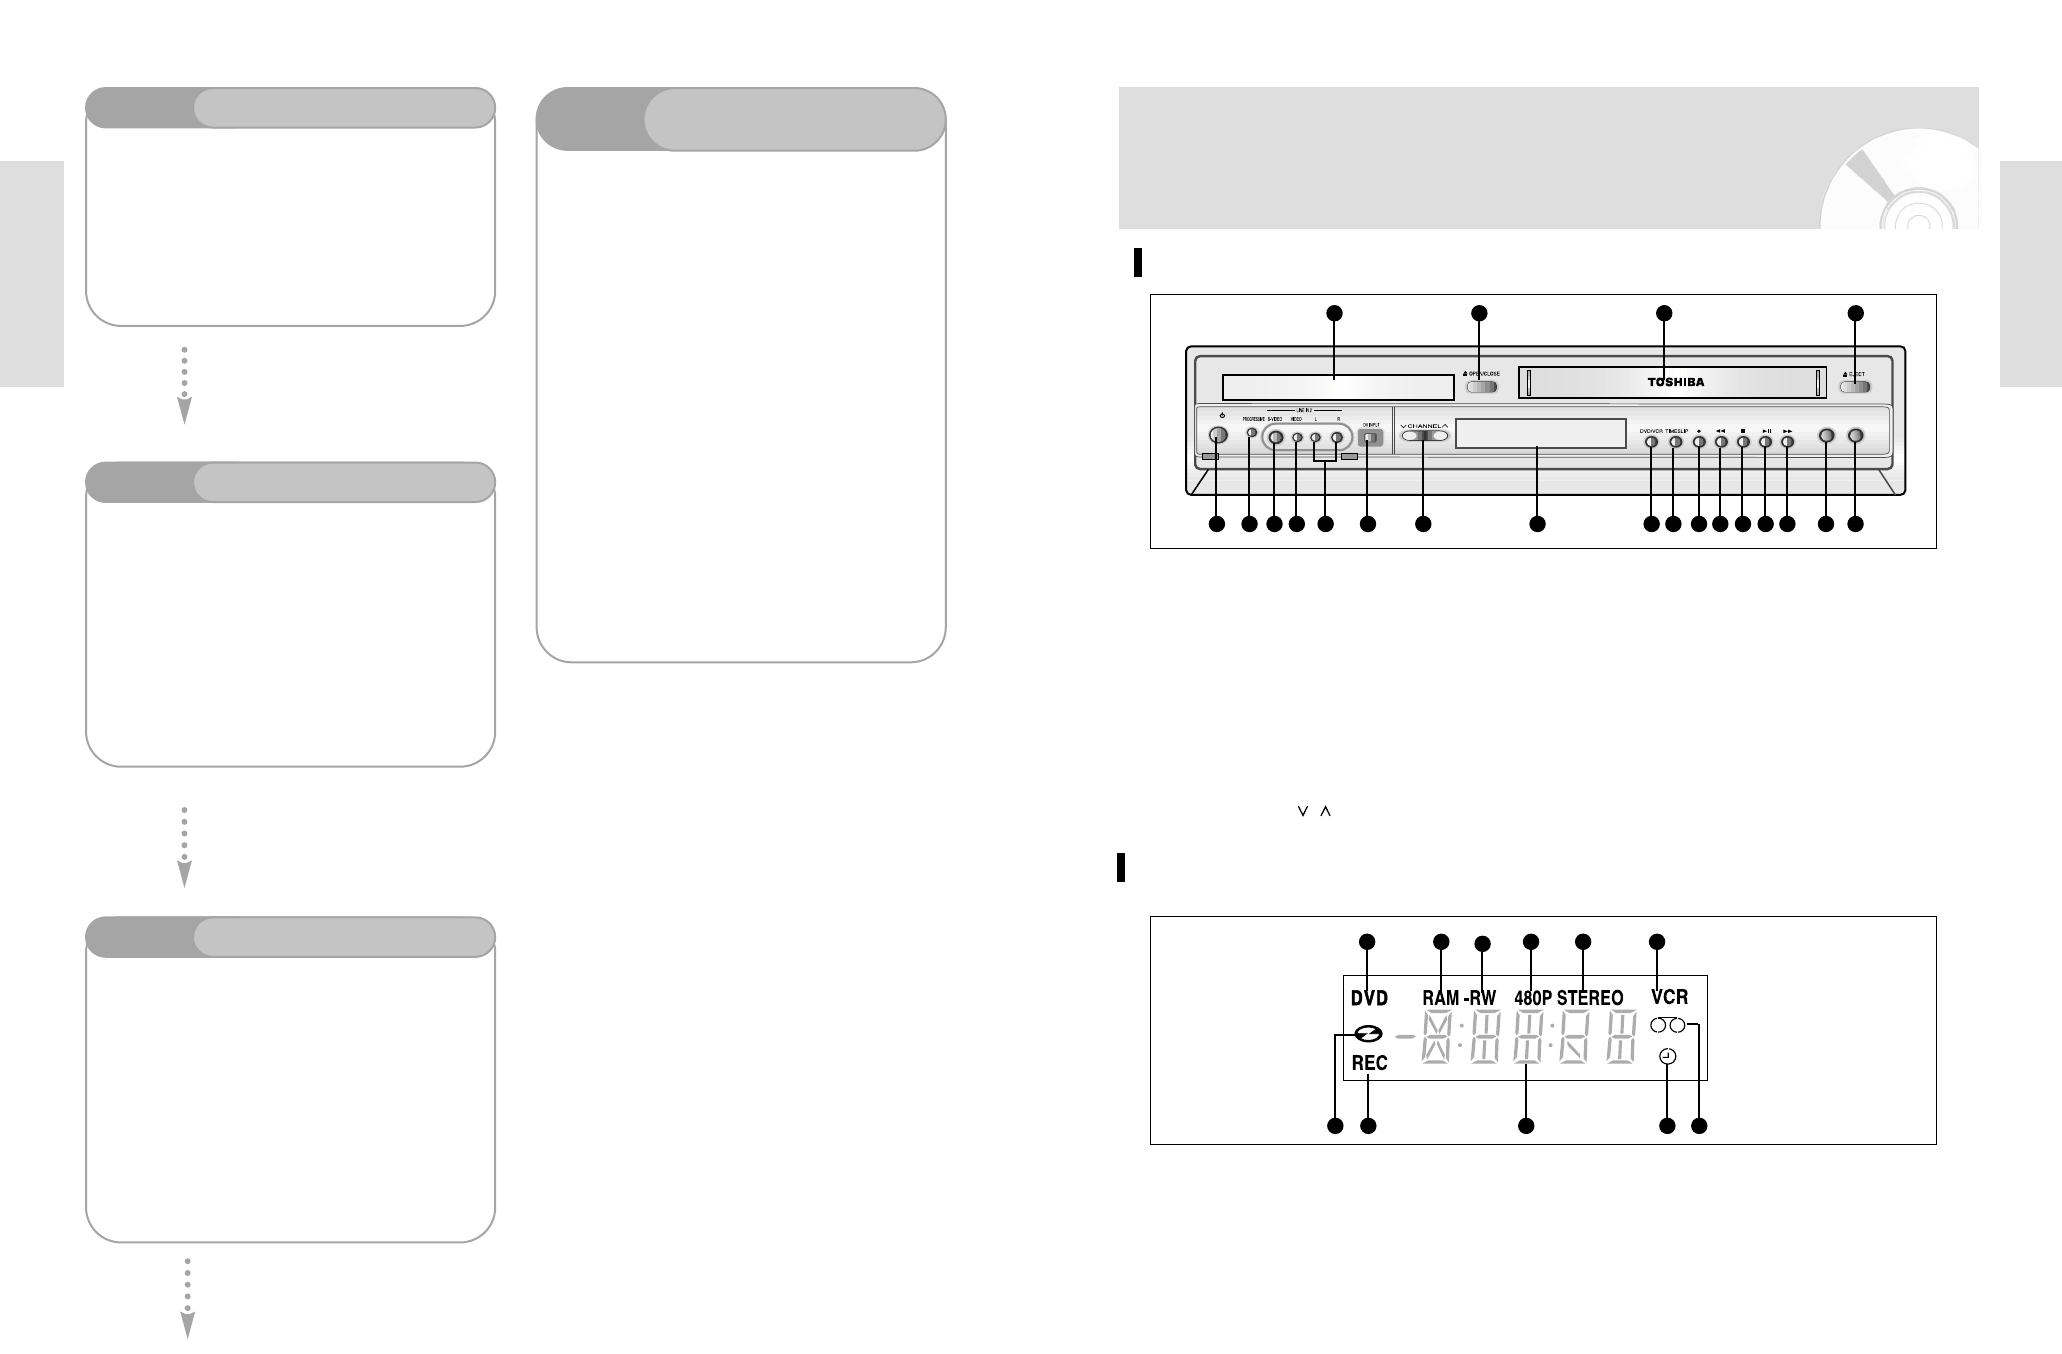
Front Panel
DUBBING
TO DVD TO VCR
ON/STANDBY
I /
1 2
5 6 7 8 9
10 11 12 13 14 15 16 17 18 19 20 21
3 4
1. DVD DECK
2. DVD OPEN/CLOSE BUTTON
3. VCR DECK
4. VCR EJECT BUTTON
5. POWER BUTTON
6. PROGRESSIVE BUTTON
7. S-VIDEO INPUT JACK
8. VIDEO INPUT JACK
9. AUDIO L.R INPUT JACK
10. DV INPUT JACK
11. CHANNEL
/
BUTTON
12. FRONT PANEL DISPLAY
13. DVD/VCR SELECT BUTTON
14. TIME SLIP BUTTON
15. RECORD BUTTON
16. REW/SKIP BUTTON (VCR/DVD)
17. STOP BUTTON
18. PLAY/STILL BUTTON
19. F.F/SKIP BUTTON (VCR/DVD)
20. TO DVD BUTTON
21. TO VCR BUTTON
Description
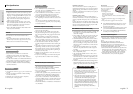
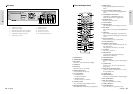
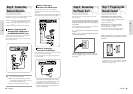
Front Panel Display
1 2
3
4 5 6
87 9
10 11
1.
When the indicator is on, DVD is activated.
2. DVD-RAM is activated.
3. DVD-R or DVD-RW is activated.
4.
Progressive Scan mode is working.
5.
When you watch SAP/STEREO channel or play-
back Hi-Fi VCR tapes, STEREO indicator lights.
6. VCR is activated.
7. DVD or CD media is loaded.
8. Record function is working.
9.
The time, counter position or current deck
status is indicated.
10.
When you set a Timer recording, it or current-
deck status is indicated. this indicator is lit.
11. VHS Videotape is loaded.
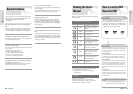
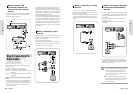
Step 3
Recording
Step 4
Playing
Step 6
Finalizing & Playing on
other DVD components
Step 5
Editing a recorded disc
You can select the title you want to play in a displayed menu
and then immediately start playback.
A DVD consists of sections, called titles, and sub sections,
called chapters.
During recording, a title is created between two points where
you start and stop recording, DVD-R/DVD-RW discs(in
Video mode) can automatically create chapters according to
the recording mode when finalized.
There are two different recording methods: Direct Recording
and Timer Recording. Timer recording is classified as record-
ing type : Once, Daily or Weekly or recording mode : XP
(high quality mode), SP (standard quality mode), LP (long
recording mode), and EP (extended mode) according to the
recording mode.
Editing on discs is easier than conventional video tapes. The
recorder supports many different edit functions, possible only
with DVDs.
With a simple edit menu, you can operate various edit func-
tions, such as delete, copy, rename, lock, etc., on a recorded
title.
Creating a playlist (DVD-RAM/-RW in VR mode)
With this recorder, you can create a new playlist on the same
disc and edit it without the change of the original recording.
To play your DVD on other DVD components, finalizing may
be necessary. First, finish all editing and recording opera-
tions, then finalize the disc.
When using a DVD-RW disc in VR Mode
Although finalizing is generally unnecessary when playing
the disc on a VR Mode compatible component, a finalized
disc should be used for playback on that type of component.
When using a DVD-RW disc in Video Mode
The disc should be finalized first to enable playback on any-
thing compatible other than this recorder. No more editing
or recording can be made on the disc once it has been final-
ized.
To enable recording on the disc again, Disc should be
unfinalized.
When using a DVD-R disc
You should finalize the disc to play it a compatible compo-
nent other than this recorder. You cannot edit or record on
the disc once it has been finalized.