English - 71
Recording
70 - English
Recording
You can copy DVD to VCR or VCR to DVD.
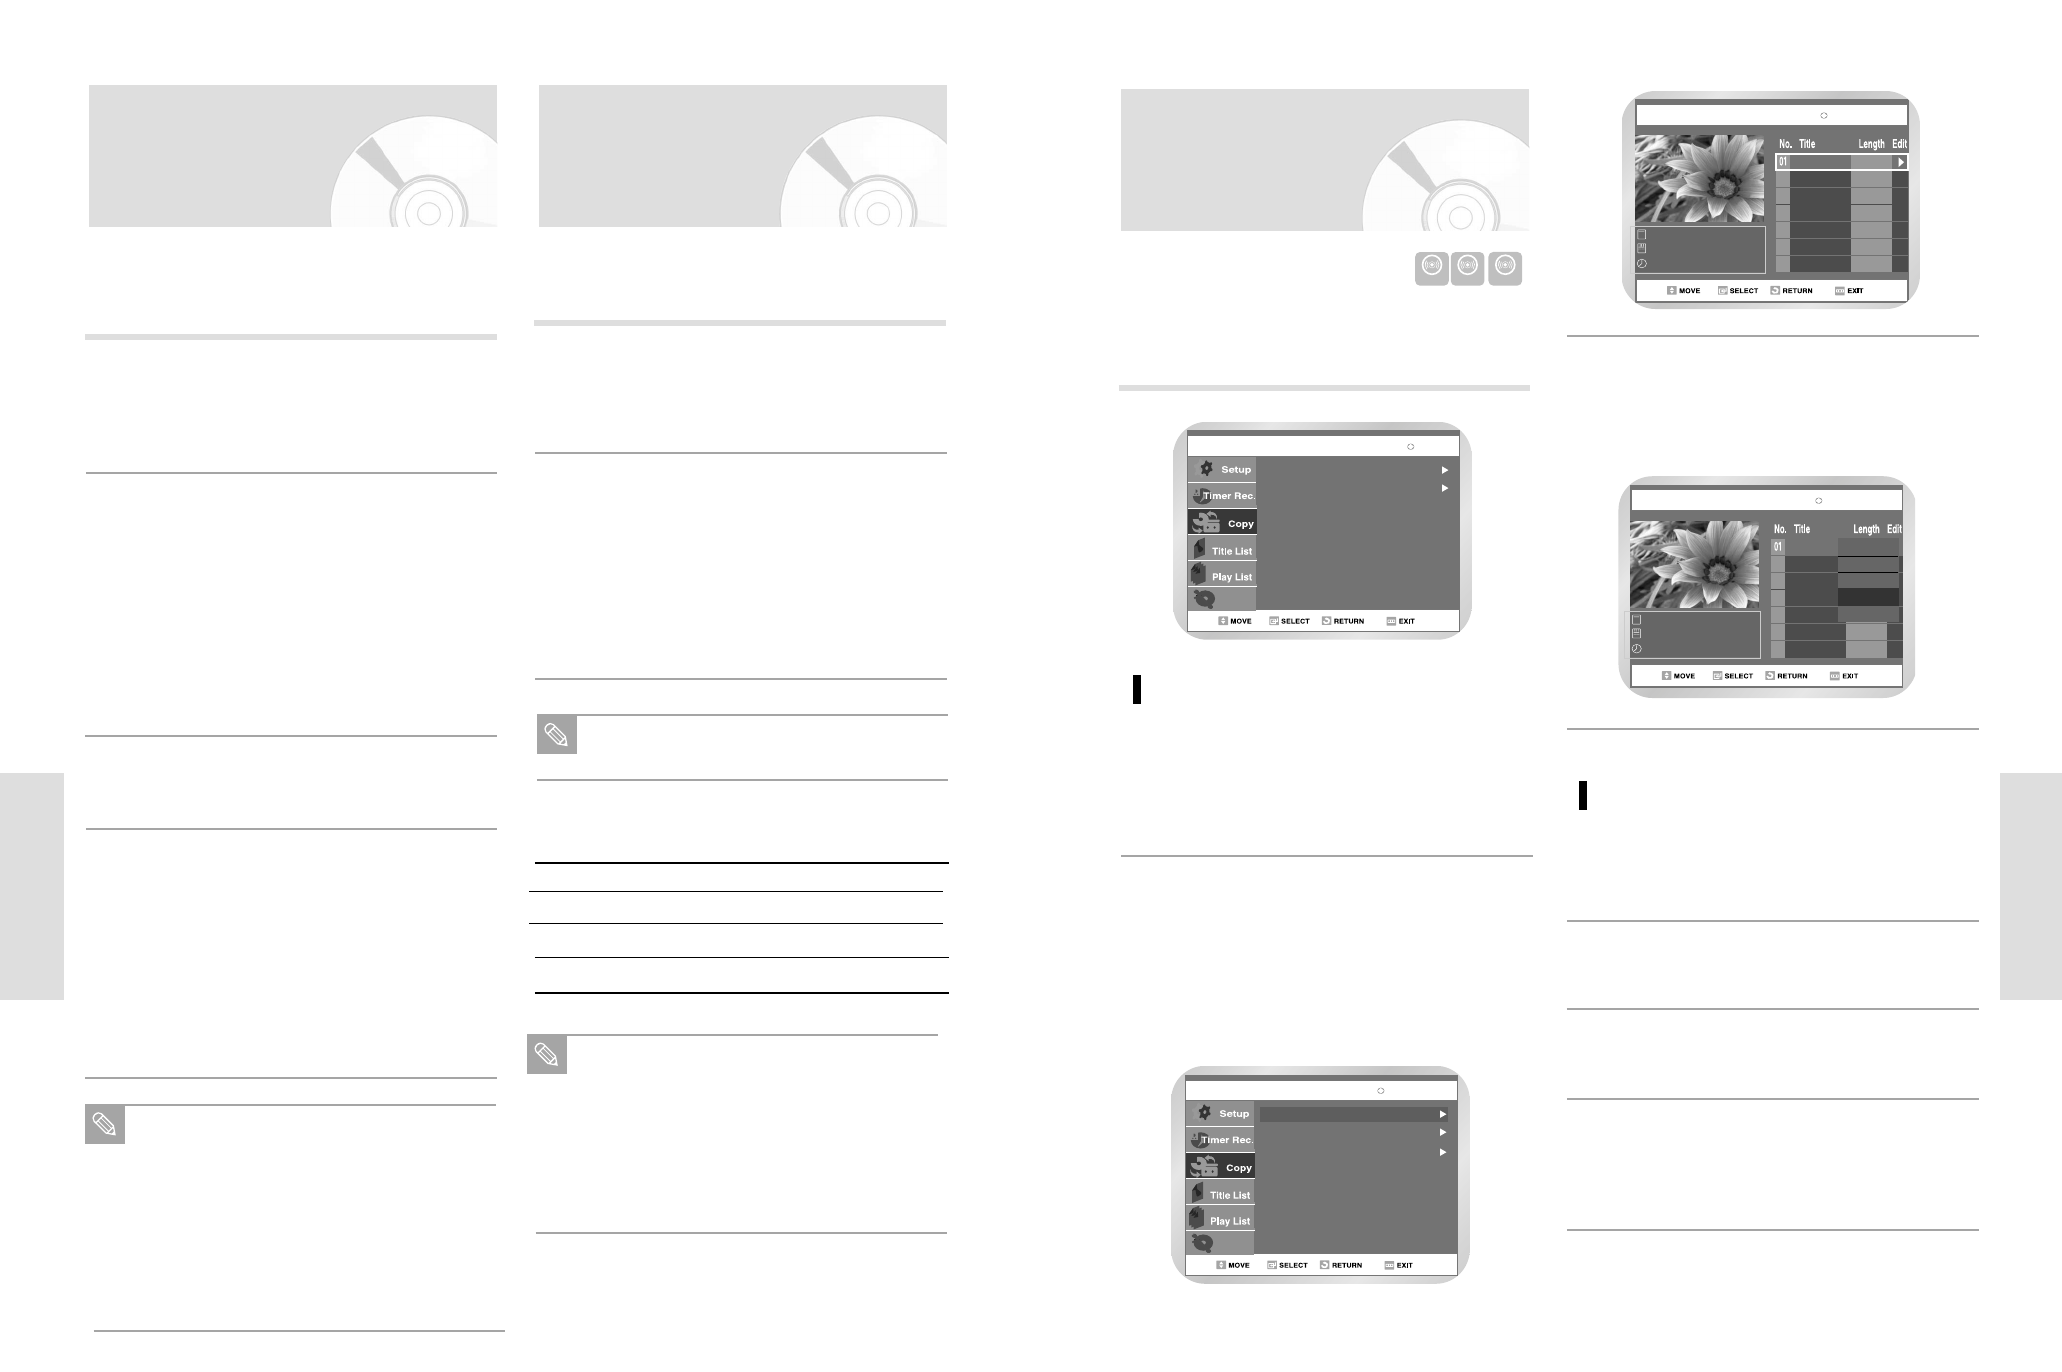
Press MENU button and select Copy.
DVD to VCR
Copy to DVD or VCR
Select DVD --> VCR to copy DVD
to VCR.
• Check the remaining time on the tape.
1
Direct copy DVD to VCR
Insert DVD disc you want to copy.
1
Insert VHS tape.
2
To stop recording press the stop button.
• You can only use the Direct Copy feature on
DVD-R and DVD-RW(V) discs.
• The pause button is not effective in the Copylist.
4
Press VCR copy button on front panel or remote
control.
3
If you want to copy from the
Copylist, choose “Edit Copylist”.
• To copy from “Edit Copylist”, you need to make a
Copylist. To make and select a “New Copylist”
(See pages 81~82).
• If you want to copy directly, choose “Direct
Copy”.
2
DVD-RAM(VR) Copy
Disc Manager
DVD --> VCR
VCR --> DVD
DVD-RAM(VR) DVD-->VCR
Disc Manager
Edit Copylist
Direct Copy
New Copylist
Select the Copylist, you want to
copy
using the ➐❷ buttons and then press ❿ button.
To copy play list, select “Copy”.
3
Edit Copylist
---/00/2000 1
---/00/2000 12:00 PM
1 Scene
00/00/00 12:00:00 PM
00:00:44Play
Rename
Edit Scene
Copy
Delete
DVD-RAM(VR)
Edit Copylist
DVD-RAM(VR)
---/00/2000 1
---/00/2000 12:00 PM
1 Scene
00/00/00 12:00:00 PM
00:00:44
Watch a Different Channel
Press the TV/VCR button on the remote to switch to
your TV tuner, then select a different channel on
your television.
1
Watch a different media during
recording
You can watch DVD during VCR recording or watch
Video tape during DVD recording.
• During VCR recording, insert a DVD in the DVD
deck. The output will automatically change to the
DVD and start playback.
• During DVD recording, insert a Video tape in the
VCR deck. The output will automatically change
to the VCR and start playback. (Only if tape is
missing the safety tab)
2
Add Recording Time
Refer to the One-Touch Recording (OTR).
3
Recording DVD and VCR at the
same time
You can record DVD and VCR at the same time, but
both modes must be set up to record separately.
• Press the DVD/VCR button to set the unit to DVD
or VCR mode.
• Choose Line input mode (Ch, Line1, Line2 or DV).
for DVD or VCR.
• Choose REC mode for DVD or VCR.
• Press REC button for DVD or VCR.
4
Special Recording
Features
While a recording is in progress, you can watch a different
channel, watch a different media, or add recording time in
30-minute increments.
When you watch or record on the VCR
during DVD Recording, some function buttons
may not operate.
The message “This function is not available.” will
be displayed.
SP(Standard Play) is for best picture quality.
SLP(Super Long Play) is for maximum recording
time.
Note
When DVD Recorder-VCR is connected to TV
using S-Video or component video cable, the
playback screen on the video tape will not display
during DVD recording.
You cannot record different channel at the same
time.
The DVD and VCR cannot start recording at the
exact same time. You must set one mode to start
recording, then the other.
Note
Start Recording
Follow the Basic Recording instructions on page 69.
1
Maximum Recording Time - SP vs. SLP
Tape Length SP (Standard Play) SLP (Super Long Play)
T-120 2 hrs 6 hrs
T-160 2hrs 40 mins 8 hrs
T-180 3 hrs 9 hrs
Record Speed
You can slow down the recording speed from SP to SLP in
order to fit six hours of programming on a T-120 tape.
Set Record Speed
Press the REC SPEED button on the remote control
to set the Record Speed to one of the following
options:
• SP – Standard Play, for best picture quality.
• SLP – Super Long Play, for maximum recording
time (3 times SP).
2
The selected Record Speed will appear on the front
panel display and on-screen display.
Note


