If you have a 4:3 or standard definition screen, select one of these options:
• 4:3 Letterbox – 4:3 TV Letterbox. Choose when the display is 4:3. Widescreen image is displayed in
“letterbox” format with black borders on top and bottom (preferred).
• 4:3 Pan & Scan – 4:3 TV Pan and Scan. Choose when the display is 4:3. Both sides of a widescreen
image are clipped (you lose about 30% of the picture).
If you have a widescreen (16:9) display, select one of these options:
• 16:9 Wide – 16:9 (widescreen) sources will be displayed in their native aspect ratio, and 4:3 sources
will be horizontally stretched.
• 16:9 Wide/Auto – 16:9 (widescreen) as well as 4:3 sources will be displayed in their native aspect
ratio. Please note that in this mode 4:3 sources will be displayed with black borders on both left and
right sides to maintain the correct 4:3 aspect ratio.
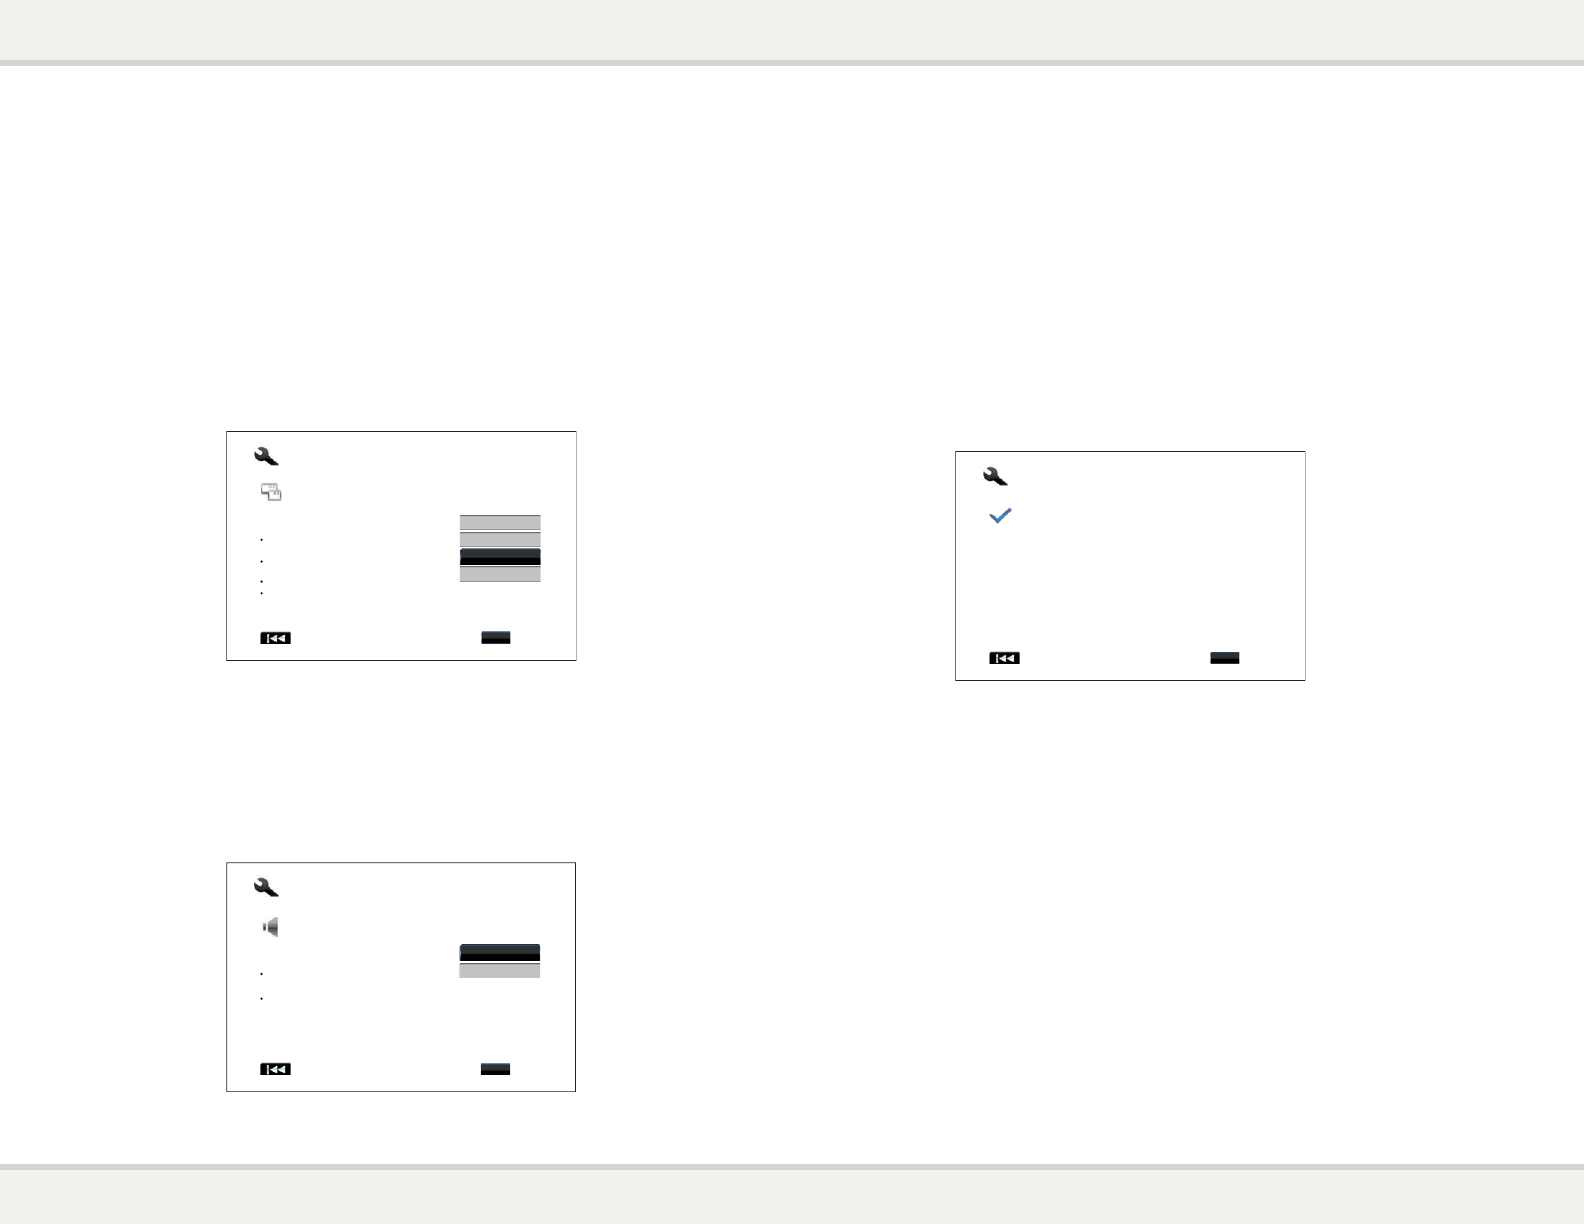
Easy Setup
NextPrevious
Step: 4/6
Choose the desired Aspect Ratio for yourTV.
4:3 Letterbox: For 4:3 TV. Wide screen content
will be displayed in a letterbox.
4:3 Pan & Scan: For 4:3 TV. Wide screen
content may be cropped on the sides.
16:9 Wide: For 16:9 TV.
16:9 Wide/Auto: For 16:9 TV. 4:3 content will be
displayed with side borders.
4:3 Pan & Scan
16:9 Wide
4:3 Letterbox
16:9 Wide/Auto
Enter
Press the A and V buttons to select the proper aspect ratio for your TV, then press the SELECT button.
Select the Audio Setting
The Blu-ray Disc format brings not only high resolution video, but also high bit rate audio such as Dolby
Digital Plus, Dolby TrueHD, DTS-HD High Resolution and DTS-HD Master Audio. Blu-ray Discs may also
include additional audio features such as menu click sound and Secondary Audio Program (SAP – audio
associated with the secondary video in Picture-in-Picture mode). Depending on the user preferences and
other audio/video equipment connected to the player, the audio settings need to be adjusted to achieve
the best result. The Easy Setup Wizard offers two basic selections to get you started.
Easy Setup
NextPrevious
Step: 5/6
Select the audio setting.
Compatible: For televisions and receivers with
HDMI 1.1/1.2 or Optical/Coaxial connections.
Advanced: For receivers with HDMI 1.3 or higher
version only. Secondary audio program is turned
off by default.
Audio settings can be further customized in the setup menu.
Advanced
Compatible
Enter
The “Compatible” setting configures audio output in a way that is generally compatible with all types of
equipment and content. If you connect the player to a television directly, or to a receiver with an HDMI
1.1/1.2 or optical/coaxial input, selecting the “Compatible” setting is recommended. When menu click
sound and Secondary Audio Program are presented in the content, those will be mixed into the audio
output.
The “Advanced” setting configures audio output to send the original main audio content to a connected
receiver for decoding and reproducing. It requires a receiver capable of decoding all high bit rate audio
formats. If you connect the player to a receiver supporting HDMI 1.3 or higher version and high bit rate
audio formats, selecting the “Advanced” setting is recommended. Menu click sound and Secondary Audio
Program are turned off by default.
Press the A and V buttons to select one of the audio setting choices, and then press the SELECT button.
The two basic audio setting choices may not cover all situations. You can further customize the audio
settings using the player’s Setup Menu.
Complete the Easy Setup Wizard
Easy Setup
FinishPrevious
Step: 6/6
Easy Setup Wizard completed.
Press the Enter button to exit.
Enter
Once you have selected the audio setting, the initial Easy Setup Wizard is completed.
Press the SELECT button to close the Easy Setup Wizard. Your player is now ready for use. You will see
a background screen with an Primare and Blu-ray Disc logo.
Please follow the rest of the User Manual for basic and advanced operations. Enjoy your new Primare Blu-
ray Disc Player!


