79
REFERENCES
Useful Notes
x In order to prolong the service life of your player, it is recommended to wait at least 30 seconds
before you turn it on again after switching it off.
x Remove disc and turn power off after operation.
x Some functions of the player may not be applicable to certain discs.
x Some discs with special features may not be fully supported by the player. This is not a
malfunction of the unit.
x In the case of player malfunction, please turn it off, wait for 30 seconds and turn it back on. If
the problem still exists, please follow the troubleshooting instructions or contac
t a Primare
service center.
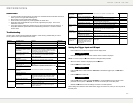
Troubleshooting
Use this chart to resolve general operational problems. If there are any problems that you cannot
resolve, please contact your Primare service center.
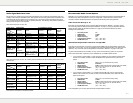
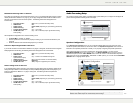
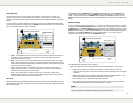
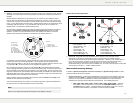
Symptom Possible Cause Solution Reference
Page
Audio cable is not properly
connected
Check audio cable, and then reconnect if necessary. 3 - 4
SACD is played and the audio
connection is coaxial or optical
digital audio
This is not supported due to copyright restrictions of
SACD. Please use the analog or HDMI audio output.
Alternatively, you may set SACD Priority to CD mode
and the player will play the CD layer.
4, 20
No sound
DVD-Audio is played and the
audio connection is coaxial or
optical digital audio
This is not supported due to copyright restrictions of
DVD-Audio. Please use the analog or HDMI audio
output. Alternatively, you may switch to the DVD-
Video playback mode.
4, 20
Video cable is not properly
connected
Check video cable; reconnect if necessary. 3
TV input is not correctly
selected
Select the input to which the player is connected.
Video output format is not
support by the TV
Select a proper output resolution that is supported by
your TV.
34
No picture
Video system is not supported
by the TV
When playback is completely stopped, press and hold
the P/N button or set the correct TV System in the
Setup Menu.
12, 22
Video system is not supported
by the TV
When playback is completely stopped, press and hold
the P/N button or set the correct TV System in the
Setup Menu.
12, 22
Saturation set too low Check the saturation setting on TV and player. 22
Loose or damaged component
video cables
If using component output, check that the three cables
are all properly plugged in and not damaged. Make
sure the color of the plugs match the jacks on both
ends.
3
No color
Incorrect video output port If using composite video output, check that the cable is
not incorrectly plugged into a component video jack.
3
Incorrect color space setting If using HDMI for video output, check the color space
setting on the TV and player.
21Incorrect color
Incorrect component video
cable connection
If using component video output, check the three
component video cables to make sure the signals
match on both ends
3
R E F E R E N C E S
80
Picture rolling or
split picture
Video system is not supported
by the TV
When playback is completely stopped, press and hold
the P/N button or set the correct TV System in the
Setup Menu.
12, 22
No disc or incompatible disc
loaded in player
Eject disc and check. 9
Dirty disc recording surface Eject the disc and clean any dirt or fingerprints. v
Disc not properly loaded Eject disc and make sure the label side is facing up
and the record side is facing down.
9
“No Disc” or
“Unknown Disc”
error
Condensation on the Laser
pick-up head
Turn on the player, eject the disc and leave the player
on for about an hour.
iv
Remote control is out of range Use the remote control within the effective range. ii
Low battery Replace the batteries. ii
Remote control
failure
Incorrect remote control code ii
Scratched or damaged disc is
used
Replace the disc. 9
Some functions are not
available during playback
Stop playback completely, then try again. 9
Temporary
function failure
Interference from other devices Identify interference by turning off other devices, and
then relocate or replace the offending device
iv
Some Setup
Menu items are
grayed out
Some setup options cannot be
changed while a disc is playing.
Some setup options may be
mutually exclusive with other
setup options.
Fully stop playback, eject the disc and try the Setup
Menu again.
6
Press and hold the +10 key on the remote for 6
seconds with the tray open to reset the code
Set the correct TV System in the Setup Menu.
Set the correct TV System in the Setup Menu.
Set the correct TV System in the Setup Menu.
Setting the Trigger Input and IR Input
• Ensure that there is no disc in the player and the display reads:
No Disc
• Hold down the = button for 3 seconds until the version number is displayed.
NOTE: You need to keep the = button held down throughout this procedure.
• When the version number is displayed press the * button.
• Press the * button to select TRIG.
TRIG OFF
• Press the ˘ button to select between TRIG OFF, to disable the trigger input, or TRIG ON, to
enable it.
• Press the * button to select IR:
IR FRONT
• Press the ˘ button to select between IR FRONT, to control the BD32 using a remote control
pointed at the front panel, or IR BACK, to control it via the IR-input on the back panel.
• Release the = button to save the settings and return to normal operation.
These settings are restored to their default values, trigger off and IR front, when you turn off power at
the back panel.


