


AVerMedia LX5000 User’s Manual
69
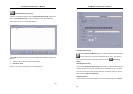
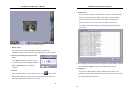
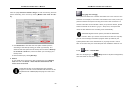
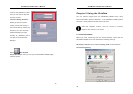
Click the page Creation session/image to view the working and free
space. Eventually, burn the CD by clicking Master and write on-the-
fly.
a. Click Statistics to calculate the free space of backup device
according to the backup setting you build up previously. It is
observed that the space sizes of backup device shown in Backup
to hard disk/ CD-R field, which will assist you to arrange your
backup stuff.
b. Execute backup by clicking Backup.
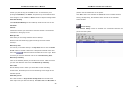
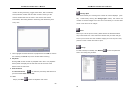
6. Delete
If you would like to remove any files, highlight the file in Backup
files field and click Delete. Note that the deleted files will
never to be recovered.
These backup files can be playbacked with playback
program in the CD-R under Windows OS and also can be
playbacked with LX5000 playback program under Linux
OS.
AVerMedia LX5000 User’s Manual
70
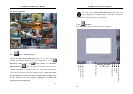
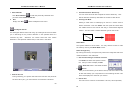
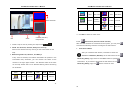
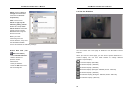
Copy jpeg file to floppy
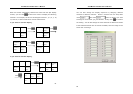
The system will detect the numbers of divided view in the screen to the
soft disk. For example, if the screen was divided into 9 views, when you
press this button the system will copy the screen view of camera 1 to
camera 9 and save to the soft disk. When you press this button, please
select the format of the file as *.jpg or *.bmp. Then, the system will
name the files based on the recording time automatically.
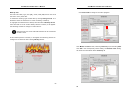
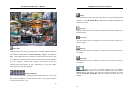
AVerMedia digital monitor system provides the WaterMark
function. When you use the save function to save the .bmp file,
you can use the Image Verification program which provided by the
system(Please refer to the attached file 2) to judge the file is real or
fake. It can also verify the saved bmp file was modified or faked or not.
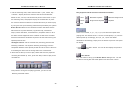
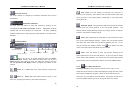
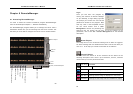
4.3.3
Show / Hide E-MAP
After the configuring in the
E-Map section of System Configuration,
click this button to view the e-maps.