Chapter 11. Network Section In-Depth
4. DDNS OPTION GUI
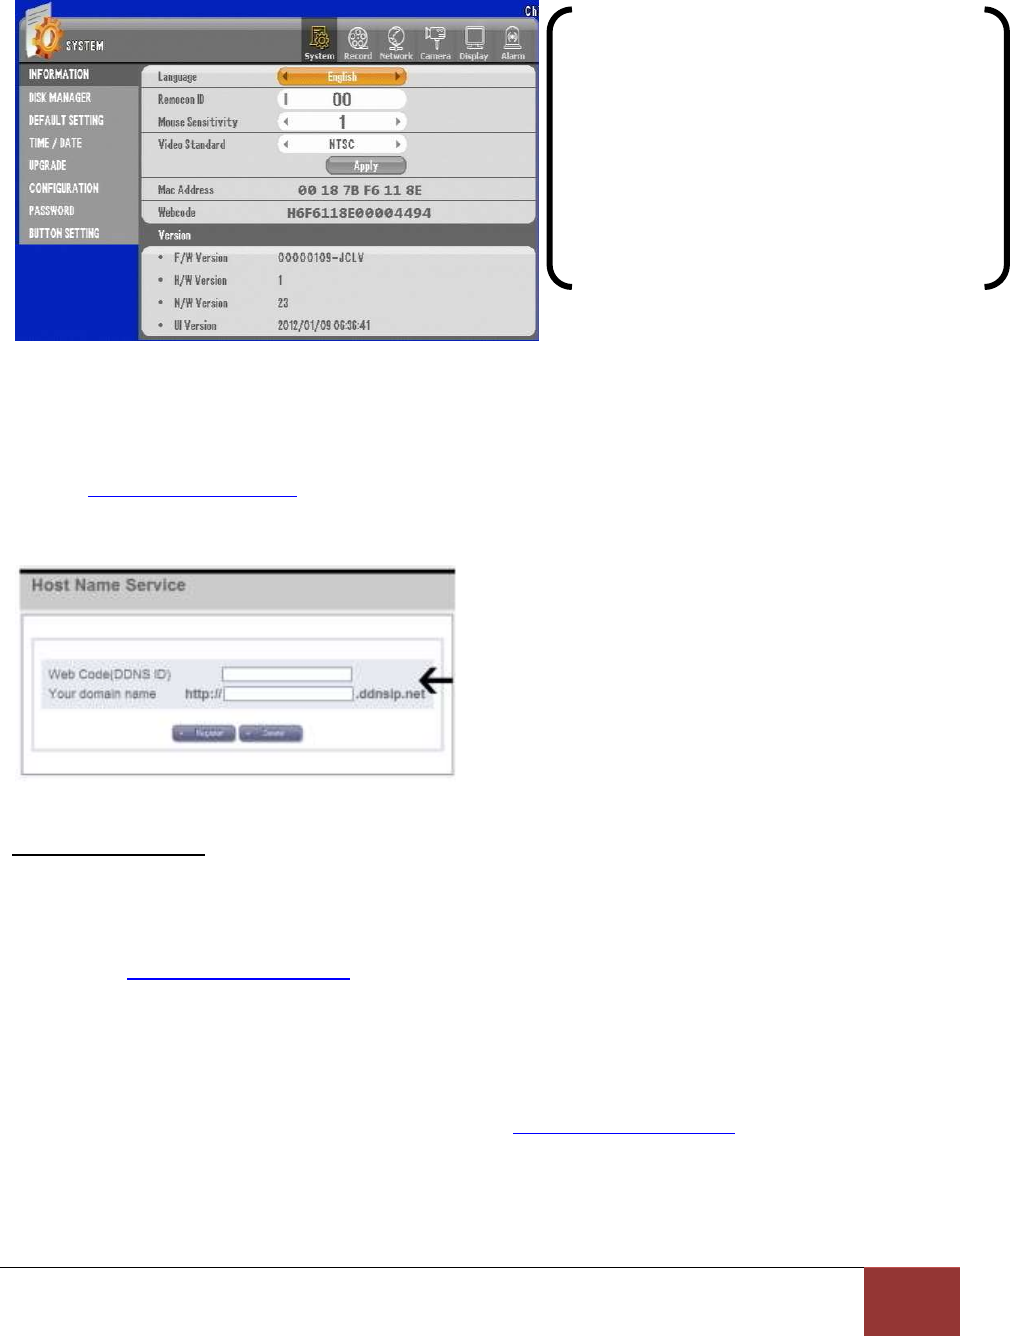
Figure 87 System Information GUI
3. Go to http://www.ddnsip.net . Enter the “Webcode” and domain name of your DVR. Then press the
“Register” button. You will receive a “Registration Success” message if your DVR was registered. Please
note that the domain name must be unique to every domain name registered with our DDNS service.
DDNSIP.Net example
Free DDNS is used for remote connection through private DDNS service. (In case of dynamic IP user, it is
recommended to use the private DDNS service instead of using manufacturer’s DDNS server)
Firstly, go to http://www.dyndns.com to create an account. Then, if your DVR is connected to a router,
you must do the DMZ setting for your DVR IP in the router setup. DMZ is a function to open all the ports
for the selected IP.
For example, here is the way how to create an account with the name of hongkildong.
[1] For creating an account, visit the website: http://www.dyndns.com
Enter the Webcode and DVRs’ Domain Name. It can
take up to 30 minutes for the registration process.
Access your DVR via Internet Explorer by entering:
“The DVR DOMAIN Name.DDNSIP.NET
Make sure all port forwarding rules have been set
on your firewall. YOU MUST SPECIFY THE WEB
SERVER PORT IF CHANGED UNDER THE DVRS’
NETWORK SETTINGS!
