8. Secure the outer rails to the rail brackets.
NOTE: The two outer rails are left and right specific.
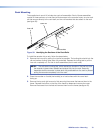
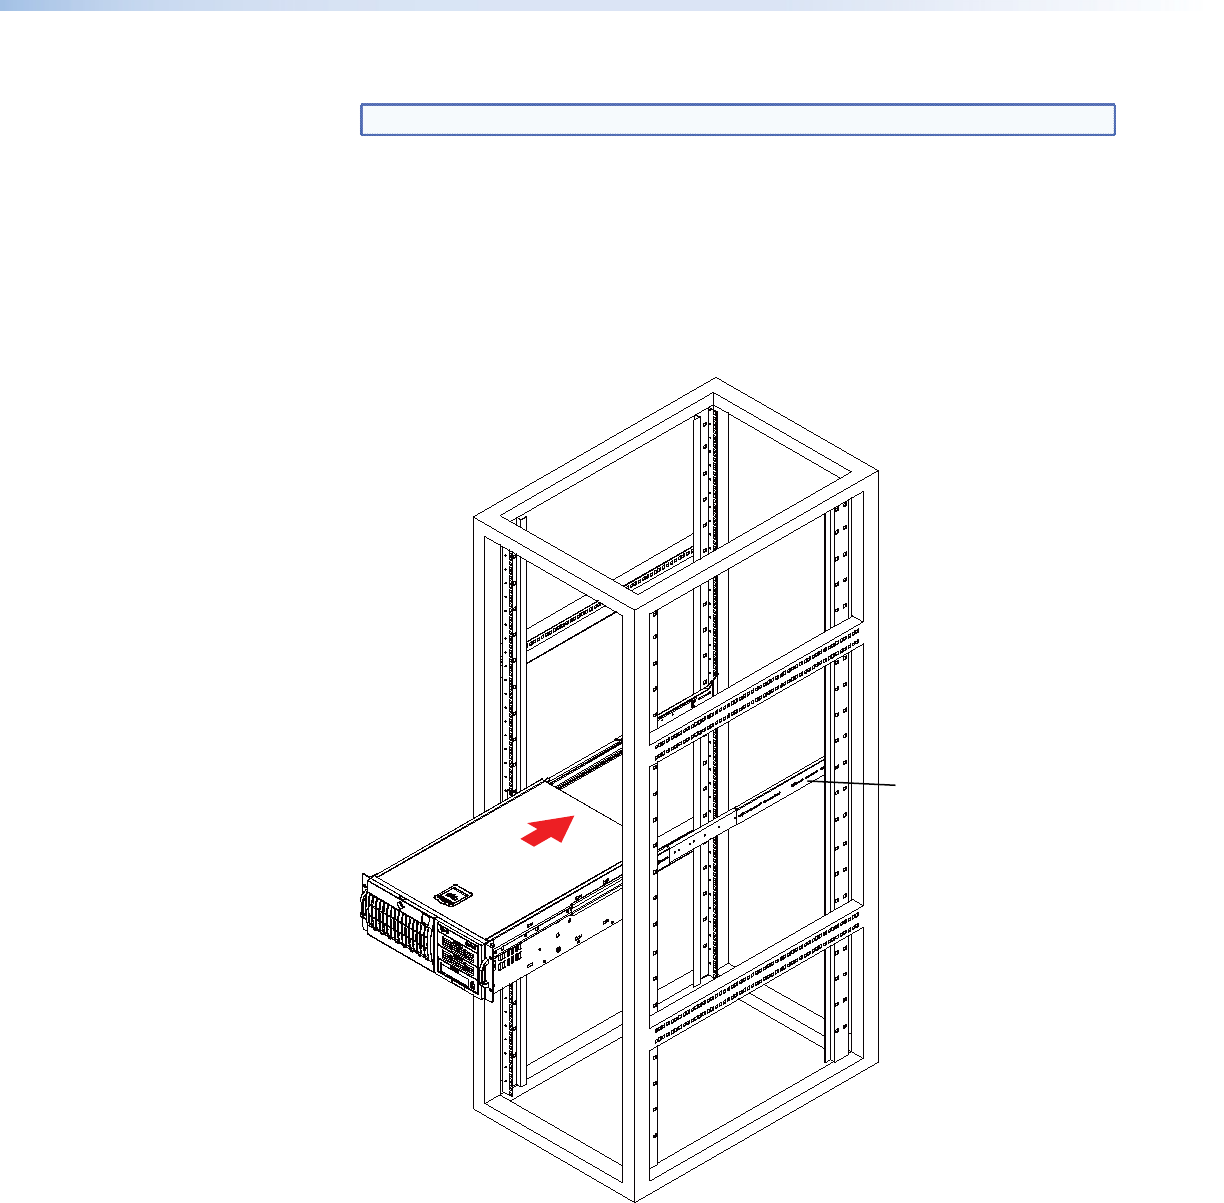
9. Line up the inner rails on the recorder with the outer rails on the rack. Gently slide the
recorder into the outer rails of the rack (see figure 42). Depress the locking tabs, if
necessary, when sliding the recorder into the outer rails.
10. Connect the necessary devices to the recorder (see the Front Panel Features section
on page 8 and the Rear Panel Features section on page 10).
11. When the recorder is pushed completely into the rack, the locking tabs make a clicking
noise. If necessary, secure the rack handles to the rack to keep the recorder in a fixed
position.
Rail Brackets
Figure 42. Installing the VNM Recorder into a Rack
VNM Recorder • Mounting 75


